


Postman is one of the most popular software testing tools which is used for API(Application Programming Interface). With the help of this tool, developers can easily create, test, share, and document APIs.
Introduction to Postman
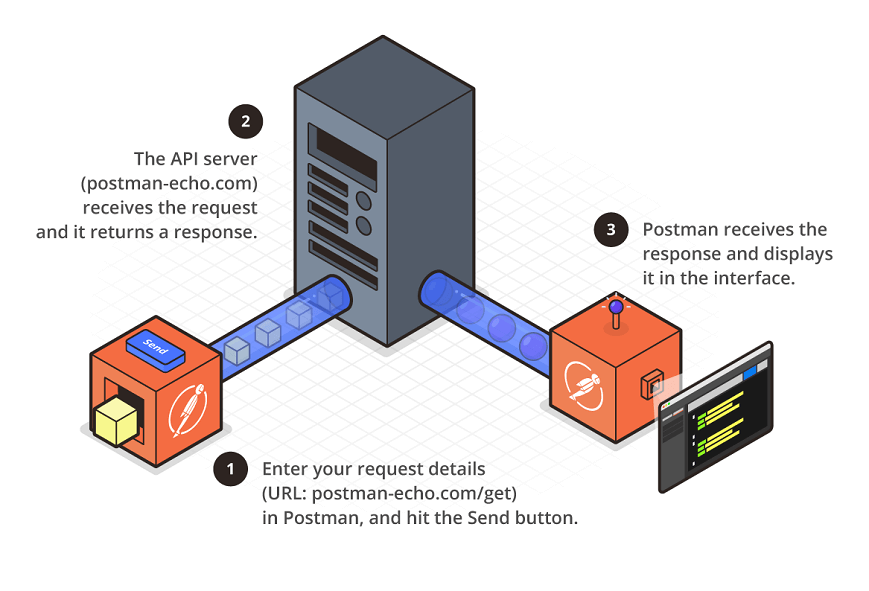
Postman is a standalone software testing API (Application Programming Interface) platform to build, test, design, modify, and document APIs. It is a simple Graphic User Interface for sending and viewing HTTP requests and responses
- While using Postman, for testing purposes, one doesn't need to write any HTTP client network code. Instead, we build test suites called collections and let Postman interact with the API.
In this tool, nearly any functionality that any developer may need is embedded. This tool has the ability to make various types of HTTP requests like GET, POST, PUT, PATCH, and convert the API to code for languages like JavaScript and Python.
The primary or most-commonly-used HTTP verbs (or methods, as they are properly called) are POST, GET, PUT, PATCH, and DELETE. These correspond to create, read, update, and delete (or CRUD) operations, respectively. There are a number of other verbs, too, but are utilized less frequently. Of those less-frequent methods, OPTIONS and HEAD are used more often than others.
Below is a table summarizing recommended return values of the primary HTTP methods in combination with the resource URIs:
| HTTP Verb | CRUD | Entire Collection (e.g. /customers) | Specific Item (e.g. /customers/{id}) |
| POST ---> | Create | 201 (Created), 'Location' header with link to /customers/{id} containing new ID. | 404 (Not Found), 409 (Conflict) if resource already exists.. |
| GET ---> | Read | 200 (OK), list of customers. Use pagination, sorting and filtering to navigate big lists. | 200 (OK), single customer. 404 (Not Found), if ID not found or invalid. |
| PUT---> | Update/Replace | 405 (Method Not Allowed), unless you want to update/replace every resource in the entire collection. | 200 (OK) or 204 (No Content). 404 (Not Found), if ID not found or invalid. |
| PATCH ---> | Update/Modify | 405 (Method Not Allowed), unless you want to modify the collection itself. | 200 (OK) or 204 (No Content). 404 (Not Found), if ID not found or invalid. |
| DELETE | Delete | 405 (Method Not Allowed), unless you want to delete the whole collection—not often desirable. | 200 (OK). 404 (Not Found), if ID not found or invalid. |
Below is a more-detailed discussion of the main HTTP methods. Click on a tab for more information about the desired HTTP method.
-
The POST verb is most-often utilized to create new resources. In particular, it's used to create subordinate resources. That is, subordinate to some other (e.g. parent) resource. In other words, when creating a new resource, POST to the parent and the service takes care of associating the new resource with the parent, assigning an ID (new resource URI), etc.
On successful creation, return HTTP status 201, returning a Location header with a link to the newly-created resource with the 201 HTTP status.
POST is neither safe nor idempotent. It is therefore recommended for non-idempotent resource requests. Making two identical POST requests will most-likely result in two resources containing the same information.
Examples:
The HTTP GET method is used to read (or retrieve) a representation of a resource. In the “happy” (or non-error) path, GET returns a representation in XML or JSON and an HTTP response code of 200 (OK). In an error case, it most often returns a 404 (NOT FOUND) or 400 (BAD REQUEST).
According to the design of the HTTP specification, GET (along with HEAD) requests are used only to read data and not change it. Therefore, when used this way, they are considered safe. That is, they can be called without risk of data modification or corruption—calling it once has the same effect as calling it 10 times, or none at all. Additionally, GET (and HEAD) is idempotent, which means that making multiple identical requests ends up having the same result as a single request.
Do not expose unsafe operations via GET—it should never modify any resources on the server.
Examples:
GET example.com/buckets/sample
PUT is most-often utilized for update capabilities, PUT-ing to a known resource URI with the request body containing the newly-updated representation of the original resource.
However, PUT can also be used to create a resource in the case where the resource ID is chosen by the client instead of by the server. In other words, if the PUT is to a URI that contains the value of a non-existent resource ID. Again, the request body contains a resource representation. Many feel this is convoluted and confusing. Consequently, this method of creation should be used sparingly, if at all.
Alternatively, use POST to create new resources and provide the client-defined ID in the body representation—presumably to a URI that doesn't include the ID of the resource (see POST below).
On successful update, return 200 (or 204 if not returning any content in the body) from a PUT. If using PUT for create, return HTTP status 201 on successful creation. A body in the response is optional—providing one consumes more bandwidth. It is not necessary to return a link via a Location header in the creation case since the client already set the resource ID.
PUT is not a safe operation, in that it modifies (or creates) state on the server, but it is idempotent.
(What do you mean by idempotent?
Idempotence is any function that can be executed several times without changing the final result beyond its first iteration.).
In other words, if you create or update a resource using PUT and then make that same call again, the resource is still there and still has the same state as it did with the first call.If, for instance, calling PUT on a resource increments a counter within the resource, the call is no longer idempotent. Sometimes that happens and it may be enough to document that the call is not idempotent. However, it's recommended to keep PUT requests idempotent. It is strongly recommended to use POST for non-idempotent requests.
Examples:
PUT example.com/buckets/secret_stuff
PATCH is used for modify capabilities. The PATCH request only needs to contain the changes to the resource, not the complete resource.
This resembles PUT, but the body contains a set of instructions describing how a resource currently residing on the server should be modified to produce a new version. This means that the PATCH body should not just be a modified part of the resource, but in some kind of patch language like JSON Patch or XML Patch.
PATCH is neither safe nor idempotent. However, a PATCH request can be issued in such a way as to be idempotent, which also helps prevent bad outcomes from collisions between two PATCH requests on the same resource in a similar time frame. Collisions from multiple PATCH requests may be more dangerous than PUT collisions because some patch formats need to operate from a known base-point or else they will corrupt the resource. Clients using this kind of patch application should use a conditional request such that the request will fail if the resource has been updated since the client last accessed the resource. For example, the client can use a strong ETag in an If-Match header on the PATCH request.
Examples:
PATCH example.com/buckets/secret_stuff
DELETE is pretty easy to understand. It is used to delete a resource identified by a URI.
On successful deletion, return HTTP status 200 (OK) along with a response body, perhaps the representation of the deleted item (often demands too much bandwidth), or a wrapped response (see Return Values below). Either that or return HTTP status 204 (NO CONTENT) with no response body. In other words, a 204 status with no body, or the JSEND-style response and HTTP status 200 are the recommended responses.
HTTP-spec-wise, DELETE operations are idempotent. If you DELETE a resource, it's removed. Repeatedly calling DELETE on that resource ends up the same: the resource is gone. If calling DELETE say, decrements a counter (within the resource), the DELETE call is no longer idempotent. As mentioned previously, usage statistics and measurements may be updated while still considering the service idempotent as long as no resource data is changed. Using POST for non-idempotent resource requests is recommended.
There is a caveat about DELETE idempotence, however. Calling DELETE on a resource a second time will often return a 404 (NOT FOUND) since it was already removed and therefore is no longer findable. This, by some opinions, makes DELETE operations no longer idempotent, however, the end-state of the resource is the same. Returning a 404 is acceptable and communicates accurately the status of the call.
Examples:
Terminologies Related to Postman
API->Application Programming Interface (API) is software that acts as an intermediary for two apps to communicate with each other. We use APIs whenever we use an application like Twitter, Facebook, sending text messages, or checking the weather over the phone.
HTTP
HTTP (Hypertext Transfer Protocol) is the collection of rules for the transmission of data on the World Wide Web, like graphic images, text, video, sound, and other multimedia data. The Web users implicitly make use of HTTP as soon as they open their Web browser.
Example: A user or browser enters the HTTP request to the server; the server then returns the user response. This response includes the request status information and may consist of the requested material as well.
The most commonly used HTTP methods are GET, POST, PUT, PATCH, HEAD, DELETE, and OPTIONS.
Why use Postman?
Postman is based on a wide range of extremely user-friendly power tools. For more than 8 million users, Postman has become a tool of convenience. Following are the reasons why Postman is used:
Accessibility- One can use it anywhere after installing Postman into the device by simply logging in to the account.
Use Collections-Postman allows users to build collections for their API-calls. Every set can create multiple requests and subfolders. It will help to organize the test suites.
Test development- To test checkpoints, verification of successful HTTP response status shall be added to every API- calls.
Automation Testing-Tests can be performed in several repetitions or iterations by using the Collection Runner or Newman, which saves time for repeated tests.
Creating Environments- The design of multiple environments results in less replication of tests as one can use the same collection but for a different setting.
Debugging- To effectively debug the tests, the postman console helps to track what data is being retrieved.
Collaboration- You can import or export collections and environments to enhance the sharing of files. You may also use a direct connection to share the collections.
Continuous integration-It can support continuous integration.
Prerequisites
Before proceeding with this tutorial, you should have a basic knowledge of API, automation, and manual testing.
Postman Installation and Updates
Postman can be downloaded for all major operating systems, including Mac, Linux, and Windows, as a native app (standalone application). Postman is also available as a chrome extension application, but it is better to install and use the native app because Postman chrome extension does not support all the features that the native app has.
Introduction to Postman
For developers, Postman is the API Platform to build, test, iterate, and design their APIs. Postman reports that it has 25+ million registered users and 75k open APIs as of February 2023, which it tells constitutes the largest public API hub in the world. The organization is in San Francisco and has an office in Bangalore, in which it was discovered.
History of Postman
In 2012, Postman started as Abhinav Asthana's side project, who wanted to clarify API testing, during work at Yahoo Bangalore. As a free app, Abhinav Asthana launched Postman in Chrome Web Store. He recruited old colleagues Abhijit Kane and Ankit Sobti to help in creating Postman Inc. as the usage of the app grew. Today, these three co-founders run the company, where Sobti serves as CTO and Abhinav as CEO.
Products of Postman
API repository: It permits the user to save, catalog, and cooperate across API artifacts within a central platform in partner, private, or public networks.
One truth source for APIs: Postman offers a centralized, version-controlled, and cloud-based repository for every API artifact from the whole API lifecycle. Every tool of the Postman platform uses the repository, which guarantees one truth source for our APIs. This API repository allows organizations and teams to assemble metrics and detect insights from the built-in governance facilities in the platform.
The web and desktop applications of Postman link to the API repository by workspaces for public, partner, team, and personal use. Also, we can connect our API repository to other tools and products we use by the pre-built integrations of Postman. We can better scale, organize, and simplify our whole API lifecycle with the API repository of Postman, whether it is for one API or for our whole API landscape.Tools: API detection, mock servers, API testing, API documentation, API design, and API client.
API builder: It helps in implementing the workflow of an API design with specifications, including RAML, GraphQL, and OpenAPI. It develops varied APM solutions, gateways, CI/CD, and source controls.
Intelligence: API governance, reporting, workspaces, API repository search, security warnings, etc.
Workspaces: Public, partner, team, and personal workspaces permit developers to cooperate externally and internally.
Postman API development
Postman Provides its support for API- initial development with API Builder. In Postman, we can apply the API Builder to develop our API. Then, our API definition can act as one truth source for our API project. We can connect many elements of our API development and inspection process to our API definition, including monitors, tests, documentation, and collections. Also, we can sync our API with the Git repository in Postman.
High-level steps
Below are some high-level steps required when designing and integrating APIs:
Creating API: We can begin a new API in the first step in Postman.
With API version control: We can sync our modifications between the remote Git repository and Postman. We can also release a version when we are ready to distribute our modifications to customers.
Developing API: We can build our API by adding collections and editing our API definition. Also, we can produce server-side code from our OpenAPI 3 specification and validate our API definition and attached elements.
Testing API: We can add tests to our API and apply CI integration to create and automate the testing process.
Deploying API: We can connect our API deployment service to include greater visibility in Postman.
Monitoring API: We can add monitors to inspect our API.
Handling and sharing APIs: We can share our APIs with several team members, see changes, view changelog, and add comments.
Mocking API: We can configure a mock server to reproduce the endpoints of our API to test and development purposes.
API reports: We can use reports to see statistics, including the improvement, development, and usage done by our team on APIs.
Navigate API Builder
To see and implement APIs, we can choose APIs inside the sidebar. We can open and change any previous APIs or create or ship new APIs. We can utilize the arrows to increase API within the sidebar and see the linked elements and definition files of API.
When we choose API, the workbench shows the API overview. This overview shows the API description, published versions, and linked collections. Also, the overview offers quick access to operations, including viewing deployments, inspecting the API, adding tests, and connecting to any repository.
Steps to download and install the native Postman application
Step-1: Go to the link https://www.postman.com/downloads/ and click download for Mac or Windows or Linux based on your operating system.
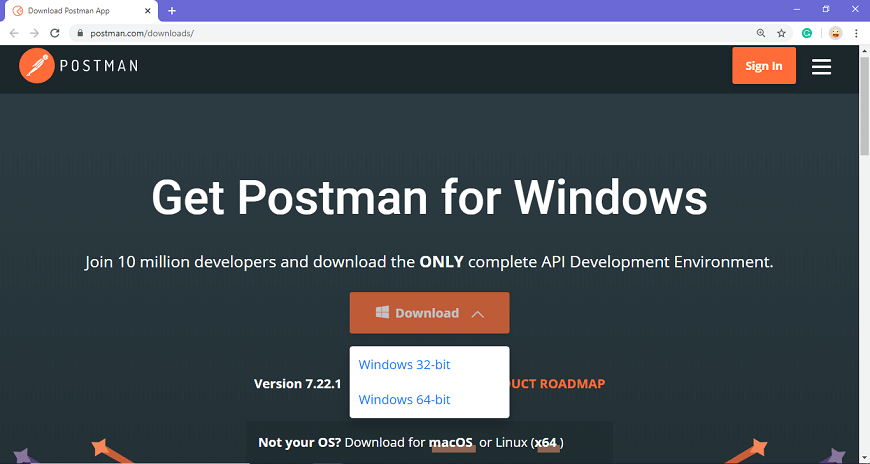
Step-2: For downloading the app for Windows, click on the download button and select the particular version. I opted for the 64-bit version. If you are using a 32-bit OS, you can choose the 32 bit, as shown in the above image.
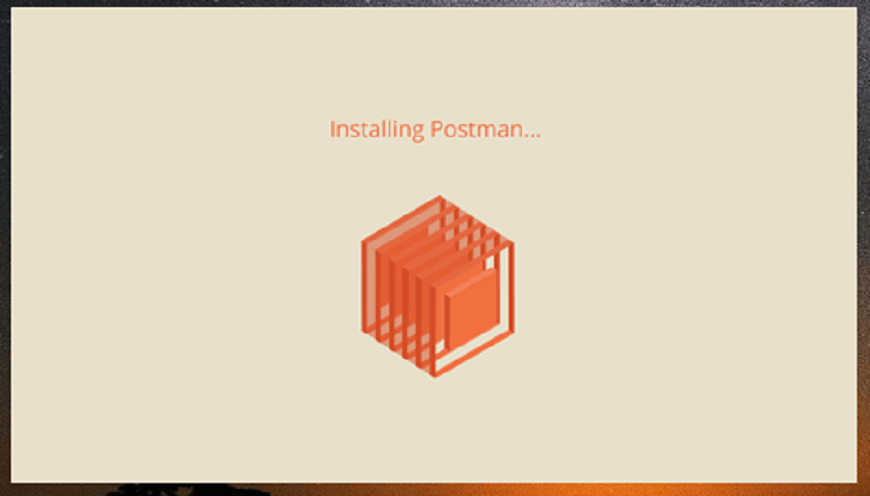
Step-3: You can check the download progress on the bottom left if you are using the Chrome browser. Once the .exe file is downloaded, you need to install the application, as shown in the below image.
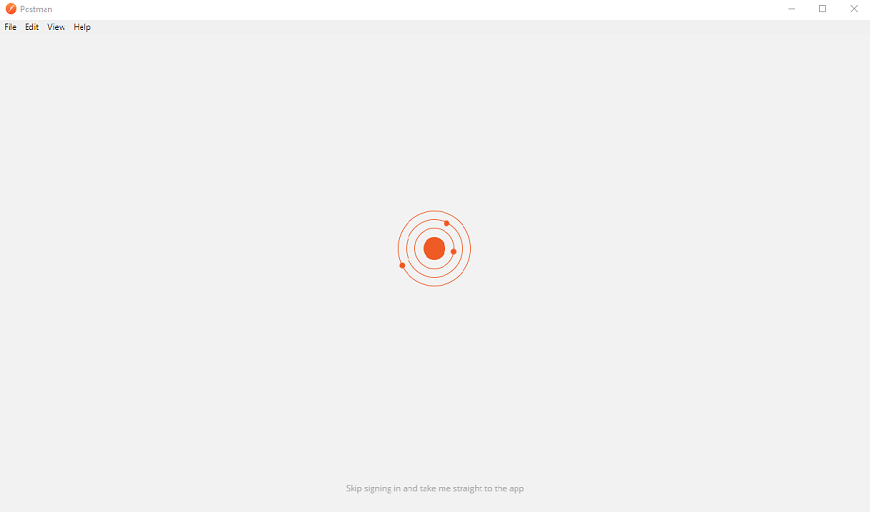
Step-4: Once the installation completes, you will be redirected to a window as shown in the image where you can click on Stop signing in and take me straight to the app (as this app can also be used without logging in) or otherwise you will get a new window to sign up.
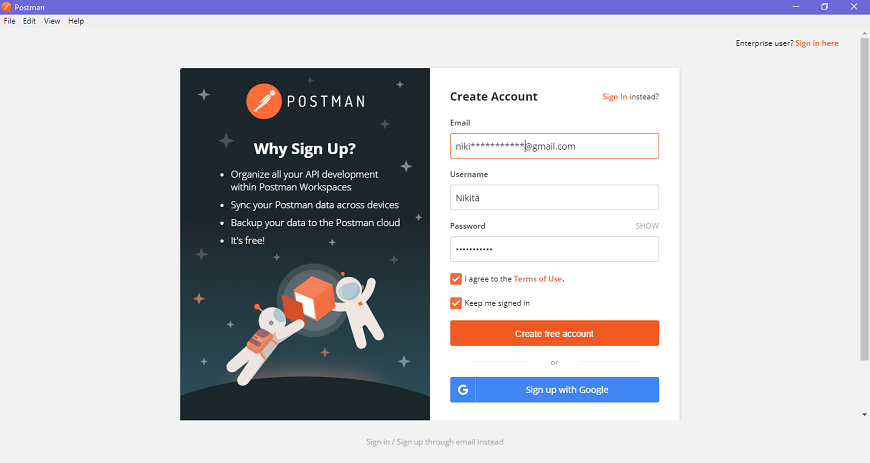
It is better to create an account as this will help you to save the work you do within the Postman, and with this, you won't lose any work.
Step-5: Create your account with all the required details, or you can also signup with Google, as shown in the image.
Step-6: After signing in, select the workspace tools as per your requirement, and then click on, continue to get the startup screen.
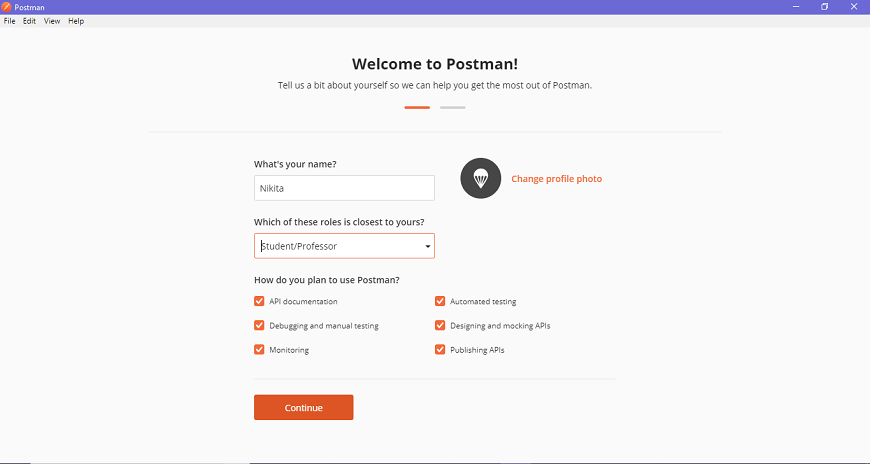
Step-7: You will see the following page, and then you are ready to use Postman.
Steps to update the Postman
You will receive a notification in your Postman app if any update is available.
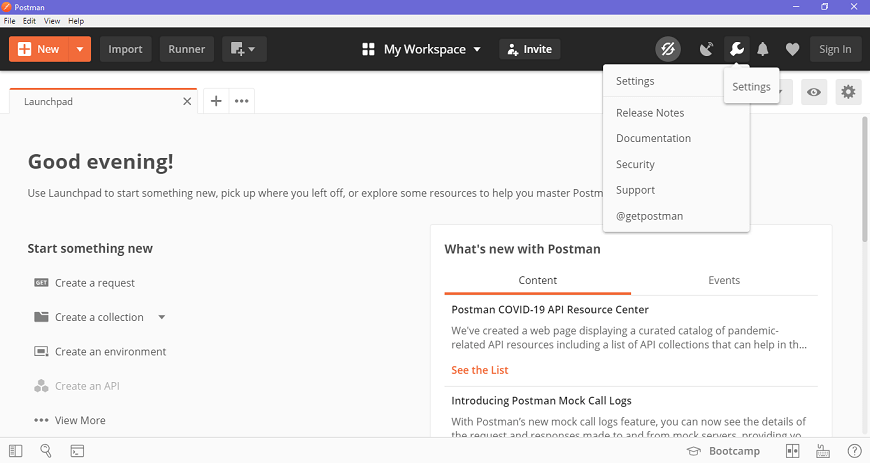
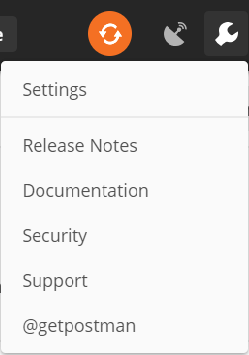
To download or install the latest update, click on the Settings icon, as shown in the image below, go to Settings>Update.
You can change the update settings by enabling the settings of automatically download major updates, as shown in the image below.

You can also check for the latest updates by clicking on Check for updates, which will show you if any new update is available.
You will have to select the update option to download and install the latest update. When the download is complete, you will see a notification asking you to restart the app to install the updated features.
It automatically downloads minor updates and bug fixes.
[Note-->PARAMS=A parameter is a part of the URL used to pass more information to the server. The data can be used in the form of a data file or an Environment variable. Parameterization is an important feature of Postman and helps to eliminate redundant tests. Parameters are enclosed in double curly braces {{parameter}}.]
The HEAD method is used to ask only for information about a document, not for the document itself. HEAD is much faster than GET, as a much smaller amount of data is transferred. It's often used by clients who use caching, to see if the document has changed since it was last accessed.
What is head in API?
What is the HEAD Method? The HEAD method is used to retrieve the header information of a resource. This method is similar to the GET method, but it does not return the body of the response. Instead, it only returns the header information, such as the content type, content length, and other metadata.
What is the OPTIONS Method?
The OPTIONS method is used to retrieve the communication options for a resource. This method is used to determine what methods are allowed for a particular resource. For example, if a resource supports the GET, POST, and PUT methods, the OPTIONS method will return this information.
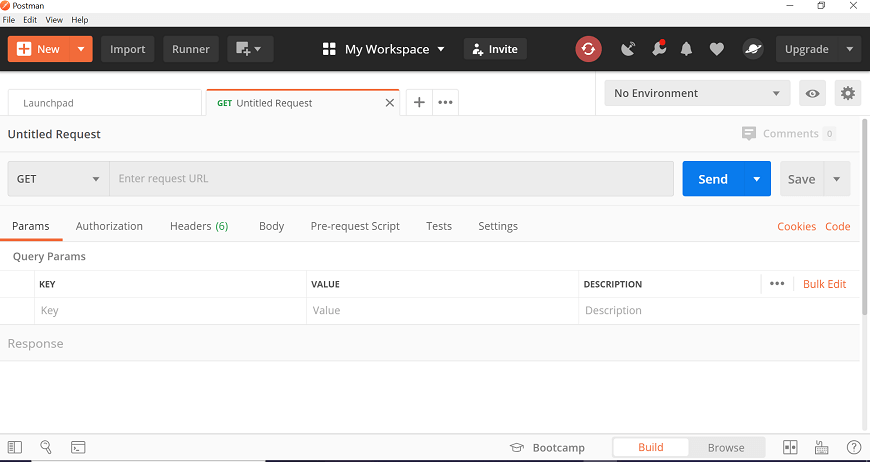
Postman Navigation
After downloading and installing Postman in our system, we will now discuss the user interface of Postman to learn about the features and terminologies that Postman offers.
We can split the postman navigation into four UI structures, as shown in the image below.
Header bar
Sidebar
Builder section
Response section
1. Header bar
Header bar contains the following options-
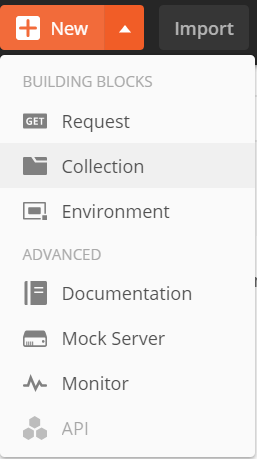
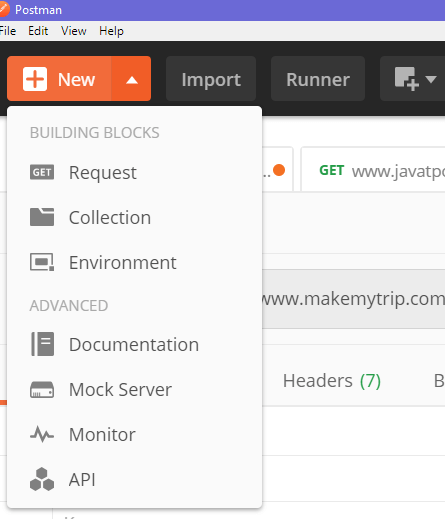
New

The new option is used for the following tasks
Request
It is used to create a new request, where you can create and save requests by entering the request name and can use it in the future.
Collection
It saves your requests in the form of a collection for reusing and sharing.
Environment
Environments are variables with key-values. Every variable name represents its key. So if we reference the name of the variable, it enables us to access its corresponding value. So it basically saves the values you frequently use in an environment.
The new button also provides some advanced features like--
Documentation - to create documentation for API,
Mock server- to create in-development APIs,
Monitor- to test API performance,
API - for managing all aspects of APIs, including design, development, and testing.
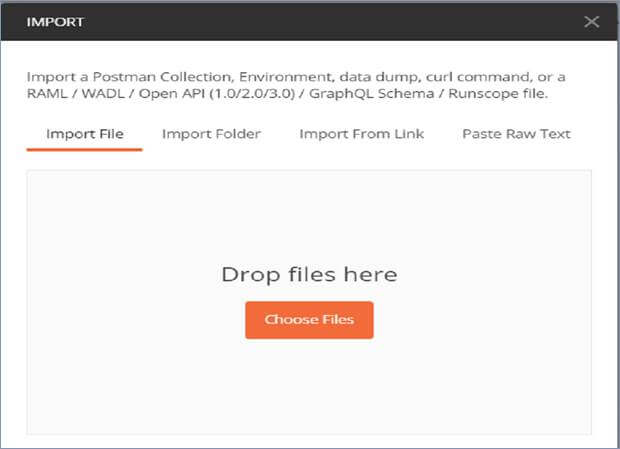
- Import
You may use the Import option for importing files in different formats into the software. As seen in the image below, you can import Postman collection and Environment files from any location and can run it through postman.
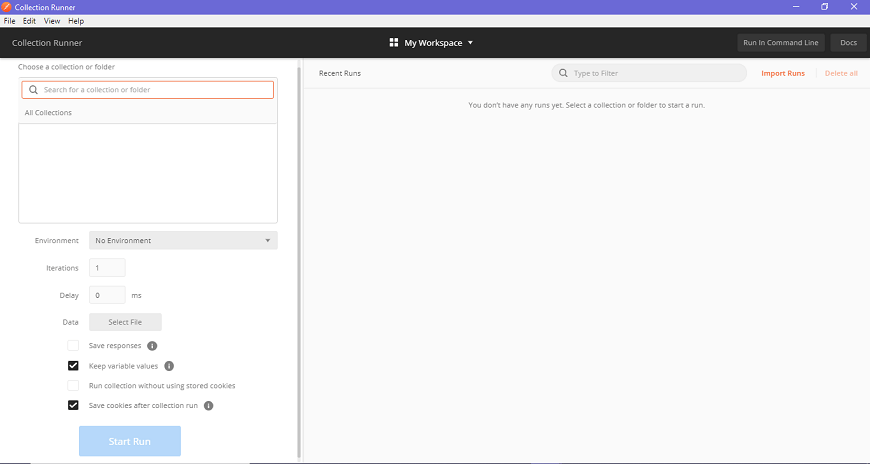
- Runner
This option helps to directly run the loaded collections in the Postman.
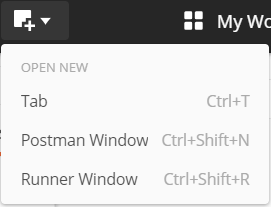
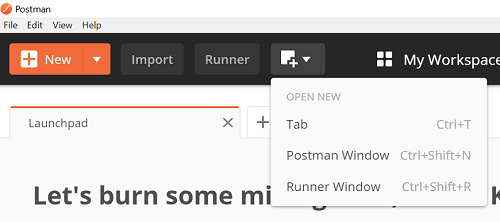
- Open new icon
This option is used to open a new Tab, a new Postman window, and a new Runner window.
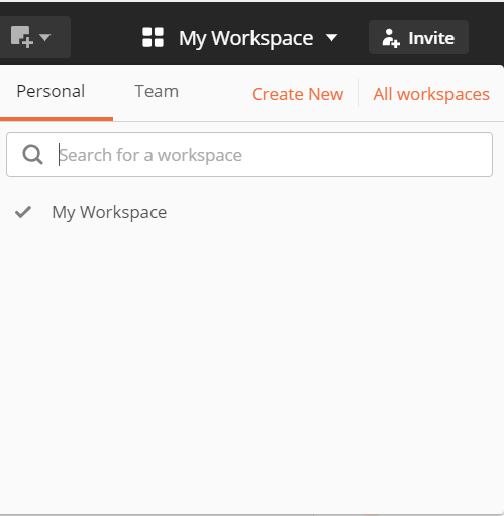
- My Workspace
This option helps you to view, manage, and create personal as well as team workspaces. Collections, monitors, environments, and mocks are components of the workspace.
- Invite
This is used to invite other users into your team to collaborate with them for team workspace. As seen in the image below, this can be done by entering the email address or uploading the list of people to invite them.
Request
It is used to create a new request, where you can create and save requests by entering the request name and can use it in the future.
Collection
It saves your requests in the form of a collection for reusing and sharing.
Environment
Environments are variables with key-values. Every variable name represents its key. So if we reference the name of the variable, it enables us to access its corresponding value. So it basically saves the values you frequently use in an environment.
The new button also provides some advanced features like
Documentation - to create documentation for API,
Mock server- to create in-development APIs,
Monitor- to test API performance,
API - for managing all aspects of APIs, including design, development, and testing.
- Import
You may use the Import option for importing files in different formats into the software. As seen in the image below, you can import Postman collection and Environment files from any location and can run it through postman.
- Runner
This option helps to directly run the loaded collections in the Postman.
- Open new icon
This option is used to open a new Tab, a new Postman window, and a new Runner window.
- My Workspace
This option helps you to view, manage, and create personal as well as team workspaces. Collections, monitors, environments, and mocks are components of the workspace.
- Invite
This is used to invite other users into your team to collaborate with them for team workspace. As seen in the image below, this can be done by entering the email address or uploading the list of people to invite them.
- Sync icon
This option is used to synchronize the API requests that you send from other devices and updates your postman account status.

- Interceptor icon
The interceptor option is a proxy server, used to capture all the requests that you send through browser or phone or from any other device.
- Settings icon
- Notification icon
It shows all the notification of the Postman app.
2. Sidebar
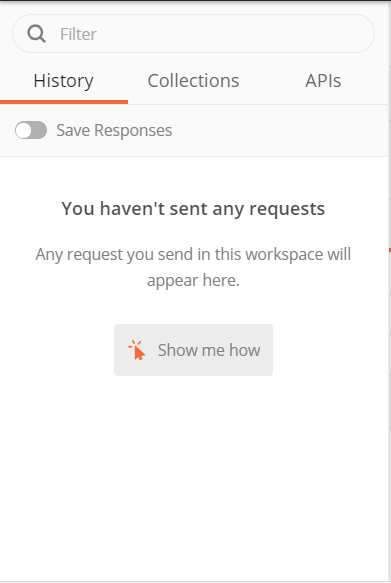
History
The history option is situated below the filter section of the app. The History tab automatically keeps a record of all your API requests, just like any other browser. It keeps handy all your past searches.Collections
The collection is the group of related requests which are displayed under the collection tab. In the collection tab, you can also create a new collection, as shown in the picture below. There is also a Trash section from where you can recover your lost or deleted collections.
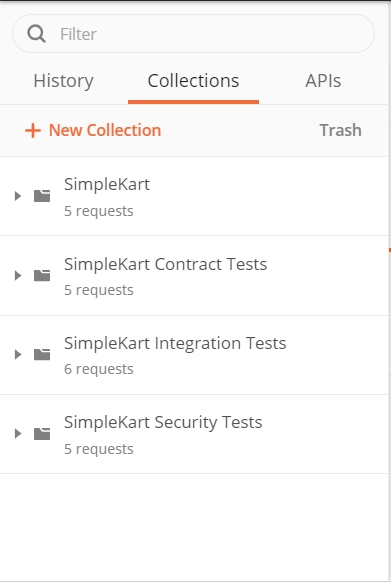
- APIs
All the APIs are listed in this section. New API can also be created from this tab.

3. Builder or Request section
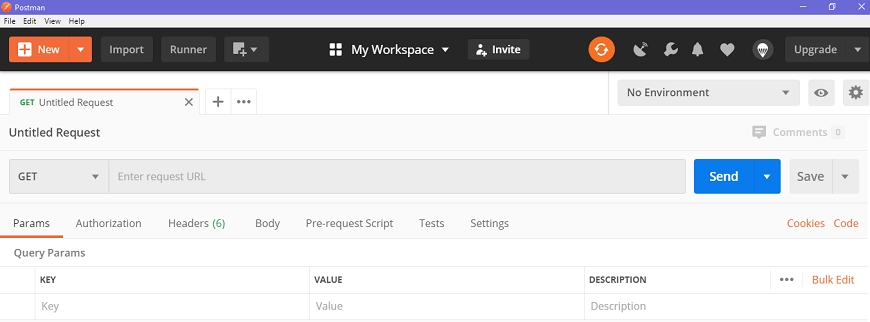
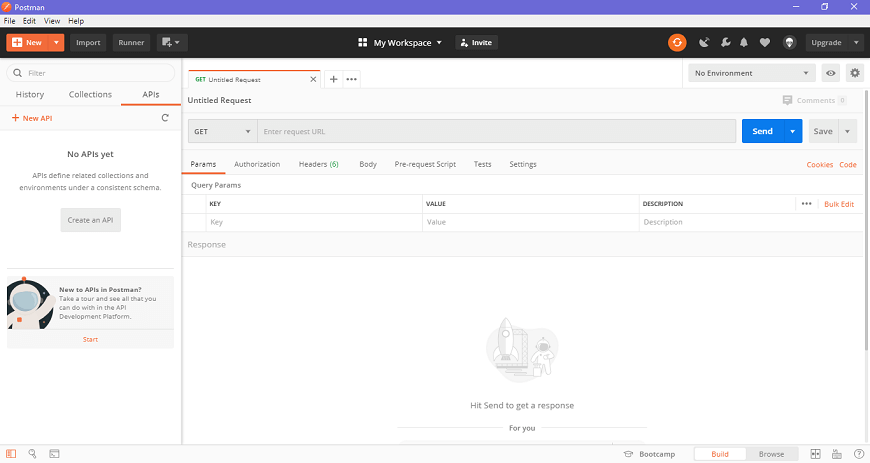
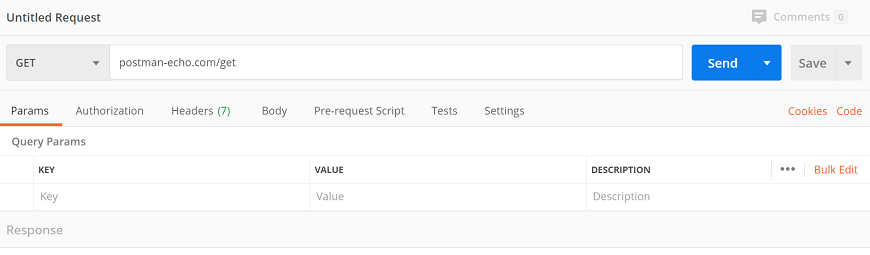
- Untitled Request
'Untitled request' is basically the default request title you are working on. The title depends on the type of request method you are working on, as shown in the image below.
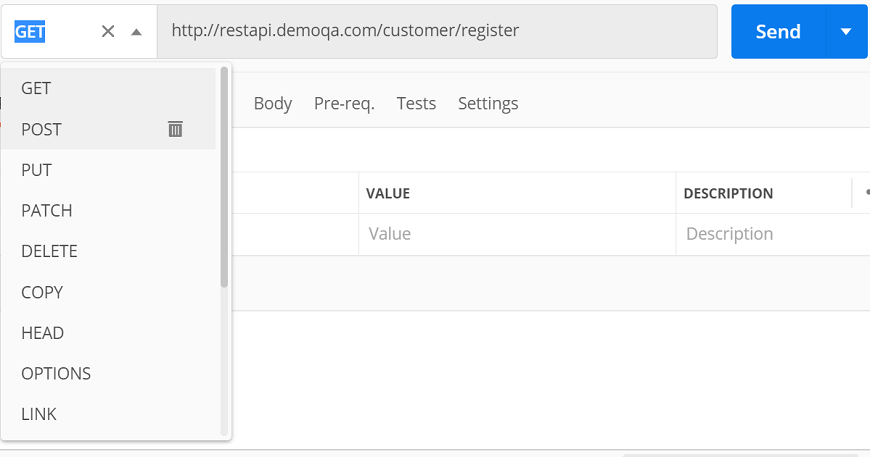
- HTTP request
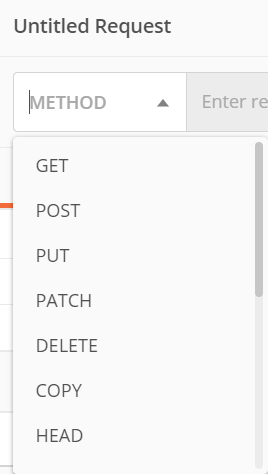
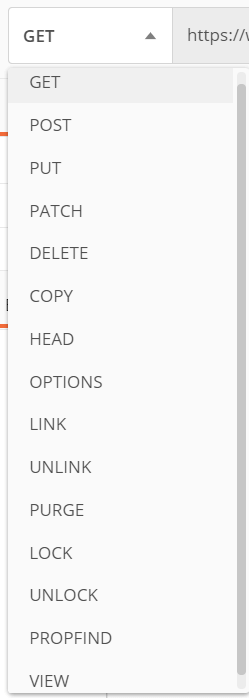
This option opens a drop-down list of all the HTTP request methods, as shown in the image like GET, DELETE, PATCH, OPTIONS, LINK, POST, COPY, UNLOCK, PURGE, etc. In general, we mostly use POST and GET. We will discuss these requests in later chapters.
- Request URL or Endpoint
This URL option is like any other browser URL. In this, we mention the link to where the API will communicate with.

- Params
This option is used to write the parameters of the request. These parameters include key values and descriptions.

- Authorization
The authorization process is required to access the APIs. This process verifies whether you have permission from the server to access the data you want. We will discuss this as a complete chapter later on.
- Headers
An HTTP request header is the additional data that is required to send along with the request. This header information is required for proper two-direction communication between the client and the server.
- Body
It let you specify the data type that you need to send with a request. There are various types of body data that you can send to match your API.

What is an SSL certificate?
An SSL certificate is a digital certificate that authenticates a website's identity and enables an encrypted connection. SSL stands for Secure Sockets Layer, a security protocol that creates an encrypted link between a web server and a web browser
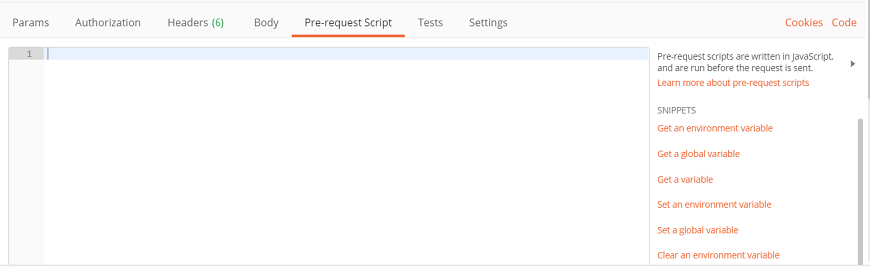
Pre-request script
These are written in JavaScript, and as the name suggests, these are executed before sending the request. Generally, these scripts are for setting the environment and ensuring that the request is running in the right environment.
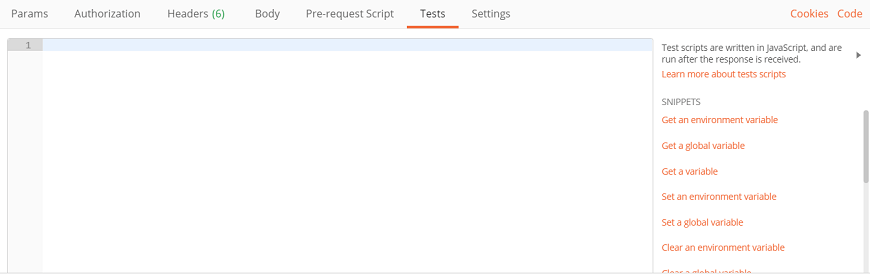
- Test scripts
It is executed during the request. It is also written in JavaScript. This helps you to ensure that API works as intended. Testing is important as it sets up checkpoints to verify whether the response status is ok and retrieved data is as expected.
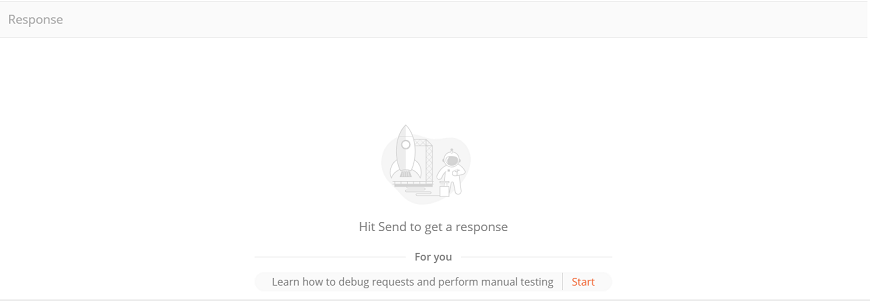
4. Response section
The API responses which are sent back from the server are shown in the response window. These are generated after you send an API request to the server. As we have not sent any request, so there is no response in our case.
Postman Sending Your First Request
Sending a request is as easy as posting a URL into your web browser. We can easily send requests to APIs in Postman. An API request helps you to access, or send, data from a data source.
To send the API request, we need an HTTP method. Some commonly used methods are POST, GET, DELETE, PUT, and PATCH.
GET: This HTTP method is used to access the data from an API.
POST: This method transmits new data.
DELETE: This is used to remove or delete the existing data.
PATCH: This method is used to update the existing data.
PUT: This method is used to update the existing data.
Without any terminal or code, we can make API requests and review the answers with the help of postman. Just build a new request and select the send button, you'll get the API response.
Sending a Request
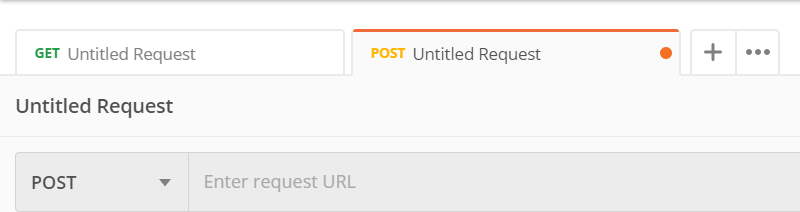
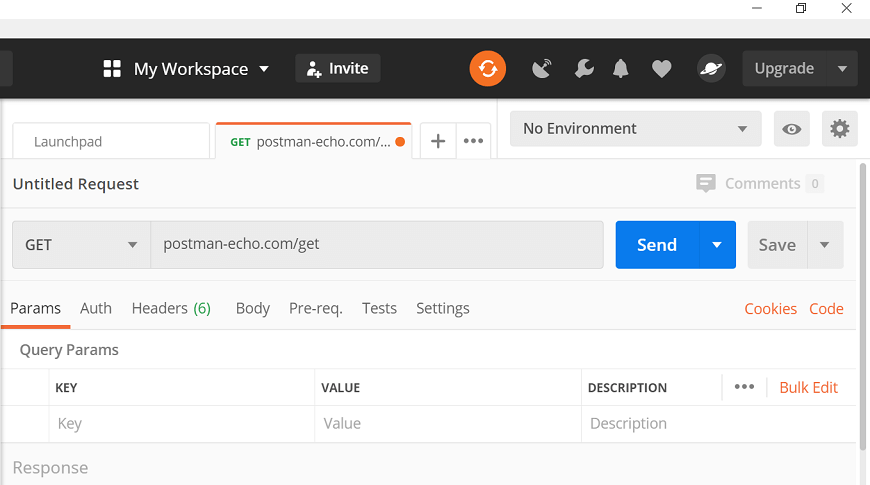
Open the Postman app to send the first API request. Now, to open a new tab, click on the + plus button.

You can also open the new tab by entering ctrl+T or from the Open New menu select Tab option.
In the URL field, enter the following URL:
From the right side of the URL field, click on the Send button.
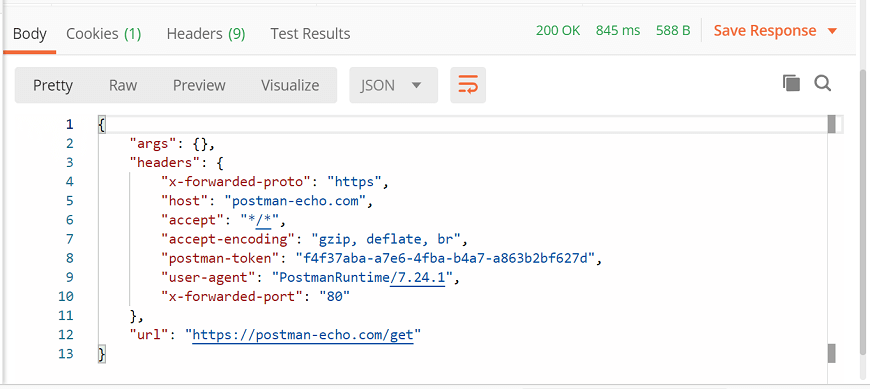
In the lower pane, you will get the response in JSON data from the server.
{
"args": {},
"headers": {
"x-forwarded-proto": "https",
"host": "postman-echo.com",
"accept": "*/*",
"accept-encoding": "gzip, deflate, br",
"postman-token": "f4f37aba-a7e6-4fba-b4a7-a863b2bf627d",
"user-agent": "PostmanRuntime/7.24.1",
"x-forwarded-port": "80"
},
"url": "https://postman-echo.com/get"
}
Creating the First Collection
Collection in Postman means a group of API requests that you have already saved in the Postman. You can arrange these requests into folders.
Steps to Create the First Collection
- Enter the new request in the Request URL option, which is present in the Builder section.
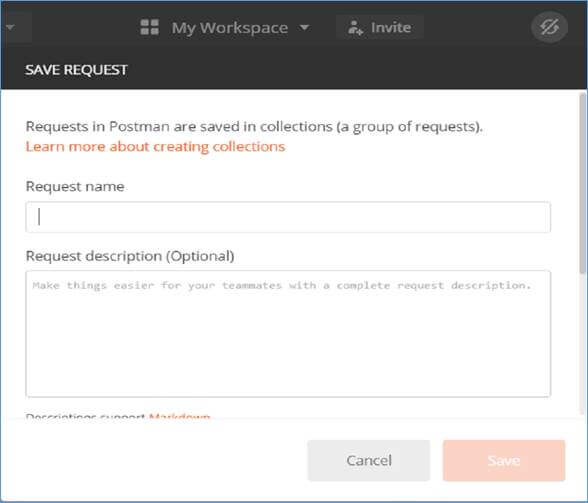
- Click on the Save button, and then a new window will open, as shown in the image below.
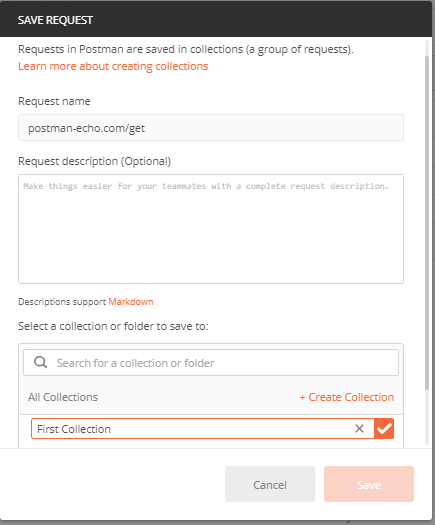
You can change the Request name, or by default, Request URL will be displayed as the Request name.
You can also write the Request description as an optional step.
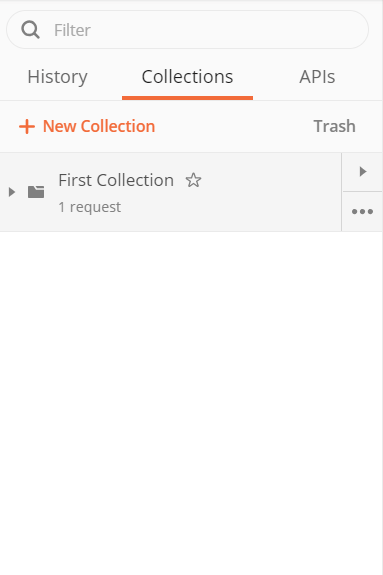
Now go to create a collection option and write a name to your collection. I have named it First Collection, as you can see in the image above.
Save your collection by clicking on the Save button.
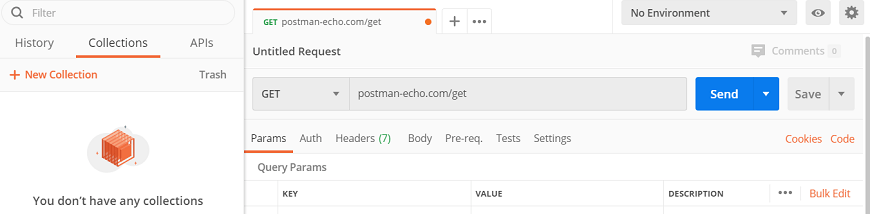
Now, after saving, you can see your collection in the sidebar under the Collection tab, as shown in the image below.
Within a collection, any number of requests can be added.
SENDING API REQUEST
Creating Requests
Let's create a new request in Postman. In the request, we can have many details. And during this request creation process, you have to enter a URL and select the method. Other than you can optionally specify the number of additional information.
To create a request, follow the following steps:
Step 1: Launch the Postman.
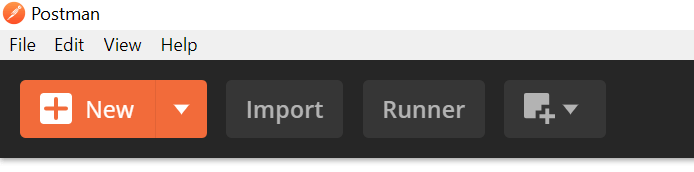
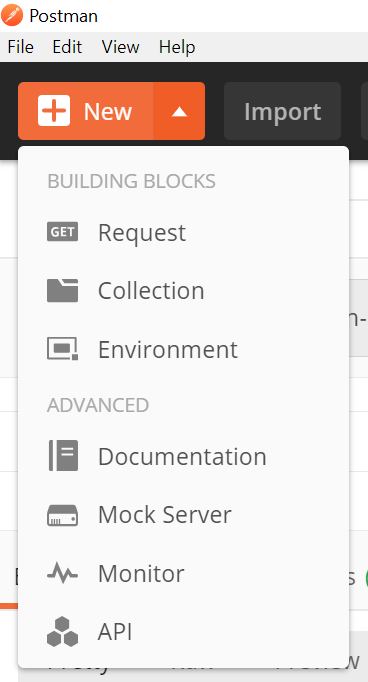
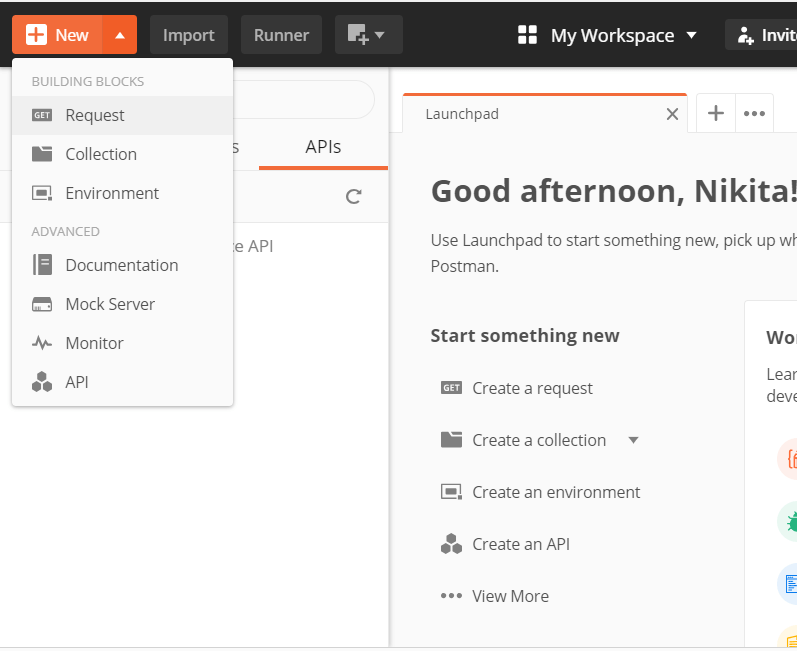
Step 2: Click on New option from the top left corner of the Postman homepage window. Once you click on the button, a drop-down menu will open.
Step 3: Click on the Request option from the drop-down list.
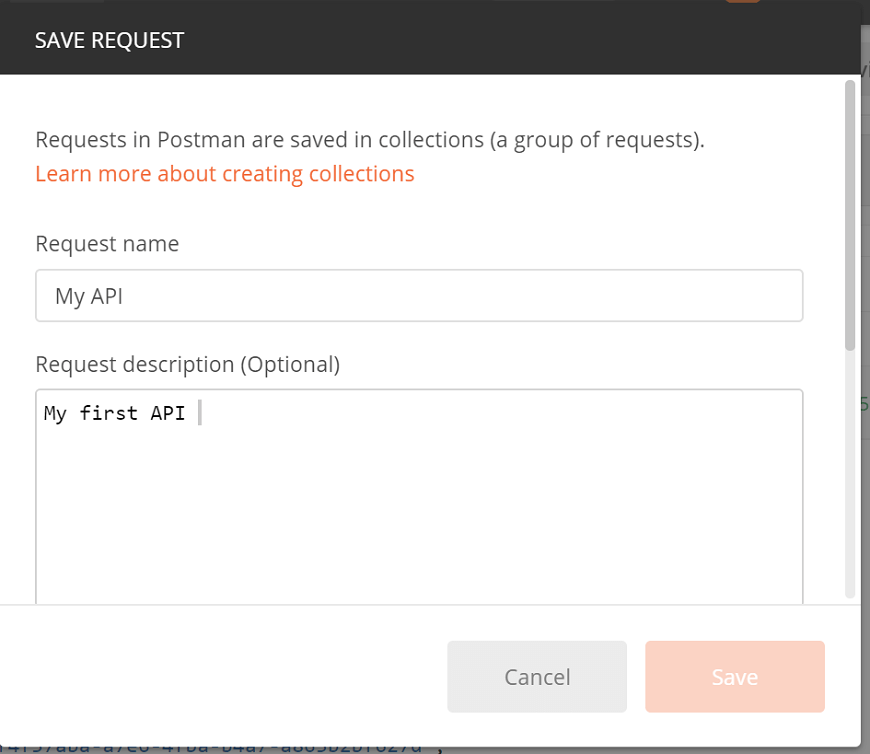
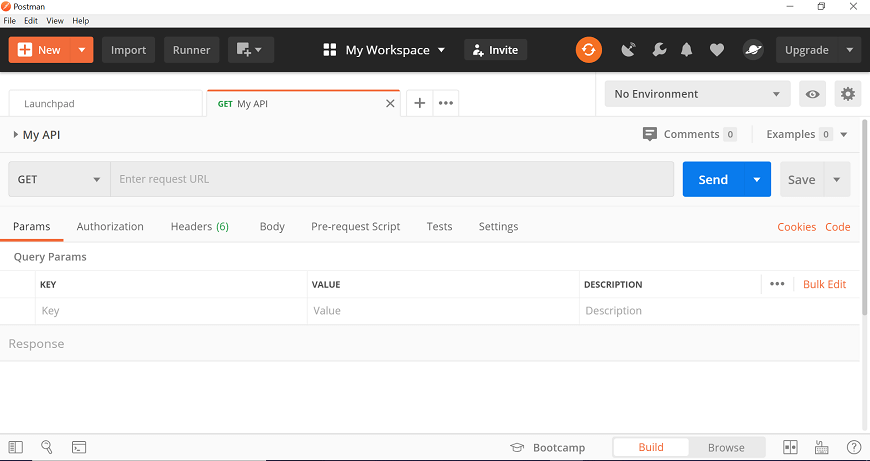
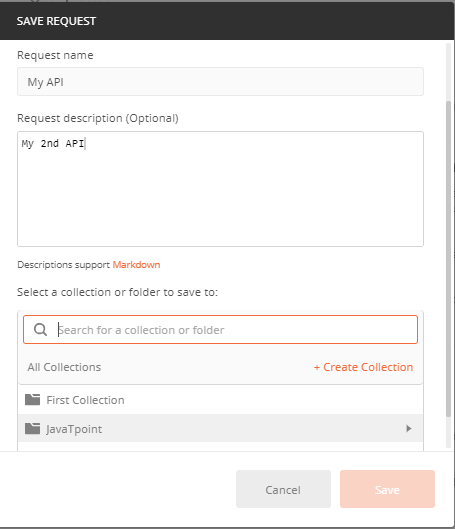
Step 4: Once you select the Request option, you will be prompted to enter the request name, and you can also describe that API for future use. The description section is optional; we can leave it blank.
Here my Request name is "My API."
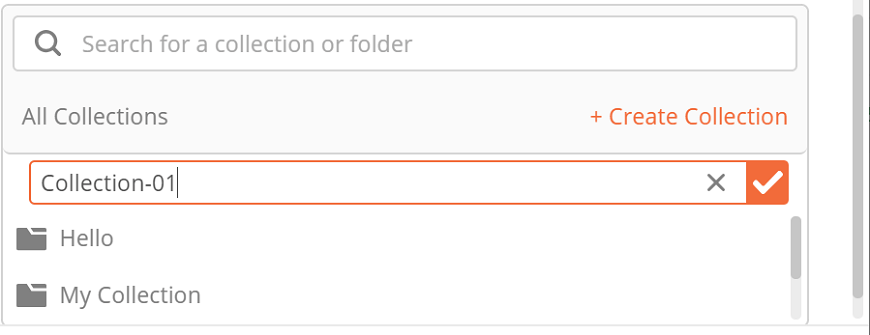
Step 5: Scroll down and click on + Create Collection.
Enter the collection Name (here, 'Collection-01' is my collection name) and click on the right mark.
Step 6: Click on the Save button to create your request.
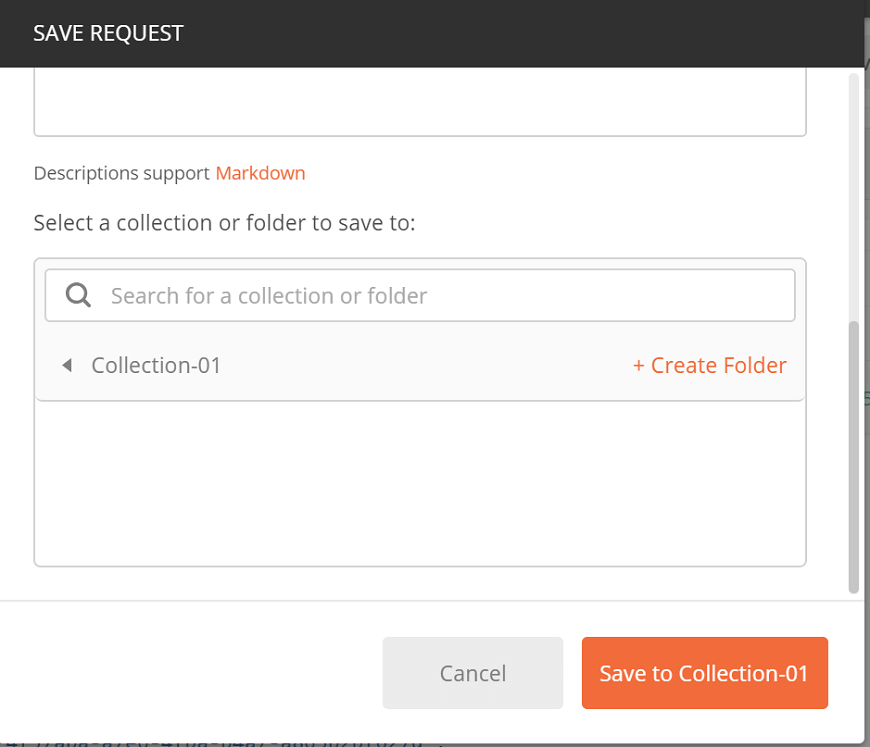
Once you click on the save button, a new tab will open with your given request name.
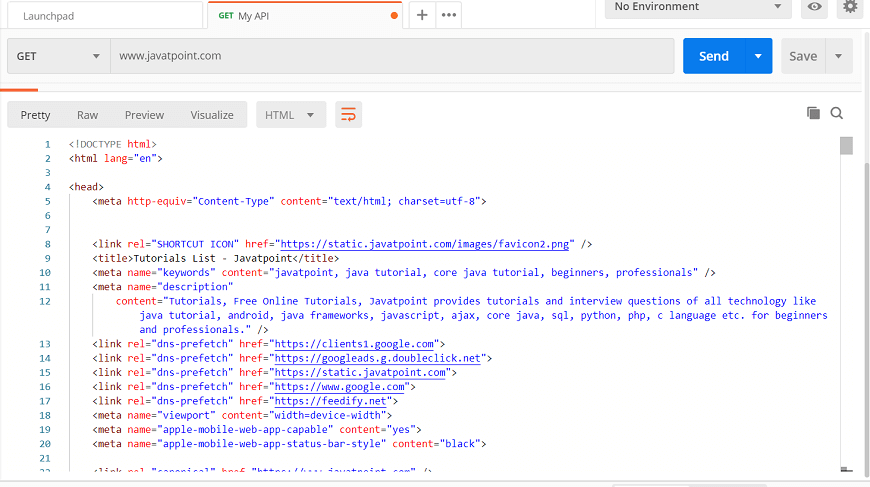
Step 7: Enter javatpoint.com in the address bar and click on Send.

Once you select the Send, you will get the following response.
Setting Request URLs
For sending the request, you should have a URL that defines the API endpoint. All API operation is usually associated with an endpoint, which is a place from where these APIs can access the resources that are required to perform their task.
To access the API in Postman, you need to enter the URL, and each URL contains an endpoint.
When you create an API, usually, the URL is the base location plus path. For example, javatpoint.com/java-tutorial, where javatpoint.com is the base URL and /java-tutorial, is the endpoint path.

And if you use a third-party API, then you don't need to supply the URL, your API provider will supply the URL you need.
Selecting Request Methods
Once you enter the URL in the URL text field, the GET method will be selected for new requests by default. There are multiple other methods available.
Some commonly used methods are:
GET: This HTTP method is used to retrieve data from an API.
POST: To send the new data to an API, we can use this method.
DELETE: This is used to remove or delete the existing data.
PATCH: This method is used to update the existing data.
PUT: This method is used to update the existing data
Authorizing Requests
Authorizing requests include authenticating the identity of the client who sends the request and verifies whether the client is allowed to access and conduct the endpoint operations. APIs use authorization details to make sure that the client requests access data safely.
Several authorization types are available in Postman that you can use while creating an API.
You need to ask the provider for any authorization details you require while using third party API.
Steps for Authorizing Requests in Postman
Open the Postman app and enter a request in the Request URL section.
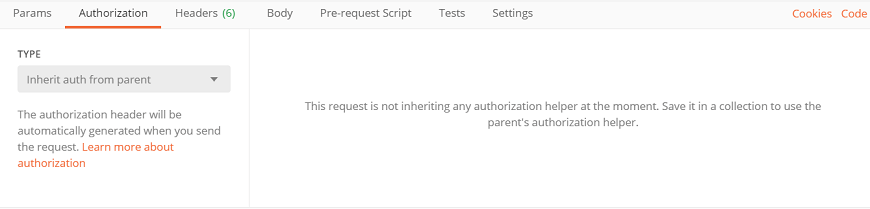
Under the Authorization, the tab selects the authorization TYPE from the drop-down menu, as shown in the image below.
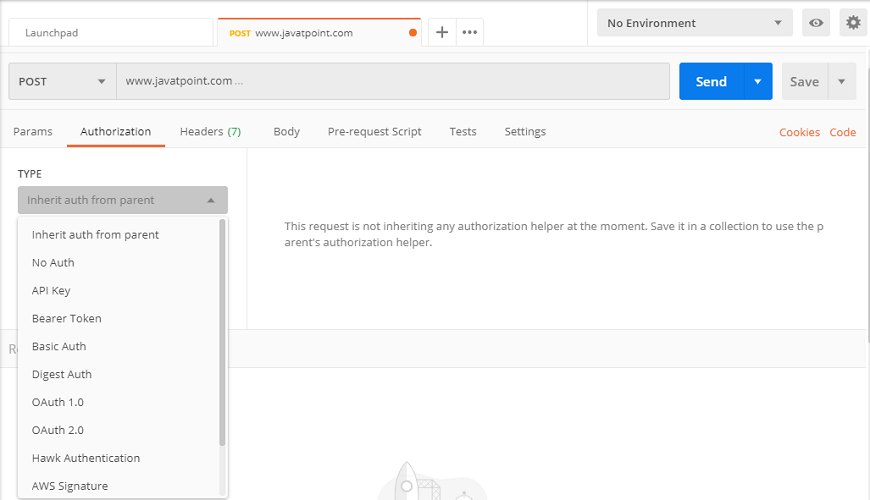
The various authorization types are--
Inherit auth from parent
This is the default auth type. In this, authorization type will be the same as the parent, which means whatever the auth type you selected for that collection (parent); the same auth type will be selected for the request, which is under that collection.No Auth
If you select this type, Postman will not send any auth data with the request.API key
This is to send the Key and Value along with the API request.Bearer Token
This auth type allows the Authorization of requests by using an access key.Basic Auth
This allows users to send username and password along with the request for API login.Digest Auth
This is the two-point authentication of your API request. In this auth type user will send a request where the server will reply with a number that can only be used once. Then the user again will send the request along with username, password, and that realm number for Authorization of the request.OAuth
This auth type is to access third-party API data.Hawk Authentication
This enables users to use partial cryptographic verification to authenticate their requests. Hawk Auth id, which is your API authentication ID value and Hawk Auth key, which is your API authentication key value, is required for Authorization under this auth type.AWS Signature
For Amazon Web Services requests, this auth type is used.NTLM Authentication (Beta)
This is the auth type for windows OS and standalone systems.Akamai EdgeGrid
Akamai technologies use this auth type for authorizing requests.After choosing an Auth type, the app will indicate which part among header, body, URL, or params will include your data so that the user can see how these data will be sent before they run the request.
The authorization data can be sent as header, body, or as parameters to a request.
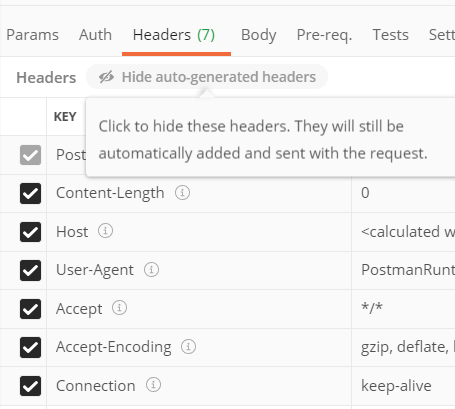
For example, the auth data is sent as headers, as shown in the image above, so these headers will be automatically sent along with the request.
GET Request in Postman
Since now we know how to create the request in Postman, it's time to work on GET request. A GET request gets the information from the server. When you make the GET request on the server, then the server responds to the request.
GET request will not affect any data on the server. Means, there is no creation, updation, addition, or deletion of data on the server when you are making a GET request.
GET request contains all information inside the URL, and because of that, some people do not prefer to use GET request while they are sending some confidential data such as passwords. For example, if you search anything on Google, you actually using a GET request because there is no sensitive information, and you are just requesting the page. You can try to search for something on Google; you will get the same search string in the URL.
To create the first GET request in Postman, follow the following steps:
Step 1: Create a request. To create a new request, open a new tab, click from the + plus button.

You can also open the new tab by entering ctrl+T or from the Open New menu select Tab option.

Once you create a new request then you will get the following window:
Step 2: Enter the URL in the address bar. We will use javatpoint.com.

Step 3: Now, select the GET request from the list of request methods.

Step 4: Now press send.

Step 5: Once you press the send button, you will get the response from the server. Make sure you have a proper internet connection; otherwise, you will not get a response.
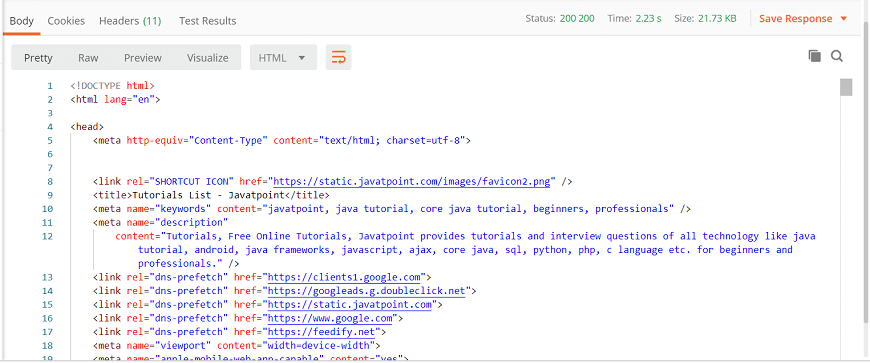
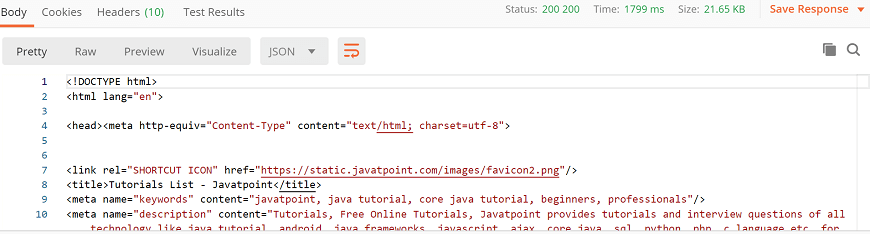
You can check the status code. Here, we got the status code 200 200, which means we got a successful response for the request.
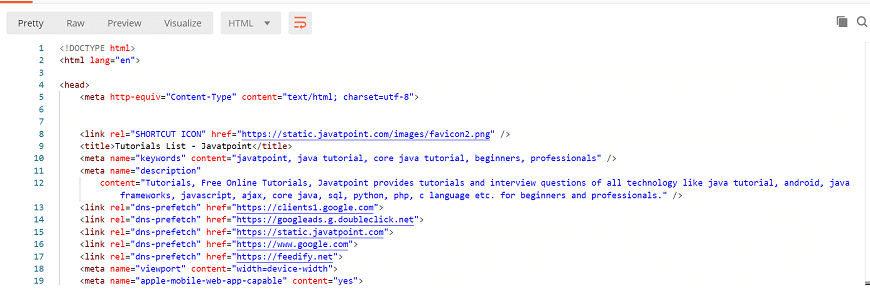
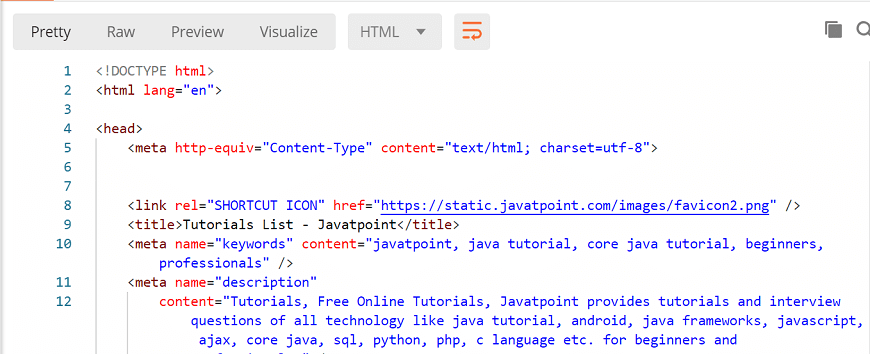
In the Body tab of the response box, we have multiple options to see the response in a different format.

Pretty: In this option, code will show colorfully with different keywords and have indentations in the code, which is useful for reading.

Raw: This is almost similar to pretty but shows the code without colors and in single lines.

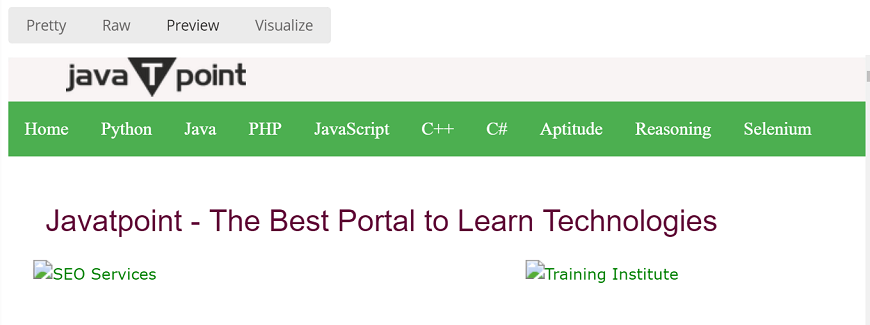
Preview: This will show the preview of the page that has been sent.
Response in Postman
Once you send the request, API sends the response. A response is a message the server receives in return for a Request we send. When we send the request, then server accepts that request in and sends back a packet of the requested information, which is called the response. Each response depends on the sent request.
The server responds differently for every request, and it will be good if we take out some info from all of the server responses. It provides a user-friendly interface to see multiple pieces of information from all of the responses easily.
The postman response interface has multiple options. Let's see these options one by one:
Response Status and Information
Enter the URL javatpoint.com and see the response:
On the top right corner of the response box, we can see the Status, Time, and Size of the code.

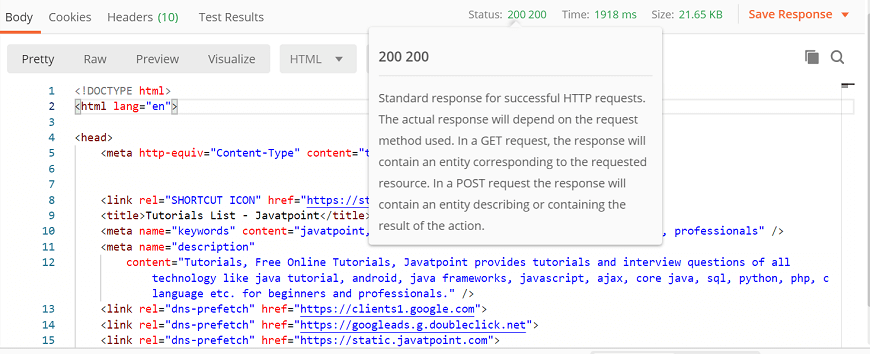
Status Code
A status code defines the status of the request. On entering URL, a mistake can be typed in the URL, or there may be a server-side problem. Status code is used to know about what went wrong and where you made a mistake. There are different status codes, and each of the status codes has different meanings.
Let's see some standard status codes:
200: This code is used for a successful request.
201: For a successful request and data was created.
204: For empty response.
400: This is used for Bad Request. If you enter something wrong or you missed some required parameters, then the request would not be understood by the server, and you will get 400 status code.
401: This is used for Unauthorized Access. If the request authentication failed or the user does not have permissions for the requested operations, then you will get a 401 status code.
403: This is for Forbidden or Access Denied.
404: This will come if the Data Not Found.
405: This will come if the method not allowed or if the requested method is not supported.
500: This code is used for Internal Server Error.
503: And this code is used for Service Unavailable.
Time
Time is the duration between the sent request time and the received response time. Means, this is the duration which the response took after we sent the request and received the response.
This is very useful sometimes because many projects have a Service Level Agreement (SLA). The time shown here is not the actual time that the request will take. It is just approximate time, but you can consider this as an actual time.
Size
Size is the size of the response when it is processed within memory. This response size includes the size of response, cookies, headers, and everything that has been transmitted along with the response.
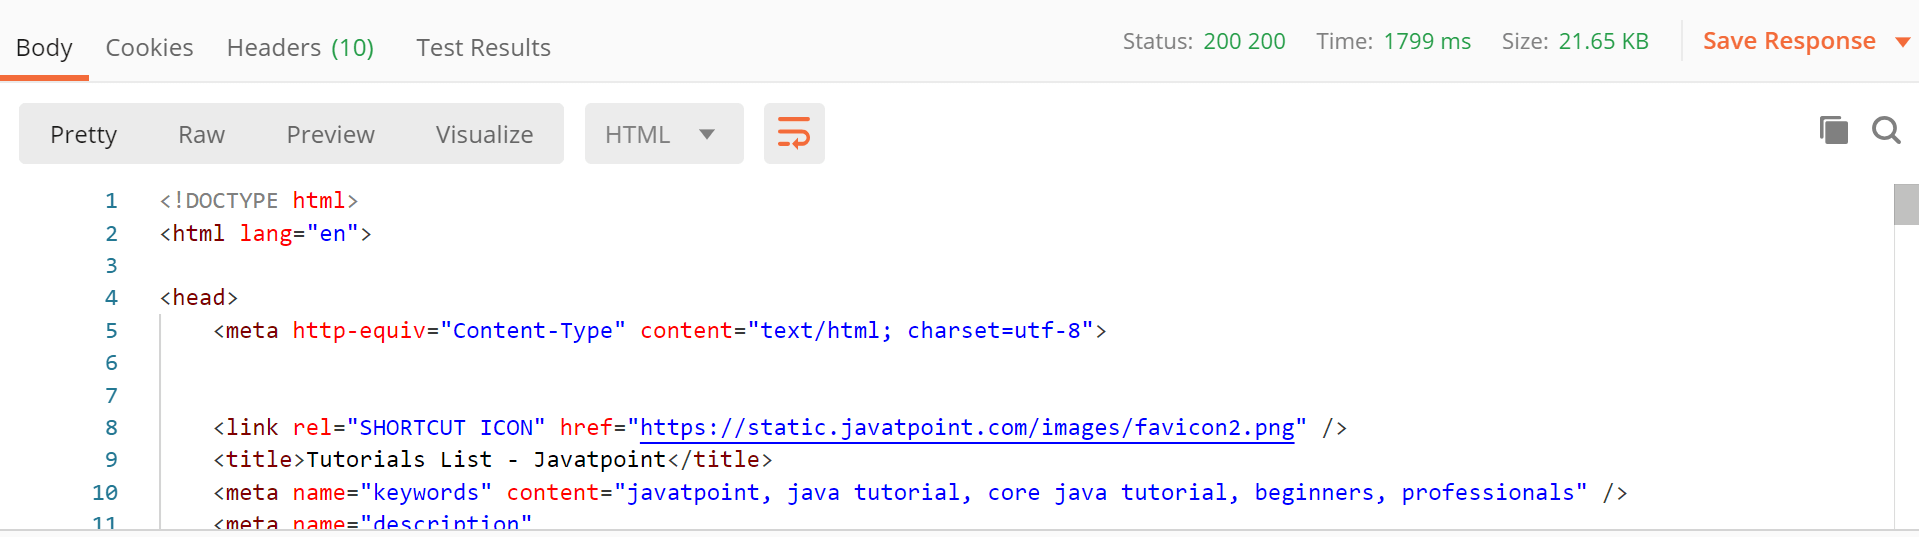
Response Body
A Response body is the body of the response, which actually contains the response content that has been sent from the server. In this section, you can see the web page code is sent to us as a response.
In this box, there are three ways to see the response in the response body:
Pretty
Raw
Preview
Pretty: As the name specifies, pretty is the prettier way to see the content. In this option, code will colorfully show with different keywords and have indentations in the code, which is useful for reading. Each color has different meanings. This makes the code nicer.
Raw: This is almost similar to pretty but shows the code without colors and in single lines. It is just a raw version of the code without any colorful keywords.
Preview: This will show the preview of the page that has been sent. It has the same page been run inside a browser. You just need to click on the preview, and you will get the exact page as you would have seen inside a browser.
Preview tab renders the response in a sandboxed iframe, and because of iframe sandbox restrictions, JavaScript and images are disabled in the iframe.
Format Type
Each request has a defined response to it as defined by the Content-Type header. That response can be in any format. Such as in the below example we have HTML code file:

You will see that we have multiple format types:
JSON
XML
HTML
Text
Auto
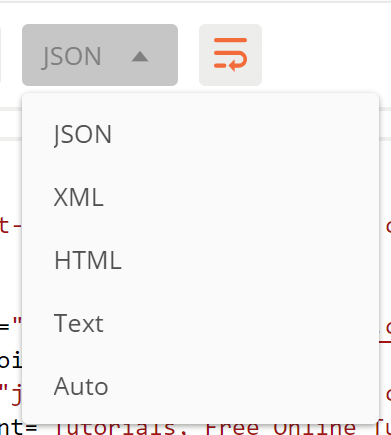
Sometimes, the server sends the response in multiple formats. The type of format of response will be visible to its corresponding format type.
Copy Response
From the right-hand side of the response box, you can see two rectangles; that option is used for copying the complete response to the clipboard, which is very useful to send the response to anyone.
Cookies
Cookies are the small size of files which contain the information related to server files or website pages. Once you open the website for the first time, a cookie file will download on your system. This cookie has some information which will be used by the same site when you visit again. This allows the website to give a specific response and specific information according to your last visit.
Postman offers you to see the cookies that have been sent from the server as a response. We cannot make any changes to the cookies since we got from the server.
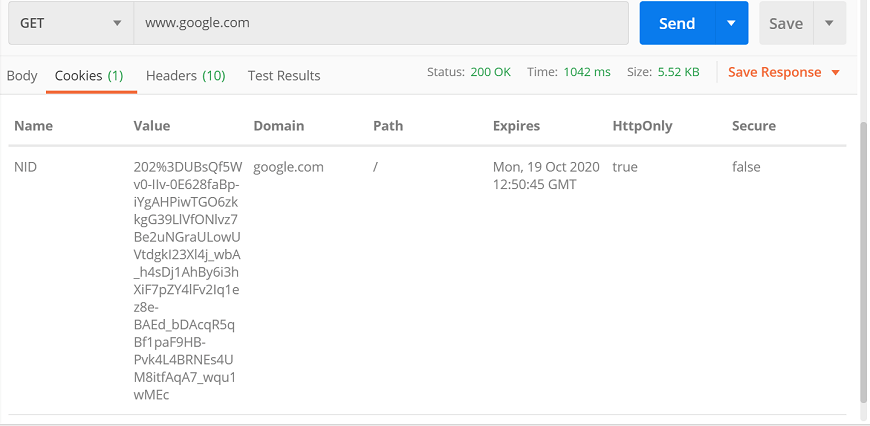
Try with the URL google.com and go to the Cookies section, you will get the cookie.
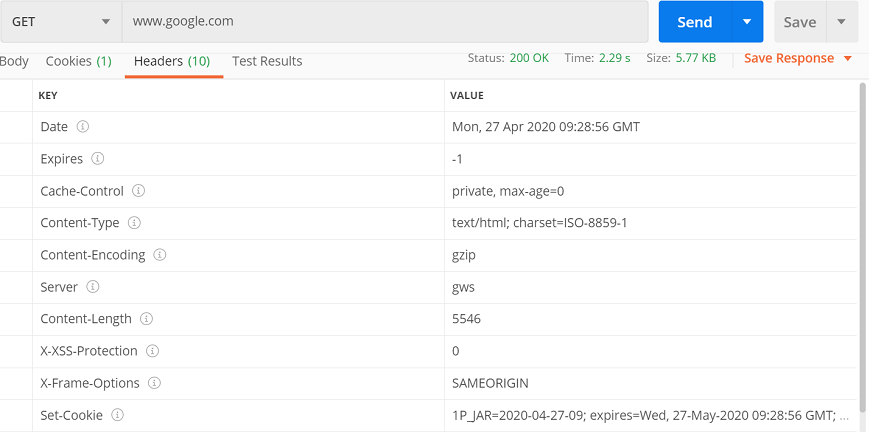
Headers
Headers are the extra information that is transferred to the server or the client. In the postman, headers will show like key-value pairs under the headers tab.
Once you select Headers option, you will get the following info:
Request Parameters in Postman
Request parameters are used to send additional information to the server. A URL contains these parameters. There are two types of parameters:
Query Parameter: These are appended to the end of the request URL, Query parameters are appended to the end of the request URL, following '?' and listed in key-value pairs, separated by '&' Syntax:
- ?id=1&type=new
Path Parameters: These are part of the request URL, which are accessed using the placeholders preceded by ':' Example:
- /customer/:id
There are two ways of setting query parameters on a request in Postman.
Using URL Field
The most common way of adding parameters is- append the query string to the end of the URL.
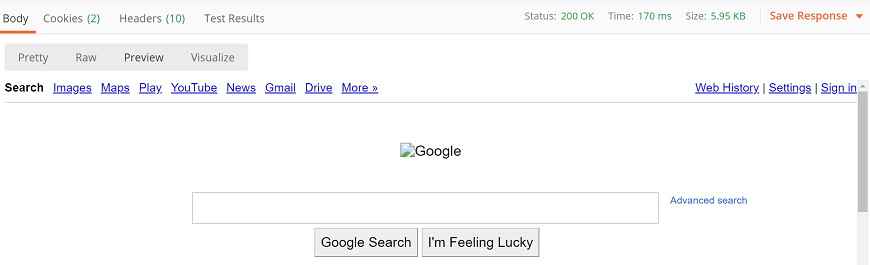
Let's enter a URL in the URL text field:
Suppose we have the URL google.com/search when you click on send option you will get the following response:
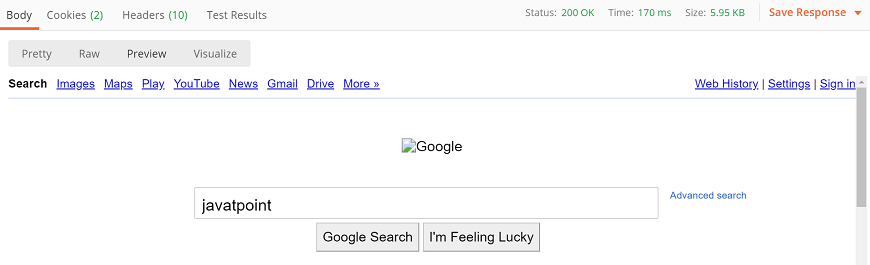
Now try to enter the parameter in the following format:
.google.com/search?q=javatpoint
Here 'q' is the key, and 'javatpoint' is the value of the key.
When you enter the parameter in the URL and select the send button then you will get the following response:
Using Params
Using Params is the second way. This option is available on the left side of the URL text field. This option will offer you additional text fields under the URL field to enter the query parameters in the form of key-value pairs.
Once you enter parameters in the Params text field, then these parameters will automatically be added to the URL. The interface offers to keep your entered parameters in an organized way, which is very useful for the requests that require several parameters.
Let's see an example:
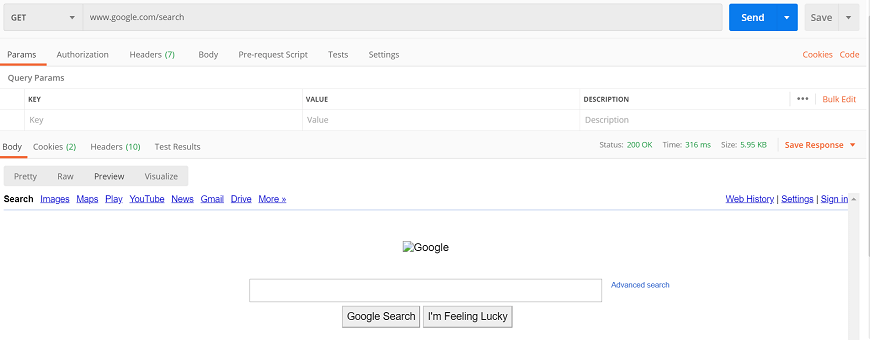
Enter the URL www.google.com/search in the URL text field:
And now go to the Params section:

Write the parameters under the key-value pair, as shown. Here, k is the query, and javatpoint is the search term.
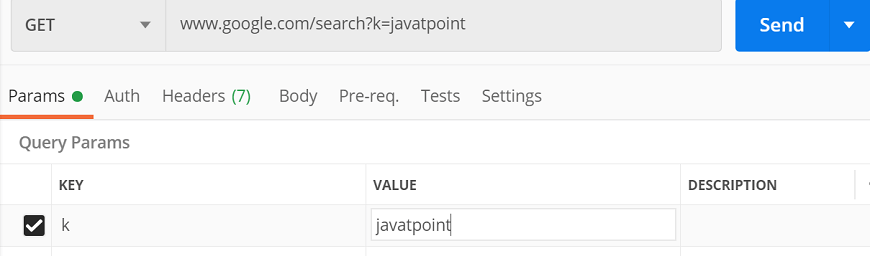
Now press send button and look at the preview section of response window; you will get the following response:

Multiple Parameters
We can also work with multiple parameters inside a single query. Just go to your browser and search in Google 'javatpoint'.
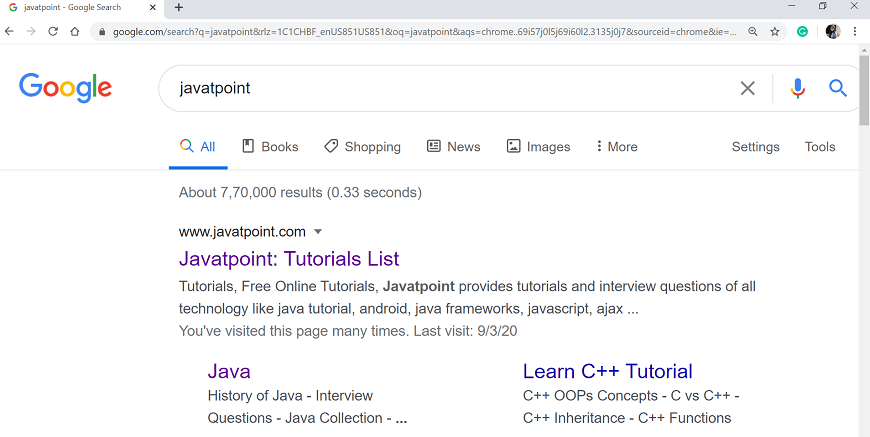
See the above image and URL; multiple parameters are sent in the URL.
In the above URL, '&' should be followed by a parameter such as &ie=UTF-8. In this parameter, i.e., is the key and, UTF-8 is the key-value.
Enter the same URL in the Postman text field; you will get the multiple parameters in the Params tab. Even you can write each of the parameters and send a request with multiple parameters.

POST Request in Postman
The post is an HTTP method like GET. We use this method when additional information needs to be sent to the server inside the body of the request. In general, when we submit a POST request, we expect to have some change on the server, such as updating, removing or inserting.
One of the best examples of using POST request is the login page of Facebook or the login page of other sites; you send your personal information such as the password to the server. The server creates a new account with the same information and that account, and the information is added permanently on the Facebook server.
The POST request is a fundamental method, and this method is mostly used when a user wants to send some sensitive data to the server like to send a form or some confidential data.
Important points of the POST request:
POST requests will not take the cookies.
POST requests are not left in the history of browsers.
We cannot bookmark the POST requests.
There is no restriction of data length in POST requests.
In Postman, every endpoint of REST API is associated with its HTTP verb. When an endpoint states that it should be called using the POST http verb, then for calling the endpoint, only the POST HTTP Verb is required.
Let's first check with the GET request for a POST endpoint.
GET Request on POST Endpoint
Here, we have one API which is used to register a new customer:
http://restapi.demoqa.com/customer/register
Enter the URL in the postman endpoint bar, and press Send. Then select the GET method from the drop-down list.

See the following response:
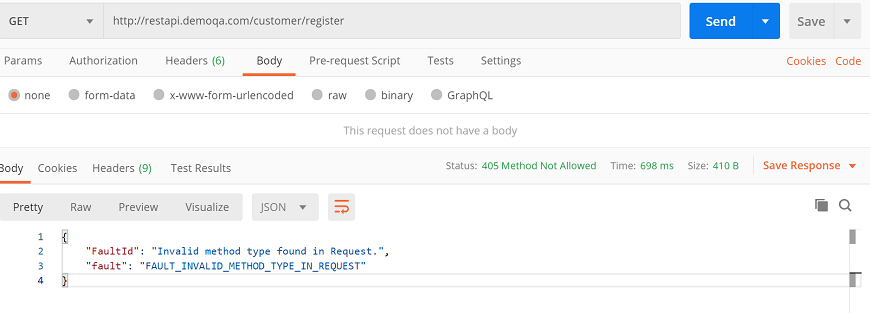
See the HTTP status code, and you will get the "405 Method Not Allowed" error code. It means we are requested for an endpoint with the wrong method. And in the Pretty tab also you can see the fault error.
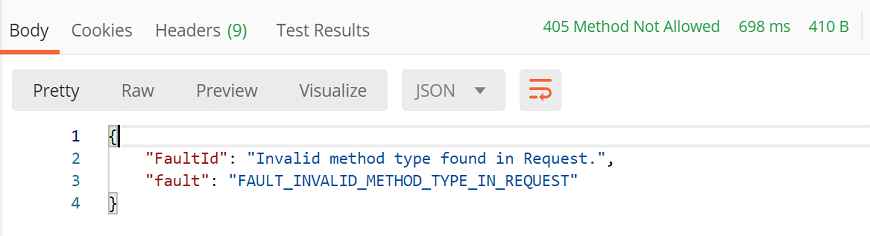
This means we selected the incorrect method type. Now let's try to change the type of method and see if we will get the right response.
Post Request without Body
First, change the type of method from GET to POST and click on the Send button.
Now, see the response section.
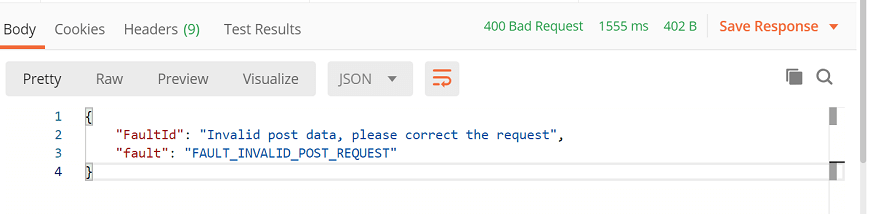
Here, 400 Bad Request, as shown in the image above, indicates that the request and server parameters are not found matched to get a response. And from the response body, 'Invalid post data' means the entered post data is not valid.
So, we are required to add the information with the correct format within the request body.
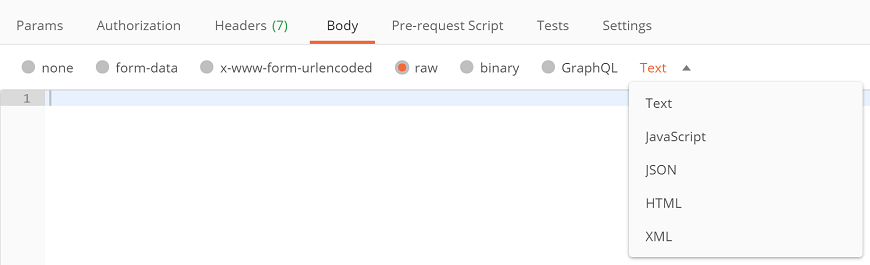
Adding a Request body to the Post request- For this, select the Body tab.

Now in the Body tab, select raw and select JSON as the format type from the drop-down menu, as shown in the image below. This is done because we need to send the request in the appropriate format that the server expects.
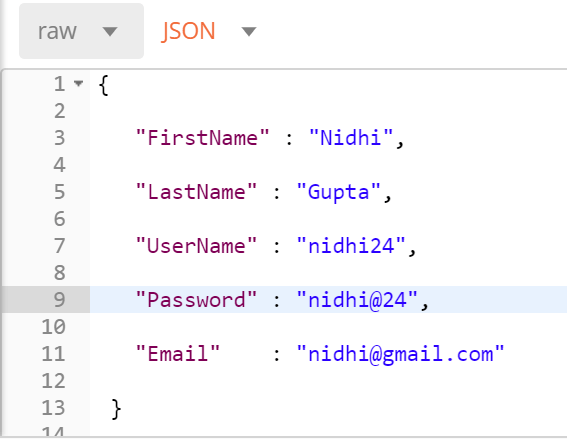
In my example, server expects a json body that contains new user information. Here is one simple example:
{
"FirstName" : "value",
"LastName" : "value",
"UserName" : "value",
"Password" : "value",
"Email" : "value"
}
Copy and paste the above example to your postman request Body. Just change the attribute value to the required value, like the below example:
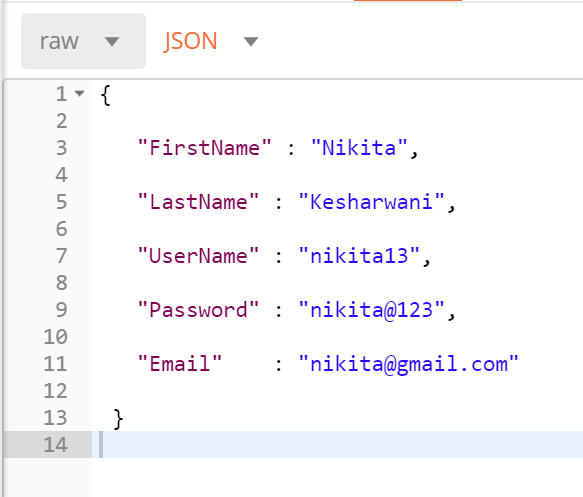
Finally, press Send and see the response body and response status.
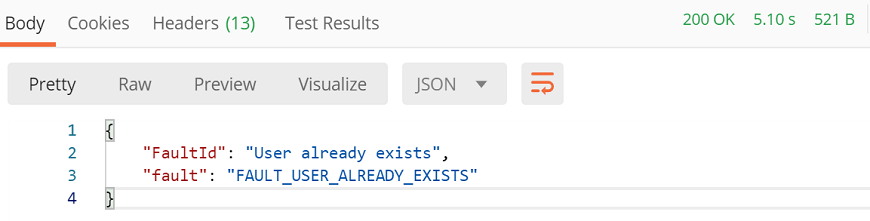
Here the status code is 200 OK; this means the server approved the request, and we received a positive response. The error "User already exists" means the data already exist in the database.
Let's enter the different value and check the response status:
Press send and check the response:
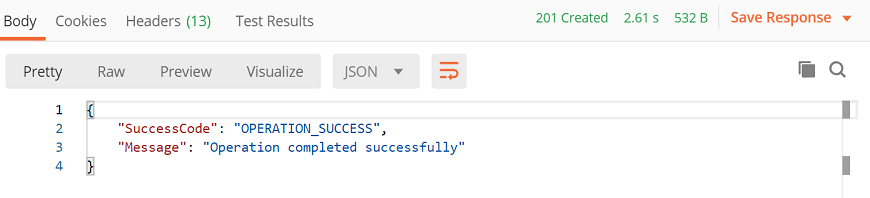
Here, "Operation completed successfully" means your entry has been created successfully, and your POST request has done successfully.
Sending Body Data
Since now, you know that we need to send the body data with requests whenever you need to add or update structured data.
Select the POST request method, and go to Body option where we have different options for sending data:

Here you have:
none
form-data
x-www-form-urlencoded
raw
binary
GarphQL
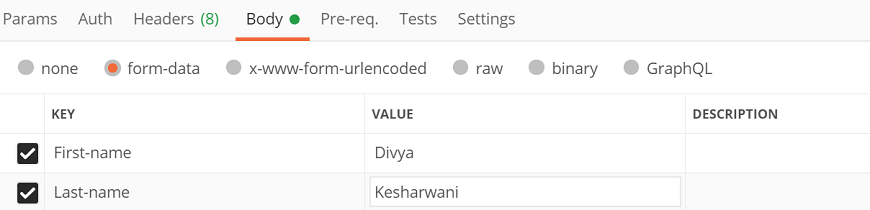
form-data
form-data sends the form's data. Such as the information you enter while filling out a form.To send these details, write them as key-value pairs. Here, the key is the name of the entry, and value is the value of the entry you are sending. Follow the following steps:
- Select form-data.
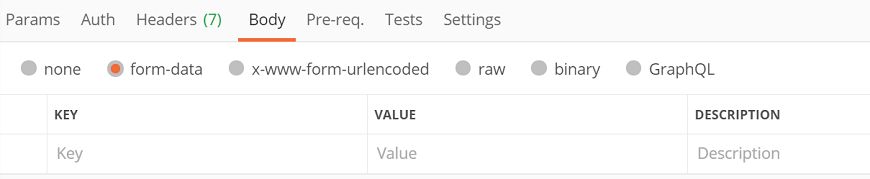
- Add the KEY-VALUE pair.
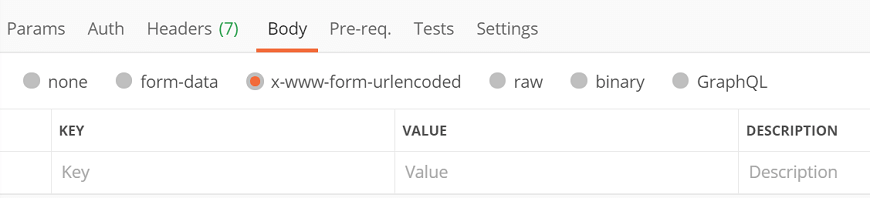
x-www-form-urlencoded
It works similar to form-data. The only difference between both of them is that, when you sent the data via x-www-form-urlencoded, the url is encoded. Encoded indicates that the transmitted data is converted to various characters so that unauthorized persons cannot recognize the data.
Raw
This is a very useful option while sending the body to the POST method. Here the body data will be presented in the form of a stream of bits.
In the above examples, we already discussed the raw. So, we will not discuss it again.
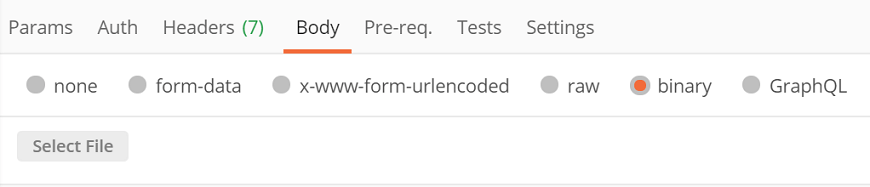
Binary
Binary is used to send the data in a different format. Such as a file, image, etc. To use this option, select binary and then click on Select File to browse any file from your system.
GraphQL
Through this option, you can send the GraphQL queries in your postman requests by selecting the GraphQL tab in the request Body.
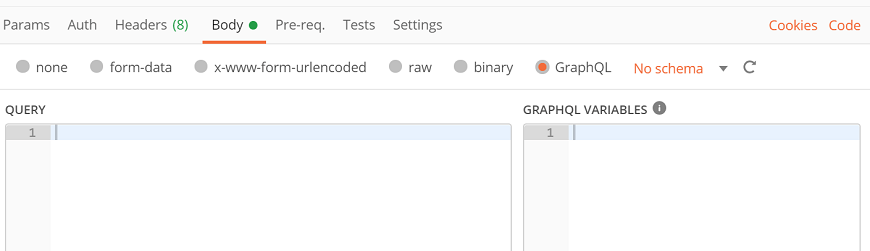
Here you need to enter the code in the section of QUERY and any variable in the section of GRAPHQL VARIABLES.
Cookies in Postman
Cookies are the files with very small size, which contain the information for server files or website pages. When you firstly open the website, a cookie file will be downloaded to your machine. This cookie contains some details; the same site can use the details when you visit again. This allows the website to offer a detailed response according to your last visit.
In postman, we can see the cookies that were sent as a response from the server. We cannot make any changes to the cookies since we got from the server.
Cookies Manager
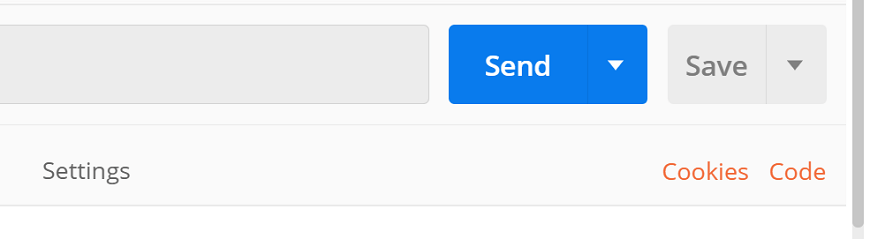
To start the work on cookies in postman, open the Cookies option from the right side of the postman window under the Send button.
When you select cookies, then it will open the Manage Cookies window. Here you can see the domains list and cookies linked with them.
Create a Cookie
In postman, we can also create new cookies for the domain. To create a new cookie, select the 'Add Cookie' button.
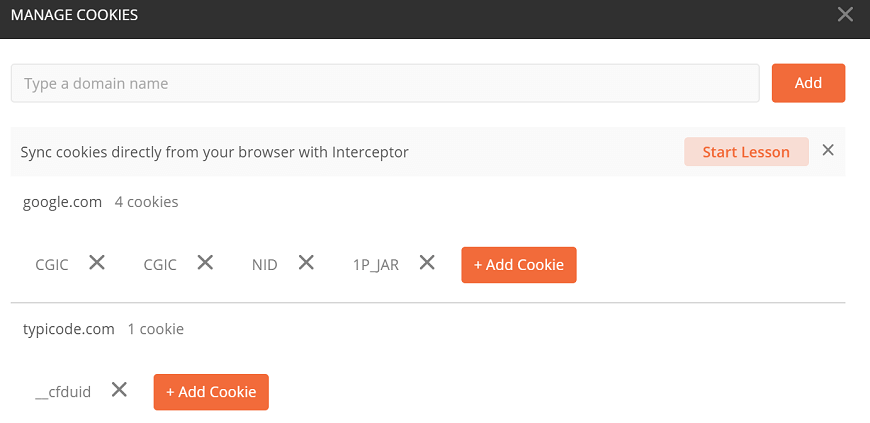
Here, I will take the www.google.com domain.
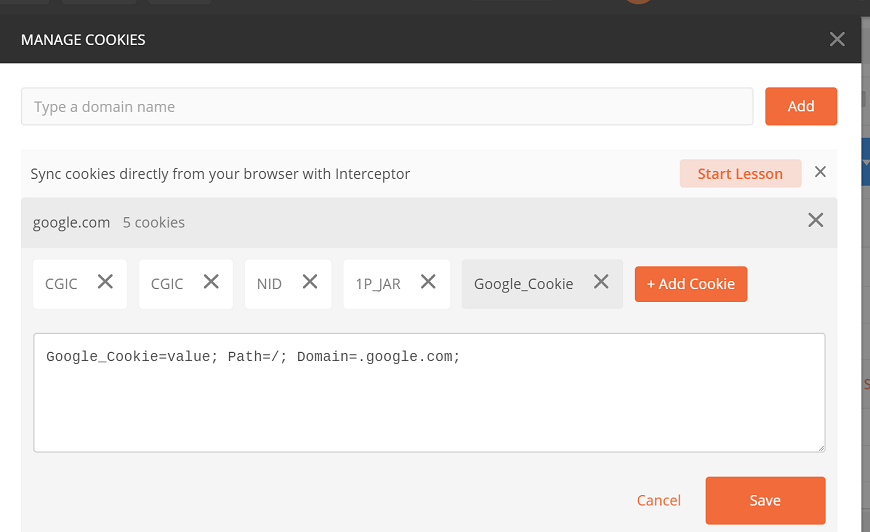
Enter the domain name in the URL text field and click on the Add button.
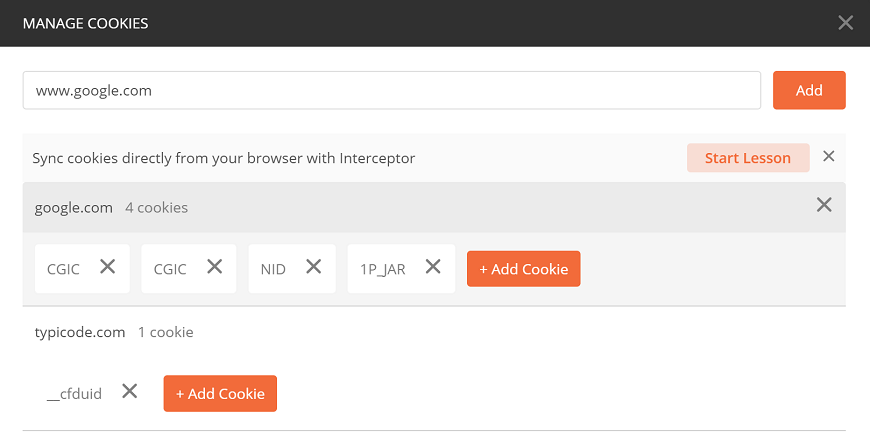
Since we already have a google.com domain in the inventory, we will directly add the cookies. Click on '+Add Cookie.'
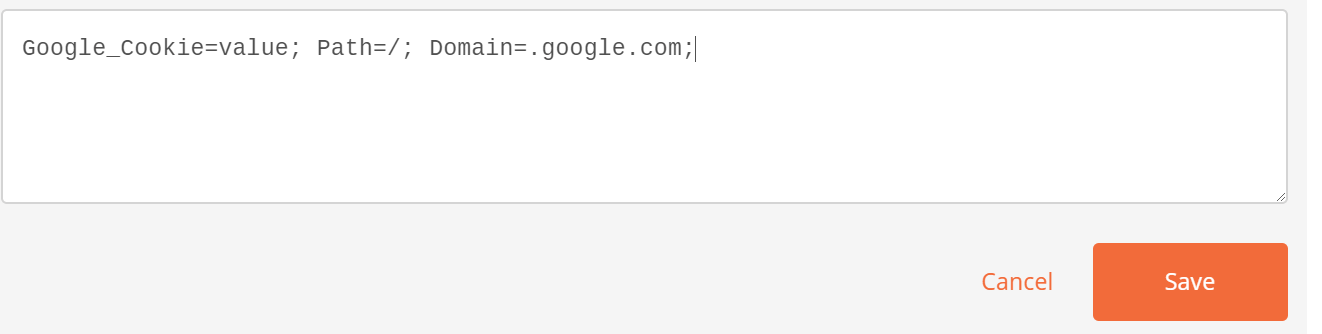
A new text box will open where some default values are already written. Edit those values as given below example:
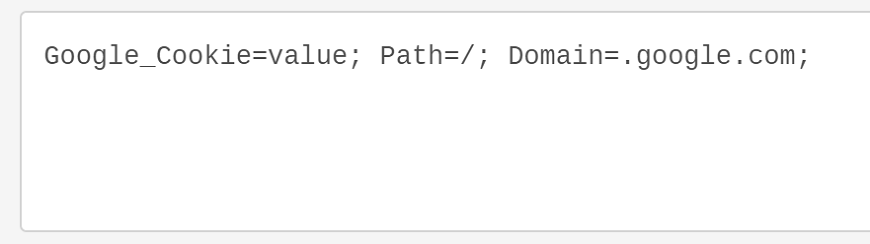
Click on the Save button.
Here you can see your newly created cookie.

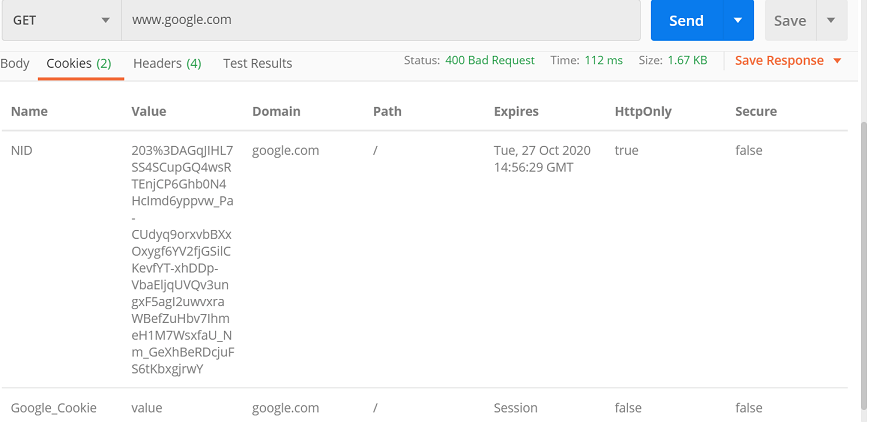
Close the panel. And enter the URL google.com in the URL text field and click on send. Go to the Response section and click on the Cookies tab. We can see the cookie which we have added here.
Updating a Cookie
In postman, we can update the cookies. Click on 'Cookies' to change an existing cookie and pick the domain from the domain list in the MANAGE COOKIES section, then click the cookie you want to update. We can change any property, and click Save to update.
Deleting a Cookie
Deleting a cookie is very easy. To delete an existing cookie, click on 'Cookies,' and in the MANAGE COOKIES section, select the domain from the domain list, go to the cookie you want to delete, and click on X option. Your cookie will be deleted.

Postman Intro to Collections
Collection in Postman means a group of API requests that are already saved in the Postman and can be arranged into folders. Any number of folders can be created inside a collection.
Putting similar requests into folders and collections helps the client in better organization and documentation of their requests.
All the APIs requests can be stored and saved within a collection, and these collections can be shared amongst the team in the Postman workspace.
Advantages of creating collections
Easy APIs import and export
A collection can be imported or exported. Thus it can save time for transferring the requests.Request categorization
Requests can be grouped into folders and collections for easy access.Passing data among requests
Scripts can be used to pass data between API requests.Running collections/folders.
You can run individual requests or folder or collection as a whole in the Postman.API documentation
Postman provides you an option to add a name and description to your request, folder, and collections.Building Test suits
Test scripts can be added to requests, and integration test suites can be built.Time-saving
Setting any variable for collections will automatically apply the same to the folders generated under the collection and requests; thus, it saves time.Postman Creating Collections
Creating a new collection
A new collection can be created from the following options in Postman.
1. New button in the Header bar
Go to New button in the header bar; click on Collection option.
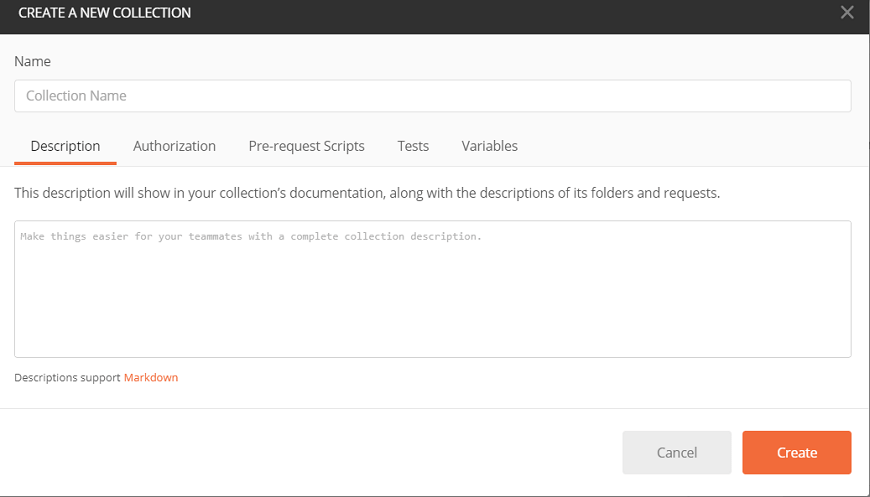
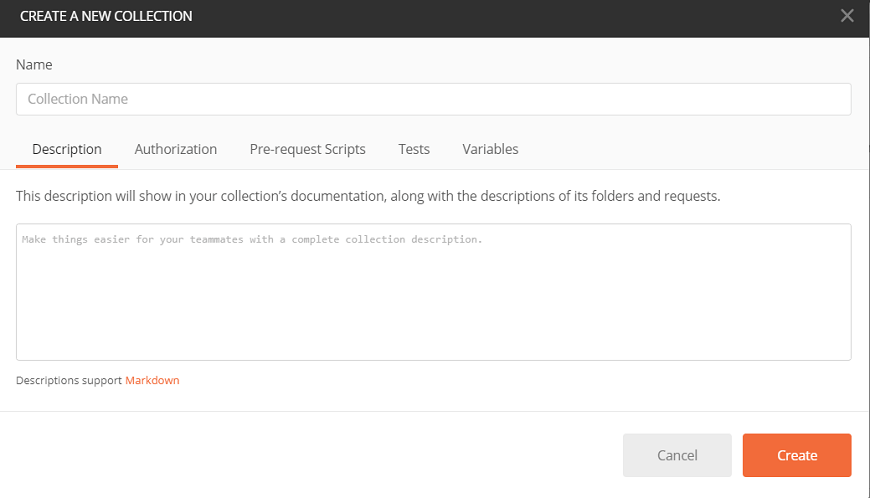
A new window will pop up, as shown in the image below.
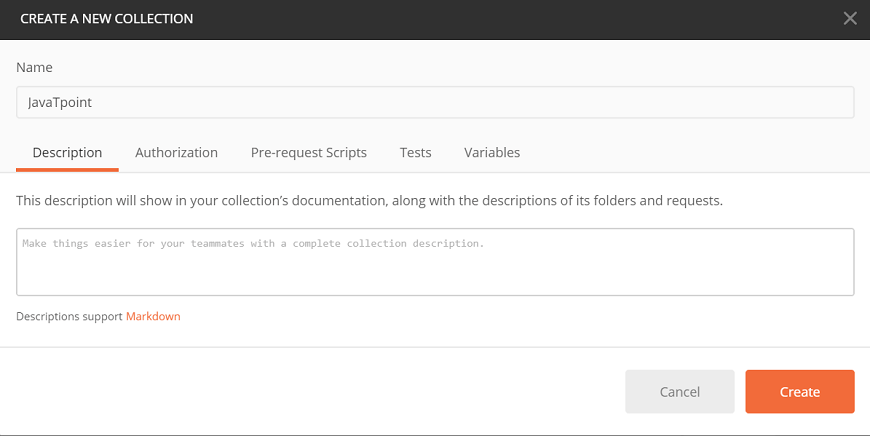
Name your Collection, and you can add an optional description.
Go to the authorization tab and select an authorization type.
Add a Pre-request script, which will execute before every request in this Collection.
Add tests, which will execute after every request in this Collection.
Add variables, which will be specific to this Collection and its requests.
Finally, click on the Create button, as shown in the image below, to save the Collection.
2. Collection tab in Sidebar
In the sidebar of Postman, click on the Collection tab and then select the New Collection option, as shown in the image below.
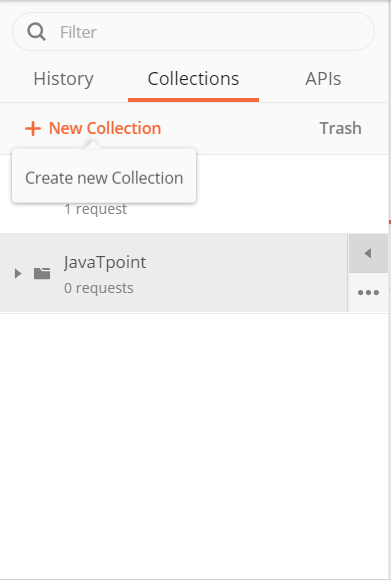
Again the same window will pop-up on the screen, then repeat the same procedure of authorization, variables, etc. to create the new Collection.
3. Create a collection option in the Launchpad
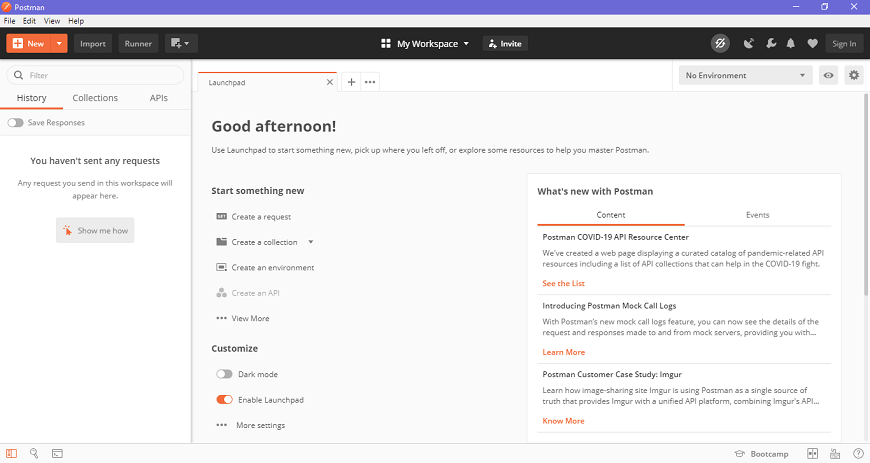
After you open the Postman app, in the builder section, you will get the launch pad.
In the launchpad, under the Start Something New tab, you will get Create a Collection option, as shown in the image below.
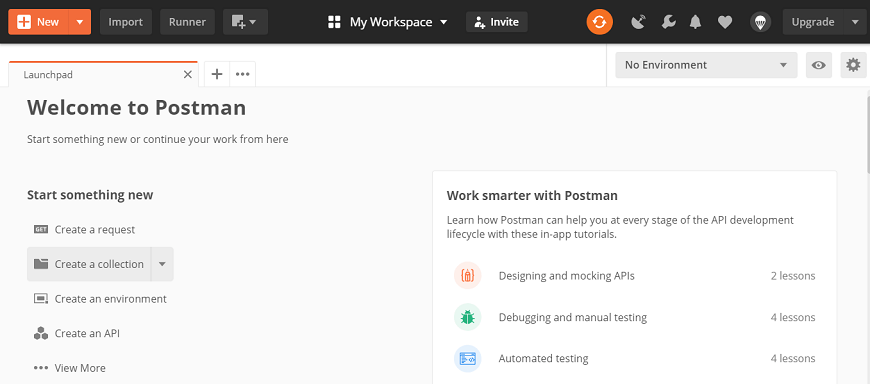
Once you click on Create a collection option, a new window will pop-up on the screen.
You will have to follow the same procedure of authentication, tests, variables, etc. as discussed earlier to create a new collection.
Saving a request to a collection
Whenever you create a new request in the Postman, you can save it as an individual request or in a new collection/folder or the existing collection/folder. You can create a new request from the following options, also mentioned in the image below.
New button in the sidebar
Create a request option in the launch screen
Builder section
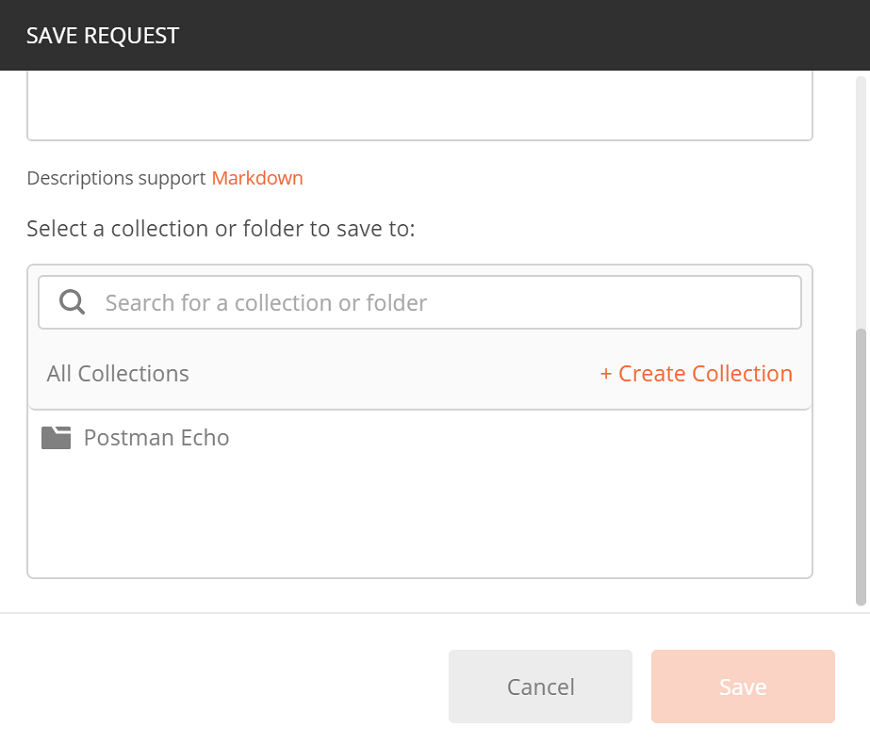
Whichever option you choose to create the request, you will get the below-mentioned window to Save
Enter the request name, optional request description, and then select a collection or folder from 'select a collection or folder to save to' option, as shown in the image.
You can also create a new collection by clicking on +Create Collection.
Now click on the Save button to save the request.
Saving a request to a collection from history
To save the request from history to an existing or a new collection, follow the following procedure.
Go to the History tab in the sidebar of Postman then click on the (+) button to save the request. As given below:
A new Save Request window will pop-up on the screen, follow the same procedure and save the request to a new or existing collection.

Duplicating an existing collection
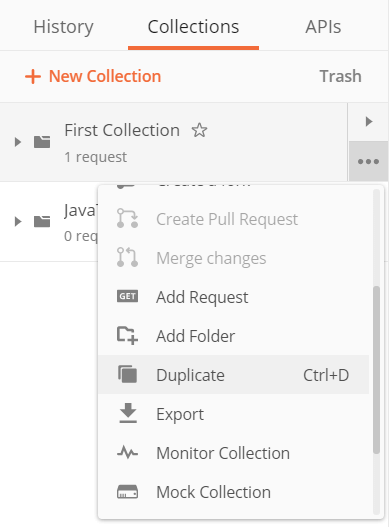
To duplicate a collection already saved in the Postman, go to the Collection tab of the sidebar.
Select the Collection that you want to duplicate, click on the (…) option to expand and click on Duplicate from the drop-down menu to duplicate the selected Collection.
Postman Sharing Collections
You can share your collections from the postman app to your workspace team and can also share it as a link to users who are not part of your workspace team. You need to sign-in to Postman to share a collection.
Users are not required to sign-in to the Postman account if they are sending collection as a file.
Steps to share collections in the app
Two options are available to share the collections.
1. From the Sidebar
Open the Postman app, go to the collection tab in the sidebar and click on (…) to extend and view more options as shown in the image.
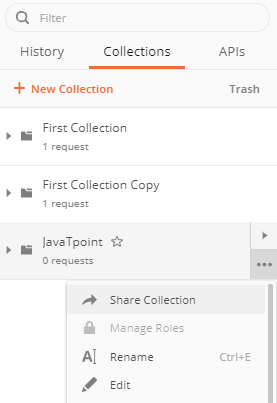
Click on the Share Collection option from the drop-down menu.
From Browse option
Switch to Browse by clicking on the Browse button available on the bottom right corner of the app, as shown in the image below.
Click on the Collections tab to see all your collections and select the Share option, as shown in the image.
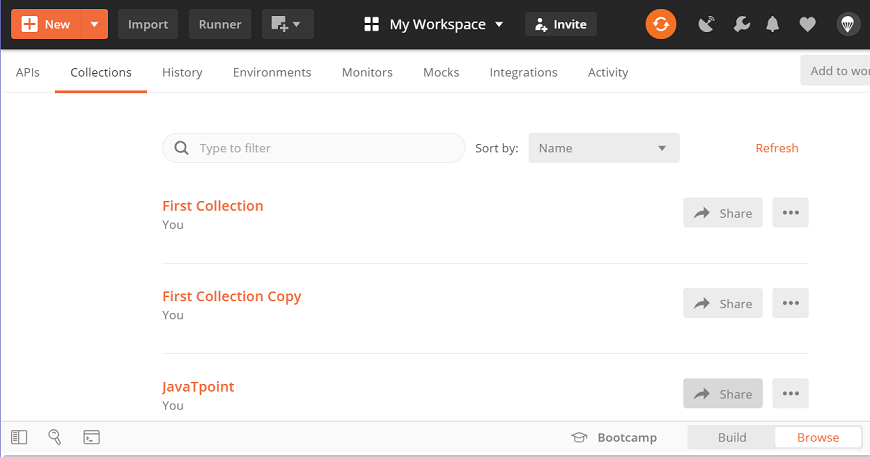
Whichever option you select to share your collections, a new window will pop-up on the screen with three options, as shown in the image below.
So in Postman, you can share your collection in the following three ways.
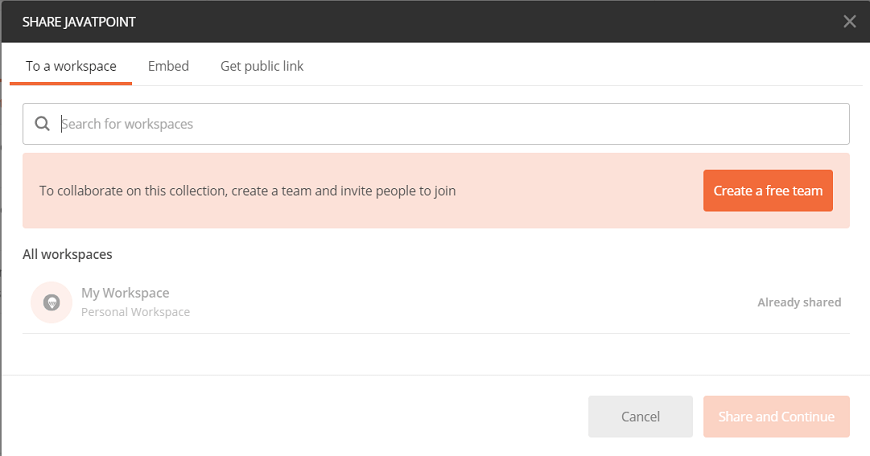
Share to a Workspace
This option is used to share the collection with another workspace or with a member of the workspace. This will be available to all the members of the team if shared with a team workspace. However, after you shared the collection, you can change the permissions of collection from read-only to edit or vice-versa.
Now select the workspace team or member and select the share button to transfer the collection.
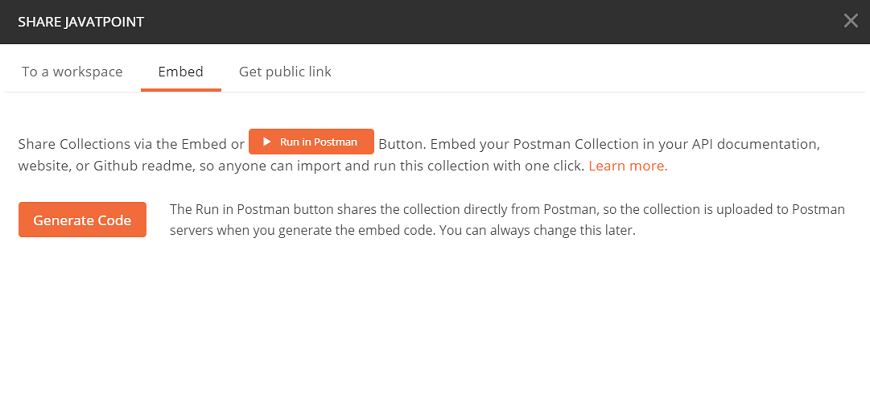
Share with Embed
With this option, as shown in the image below, you will get two buttons Run in Postman and Generate code. With the Generate code button, a link will be generated, and with Run in Postman button collection will be shared.
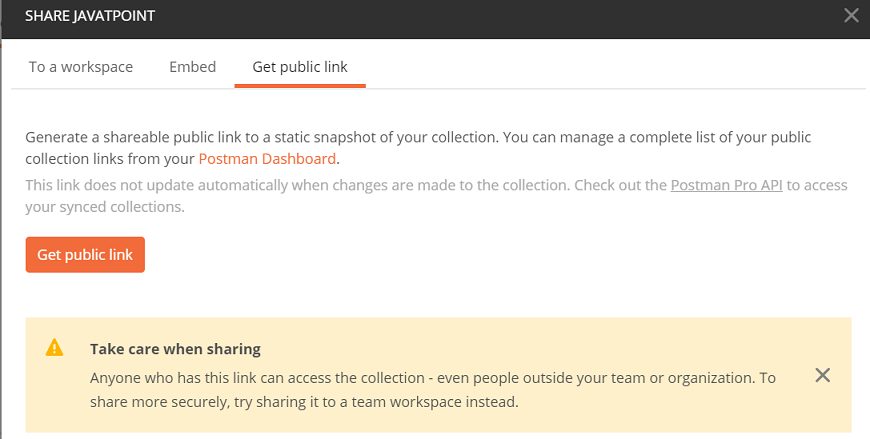
Share with a public link
By this option, when you click on the Get Public Link button, a link will be generated, and with this link, your collection can be shared. Anyone who will have this link can access your collection, even the people outside your organization or team.
Sharing Collection as a file
Users are not required to sign-in to their Postman account if they are sending collection as a file. Simply download the collection in the form of JSON (JavaScript Object Notation) file and share it.
Variables in Postman
Postman variables work in the same way as that of the programming variables. These are the symbols capable of taking various values. You can store the values in variables and can use it throughout in requests, environments, collections, and scripts.
Variables in Postman increase the user's efficiency to work and decrease the errors.
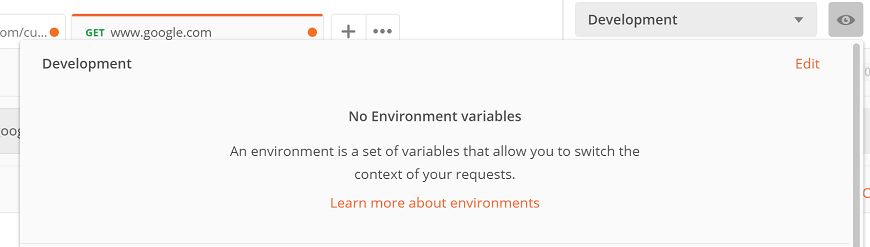
Environment in Postman
A collection of key-value pairs is called an environment. Each name of the variable represents its keys. And referencing the name of the variable allows you to access its value.
It is a set of variables that differentiate among the requests. Such as, we can have an environment for testing, one for development and another for production. We can change the value of the variables to pass the data between requests and tests.
Creating an Environment
To create an environment, follow the following steps:
Go to New -> Environment.
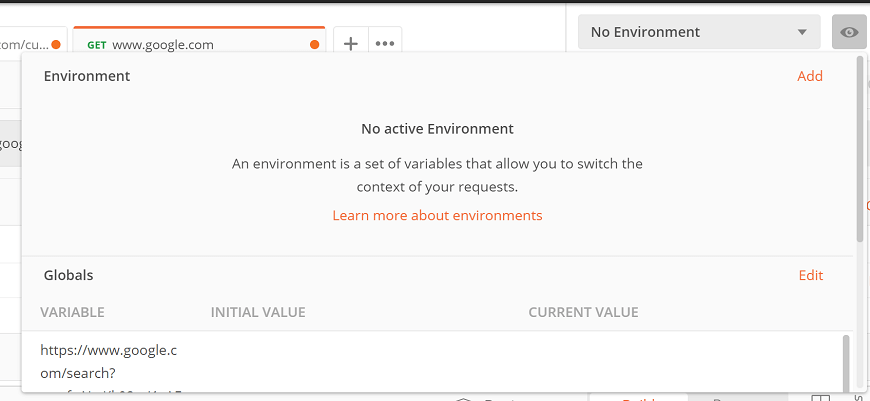
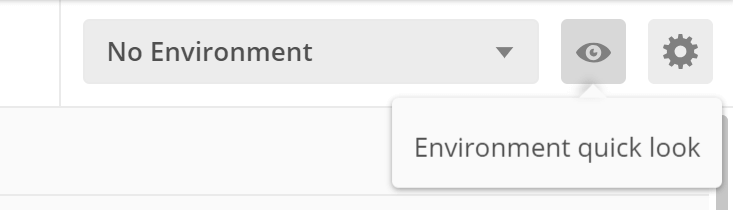
Or you can create an environment from Environment quick look. For that, click on Environment quick look button visible as an eye icon available in the top right corner of the builder section, as shown in the image below.

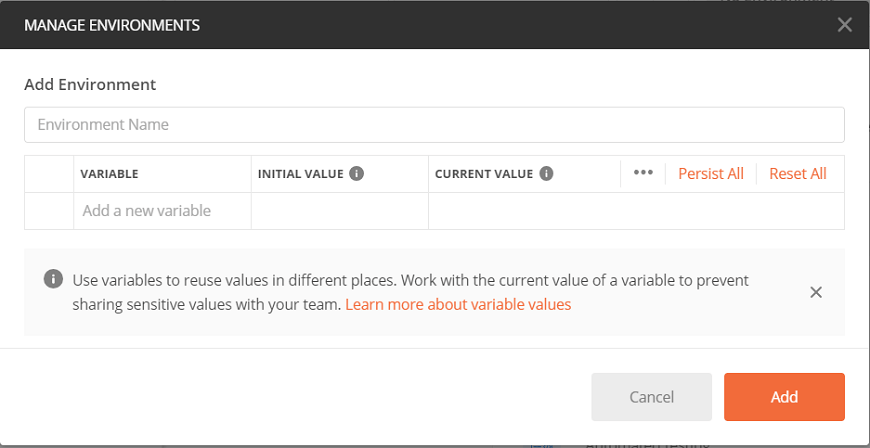
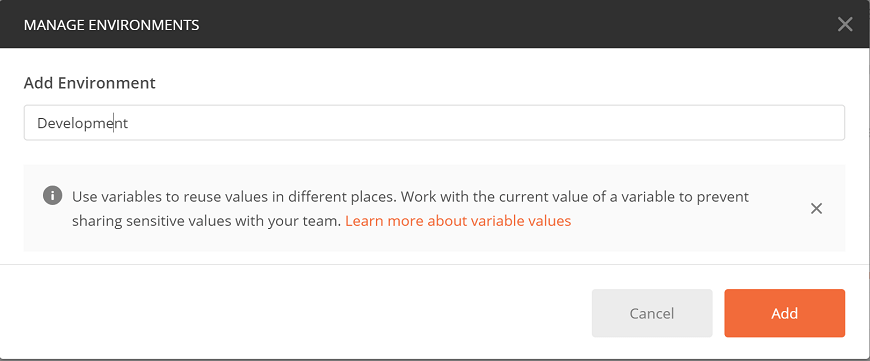
Now select Add.
Enter the name of the Environment and click on Add.
We can also download, share, delete, duplicate, or import the environment.
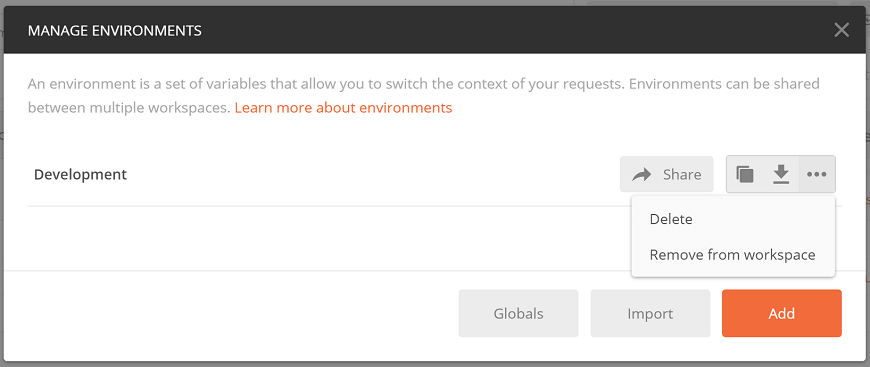
Sharing an environment will help you to run your requests against the same set of data.
Environment Variable in Postman
The postman variable is similar to the programming language variable. As we know, a variable is an entity, which stores value. You can change the value of the variable. In Postman, a variable is a set of key-value pairs. Here the key is the variable and value is the value of the variable.
Creating an Environment Variable in Postman
To create an environment variable follow the following steps:
Go to Environment quick look button visible as an eye icon available in the top right corner of the builder section.
Select the Edit option.
Enter the below mentioned key-value pairs in which Key = url and Initial Value = http://restapi.demoqa.com
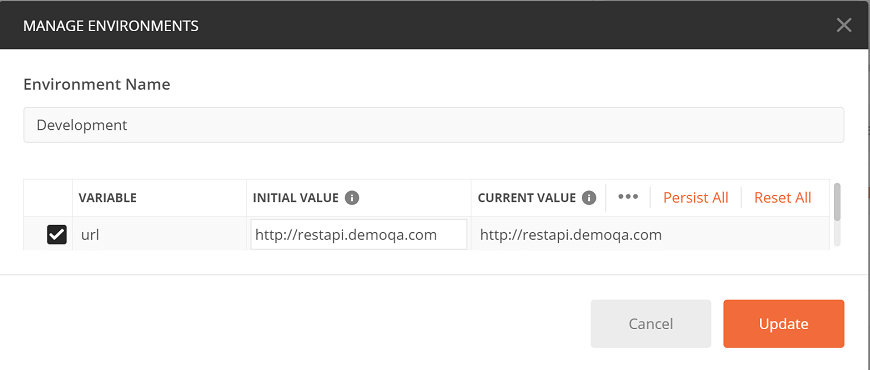
Then select the Update button and close the Manage Environment window. Now you have an environment variable with the name 'url', and the value of the variable is the http://restapi.demoqa.com.
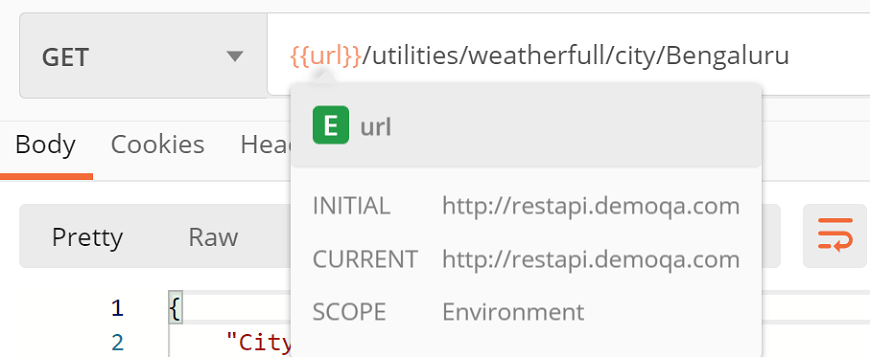
Using an Environment Variable in Postman
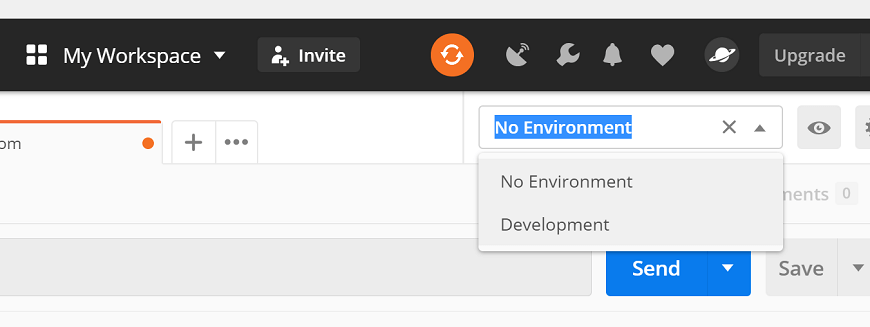
Select the environment from the drop-down. Now we can access the entire available variable in the environment.
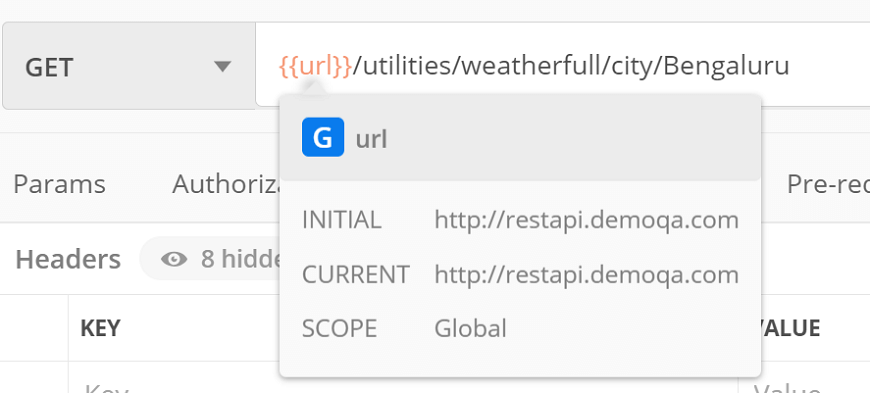
In the address bar or we can say URL text field enter the following url: {{url}}/utilities/weatherfull/city/Bengaluru

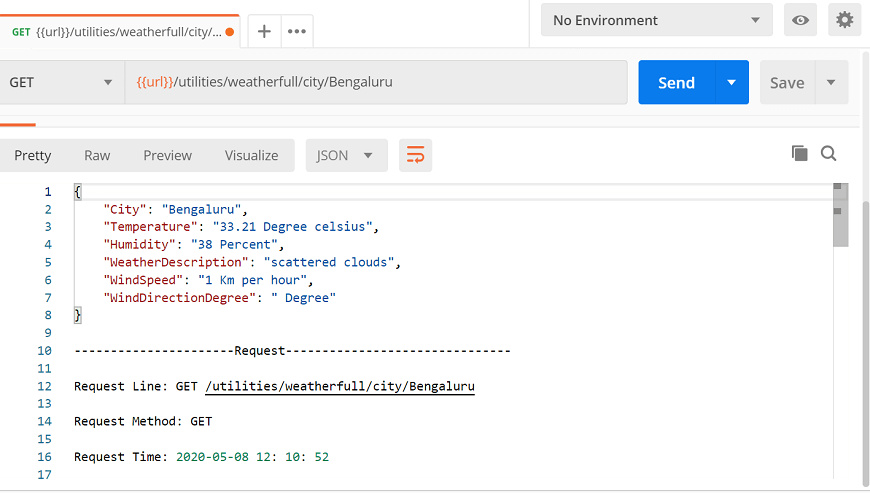
Click on send. You will get the following response:
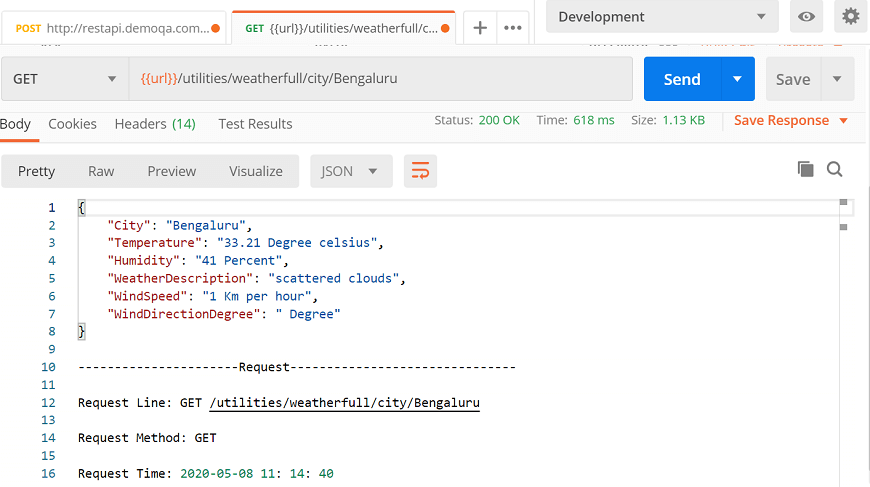
So, the environment is created with a variable named "url". This means we can now use the variable instead of the actual URL.
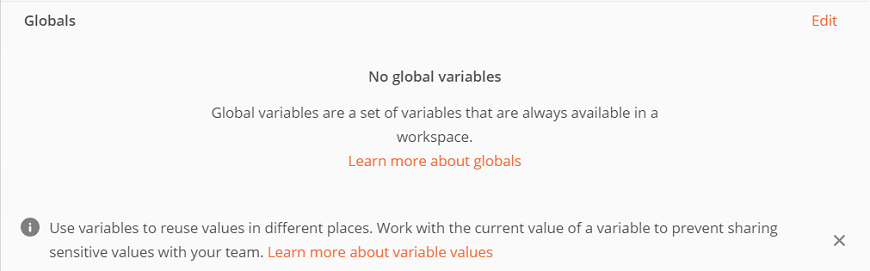
Global Variables in Postman
Here we will see how to create global variables. Unlike the environment variable, in the case of global variables, we don't need to create an environment first.
Creating a Global Variable in Postman
Open the Postman app and click on Environment quick look button visible as an eye icon available in the top right corner of the builder section, as shown in the image below.

Now select Edit option as shown in the image below available next to Globals.
Enter the below mentioned key-value pairs in which Key = url and Initial Value = restapi.demoqa.com
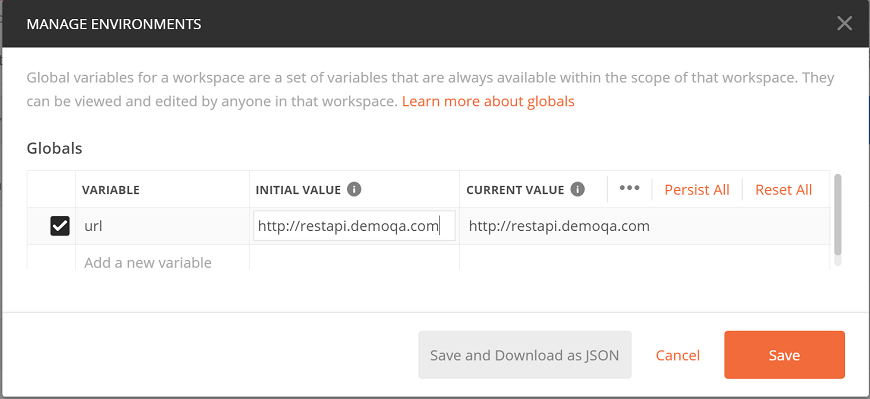
Select the save button and close the Manage Environments Here your global variable is created with the name 'url'.
Using a Global Variable in Postman
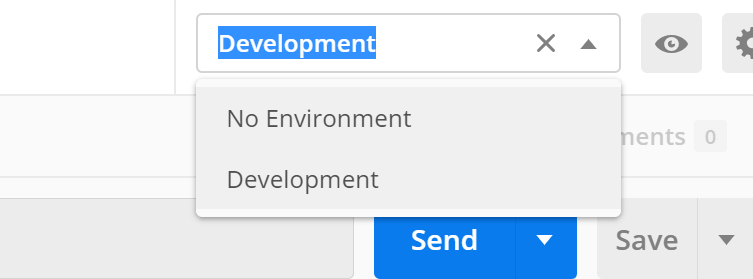
Select the No Environment from the drop-down of Postman, from the top right corner of Postman.
In the address bar enter the following url: {{url}}/utilities/weatherfull/city/Bengaluru
Click on Send and see the response.
Variable Scopes
Variable scope is the boundary within which these variables can be accessed and executed. The following variable scopes are supported by Postman, which is used for different tasks. The narrowest variable scope is Local, and then next is Data, Environment, Collection, and the broadest one is Global.
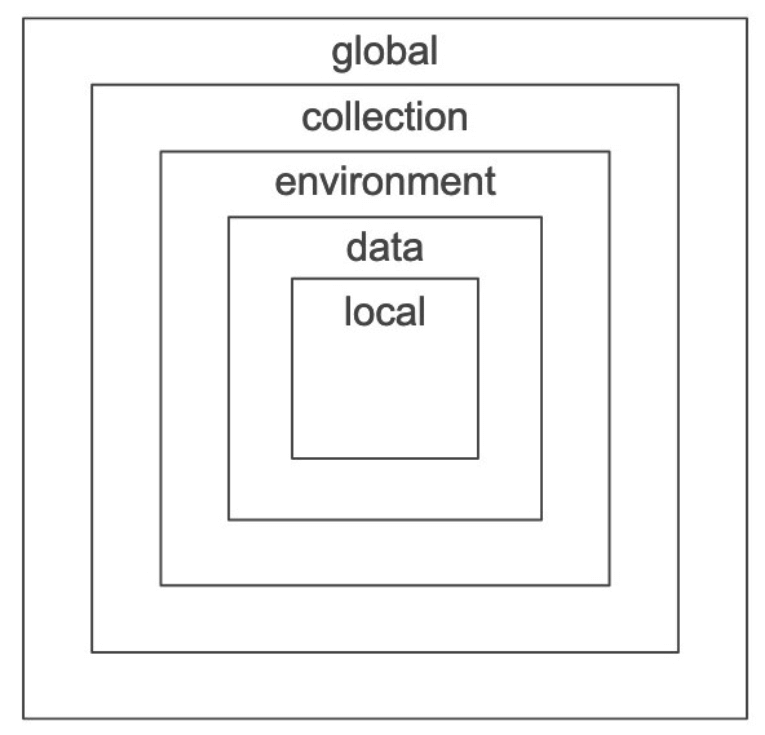
In case, the variable name is the same, in two scopes with a different value, then the value of the narrowest variable scope will be used while running the request. Let's say the name of both local and global variables is My Variable. Then Postman will use a local variable value to run the request, as a local variable is the narrowest variable scope.
Let's see these variable scopes one by one:
Local Variables
These are temporary variables that will only function inside the environment they were created in. When you change the environment, the variable will stop its access, and an error will occur.Collection Variables
These are independent of environments and are available for all the requests in a collection.Environment Variables
These are the most used variable scope in Postman. At a time, a single environment can be active. They are bound to a specified environment used to execute the request.Global Variables
These are independent of environments and function outside the environment. Users are not required to create an environment for global variables. Through global variables, we can access data between collections, test scripts, requests, and environments.Data Variables
Data variables come from external CSV(Comma seperated value) and JSON files to define data sets that you can use while collections are running through Newman or the Collection Runner.Postman Dynamic Variables
Dynamic variable, as the name suggests, generates random data to your API requests and collection run. It is like a random library in a programming language. It generates random data each time in response like a random number, alphabets, alphanumeric or color, etc.
A dynamic variable name starts with '$.' In the request URL section, a dynamic variable should be written in {{__}} format.
Let's say you have to pass an integer number from 1 to 1000, so for that, you need to add {{$randomInt}}.
Like the above example of the number variable, Postman supports so many other dynamic variables as well.
Some important Dynamic Variables are
Numbers, Texts and Colors
| Variable Name | Description | | --- | --- | | $randomAlphaNumeric | A random alphanumeric character | | $randomInt | A random integer between 1 and 1000 | | $randomColor | A random color | | $randomHexColor | A random hex value | | $randomAbbreviation | A random abbreviation | | $randomBoolean | A random boolean value like true or false |
Address, Location, Phone
| Variable Name | Description | | --- | --- | | $randomCountry | A random country | | $randomCountryCode | Random country code of two letters (ISO 3166-1 alpha-2) | | $randomCity | A random city name | | $randomStreetName | A random street name | | $randomStreetAddress | A random street address | | $randomLatitude | A random latitude coordinate | | $randomLongitude | A random longitude coordinate | | $randomPhoneNumber | A random 10-digit phone number | | $randomPhoneNumberExt | A random phone number with an extension of 12 digits |
Profession
| Variable Name | Description | | --- | --- | | $randomJobType | A random job type | | $randomJobTitle | A random job title | | $randomJobDescriptor | A random job descriptor | | $randomJobArea | A random job area |
Names
| Variable Name | Description | | --- | --- | | $randomFullName | A random first and last name | | $randomNamePrefix | A random name prefix | | $randomNameSuffix | A random name suffix | | $randomFirstName | A random first name | | $randomLastName | A random, last name |
Dates
| Variable Name | Description | | --- | --- | | $randomWeekday | A random weekday | | $randomMonth | A random month | | $randomDateRecent | A random recent datetime | | $randomDateFuture | A random future datetime | | $randomDatePast | A random past datetime |
Databases
| Variable Name | Description | | --- | --- | | $randomDatabaseType | A random database type | | $randomDatabaseCollation | A random database collection | | $randomDatabaseColumn | A random database column name |
Domains, Username, and Emails
| Variable Name | Description | | --- | --- | | $randomUrl | A random URL | | $randomUserName | A random username | | $randomEmail | A random email address | | $randomDomainName | A random domain name | | $randomDomainSuffix | A random domain suffix |
Internet and IP address
| Variable Name | Description | | --- | --- | | $randomIP | A random IPv4 address | | $randomIPV6 | A random IPv6 address | | $randomPassword | A random alphanumeric password of 15-character | | $randomUserAgent | A random user agent | | $randomProtocol | A random internet protocol | | $randomMACAddress | A random MAC address |
Files and Directories
| Variable Name | Description | | --- | --- | | $randomCommonFileName | A random file name | | $randomFileName | A random file name (includes uncommon extensions) | | $randomFileExt | A random file extension (includes uncommon extensions) | | $randomFileType | A random file type including uncommon file types | | $randomCommonFileType | A random, common file type | | $randomCommonFileExt | A random, common file extension | | $randomDirectoryPath | A random directory path |
Images
| Variable Name | Description | | --- | --- | | $randomImage | A random image | | $randomImageUrl | A URL for a random image | | $randomAnimalsImage | A URL for a random animal image | | $randomCityImage | A URL for a random city image | | $randomFoodImage | A URL for a random food image | | $randomTransportImage | A URL for a random transportation image | | $randomSportsImage | A URL for a random sports image | | $randomTechnicsImage | A URL for a random tech image |
Business
| Variable Name | Description | | --- | --- | | $randomCompanyName | A random company name | | $randomCompanySuffix | A random company suffix (e.g., Inc, LLC, Group) | | $randomBs | A random phrase of business-speak |
Finance
| Variable Name | Description | | --- | --- | | $randomCurrencyName | A random currency name | | $randomCurrencySymbol | A random currency symbol | | $randomCurrencyCode | A random 3-letter currency code (ISO-4217) | | $randomBitcoin | A random bitcoin address | | $randomTransactionType | A random transaction type (e.g., invoice, payment, deposit) | | $randomBankAccount | A random bank account number of 8-digit | | $randomBankAccountName | A random bank account name (e.g., savings account, checking account) |
SCRIPT
Intro to Scripts
Postman is not only used for manual testing, but we can also do automation testing of API. Postman requests and collections can be applied to dynamic behavior.
In Postman Scripts are the lines of code that allow you to automate an API test. It offers you to write pre-request and test scripts.
Before sending a request, a pre-request script will run and,
After receiving a response, test scripts will run.
In Postman, we can write the tests, pass the data between the requests, and change the parameters. It allows adding test script and pre-request script to a collection, a folder, a request, or a request not attached to a group.
Postman Sandbox
To write the script in Postman, we use Postman Sandbox.
Postman sandbox has been written in Javascript. It is an execution environment. Since the sandbox has written in Javascript, therefore, it will only receive a script written in Javascript.
Hence, we have to write the script in javascript to make the code executable in Postman.
Execution Order of Scripts in Postman
In Postman, the order of script execution for a single request is as follows:

A pre-request script associated with a request will execute before sending the request.
Test script associated with a request will execute after sending the request.
The order of script execution for every request in a collection is as follows:
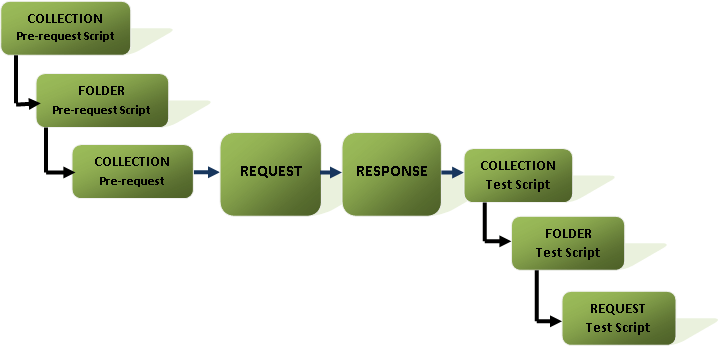
Before every request in the collection, a pre-request script associated with a collection will run.
Before every request in the folder, a pre-request script associated with a folder will run.
After every request in the collection, a test script associated with a collection will run.
After a request in the folder, a test script associated with a folder will run.
The scripts should always run according to the following hierarchy for every request in a collection:
Collection level script
Folder level script
Request level script
The same order will be applied for both pre-request and test scripts.
Pre-request Scripts
Pre-request scripts are a piece of code that will run before the execution of a request. It runs in the Postman sandbox and allows us to add dynamic behavior to request execution.
We can apply the pre-request scripts at a request level, a collection level, or a folder level, which means that a pre-request script will apply to all the requests that are part of that collection or folder.
However, if we have defined scripts in all three means in the request, collection and folder, then the script must run in a given order:
A pre-request script associated with a collection will run before any request in the collection.
A pre-request script of a folder will run before any request in the folder.
We can use the pre-request script for a pre-processing task like setting parameters, variable values, body data, and headers. We may also use pre-request scripts to debug the code, such as by logging output to the console. Also, using the concept of the pre-request script, we can get the output of the function such as date, time, timestamp, etc.
Let's look at a simple example to prove that pre-request scripts are running before a request is executed:
Click on the postman console. Postman console stores all the things that happen in the request. Through the postman console, we can see the logs and errors. It is like browsers development console in which all the things are visible, including whole requests that users have sent to that website or to the page code.
To open the postman console, select the "Postman Console" icon from the bottom of the window or press ctrl+alt+c.
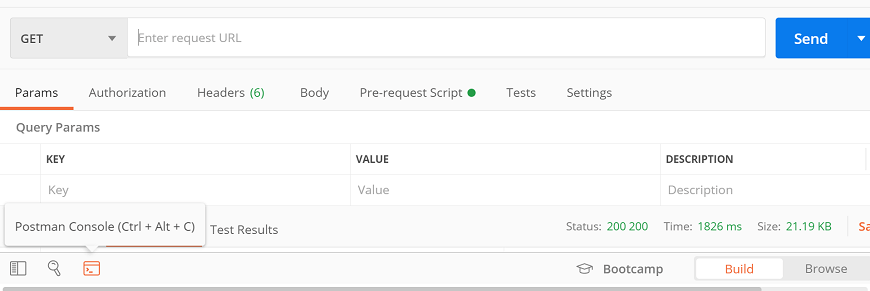
Clear the old logs from the console.

- Now, enter the URL in the URL text field.

- Go to the Pre-request Script tab and write the following script:
- console.log ("This is a pre-request script")

- Press the Send button and check the postman console.
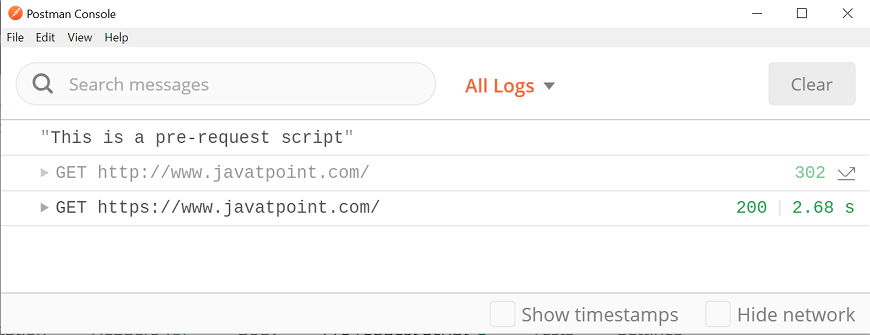
Here, you can see that the pre-request script is running prior to the request execution.
Creating Variables by Pre-request Script
Here, we will use the environment variable.
- Go to Environment quick look button visible as an eye icon available in the top right corner of the builder section.

- Select your environment from the drop-down. Here we will use Development API that we have already created while learning about 'Variables in Postman'.

- In the address bar enter the following url: {{url}}/utilities/weatherfull/city/Bengaluru

- Go to the Pre-request Script Write the following code inside the editor:
- postman.setEnvironmentVariable('username','Nikita');
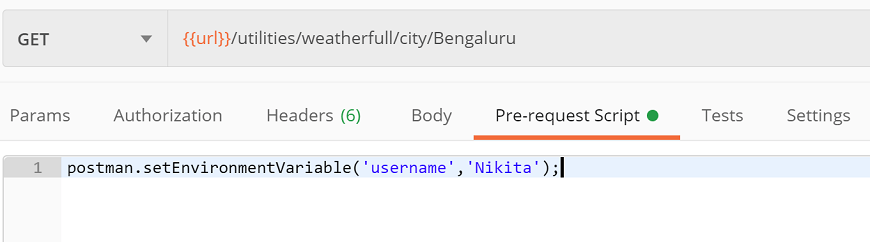
This will create a variable inside the "Development" environment with the name "username" and value "Nikita".
- Select the Send button and look at the current variable by selecting the Environment quick look button visible as an eye icon.
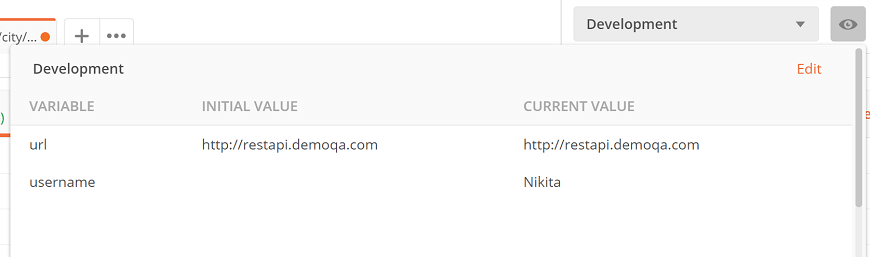
Here, we can see the created "username" variable available in the environment.
Similarly, add the following script in the pre-request script editor:
- postman.setEnvironmentVariable('Tutorial','Javatpoint');

Again check the Development environment variable:

Hence, we can perform multiple tasks in the pre-request script before script execution without going through the process of creating and deleting variables again and again.
Test Scripts
Test scripts execute after the server receives the response. In postman, we can write test scripts to test API requests in Javascript. Test script is used to test whether your API is working accordingly or not, to establish that integrations between the services are functioning properly, and to check that new developments have not affected any functionality of existing requests. Test Scripts are also called Post-Request script.
We can use the test code to debug the process of your API project. Such as, you may use the test script to verify error handling for your API by submitting an incomplete data request.
We can run the test scripts to a single request, folders, or collections. Let's see a simple example to add the test script to a request:
- Open the postman console. To open the postman console, select the "Postman Console" icon from the bottom of the window or press ctrl+alt+c.

Clear the old logs from the console.

Now, enter the URL in the URL text field.

- Go to the Tests tab and write the following script:
- console.log ("This is a tests script")
- Press the Send button and check the postman console.
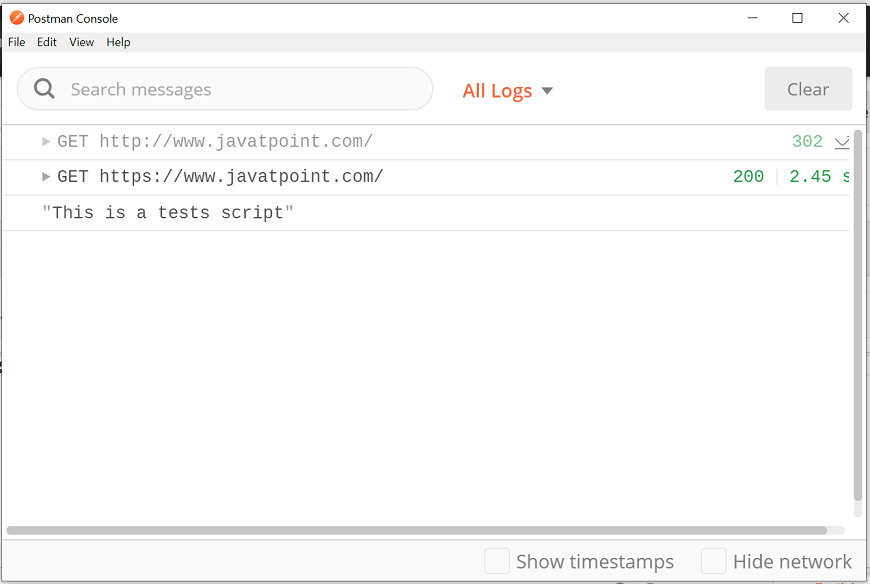
Here, you can see that the test script is running after the request execution.
Creating Variables using Tests Script
Here, we will use the environment variable.
- Go to Environment quick look button visible as an eye icon available in the top right corner of the builder section.

- Select your environment from the drop-down. Here we will use Development API that we have already created while learning about 'Variables in Postman'.

- Now, enter the given URL in the URL text field. {{url}}/utilities/weatherfull/city/Bengaluru
- Go to the Tests Write the following code inside the editor:
- pm.environment.set("u", "Hello");
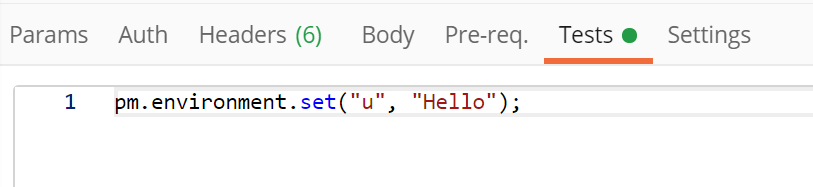
This will create a variable inside the "Development" environment with the name "u" and value "Hello".
- Select the Send button and look at the current variable by selecting the Environment quick look button visible as an eye icon.
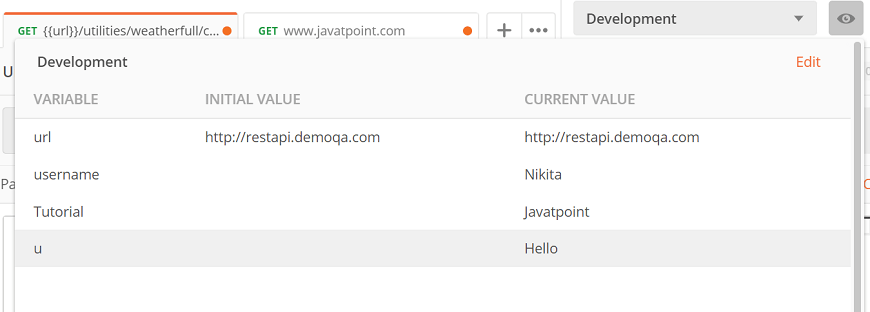
Here, we can see the created "u" variable is available in the environment.
Writing Test Scripts
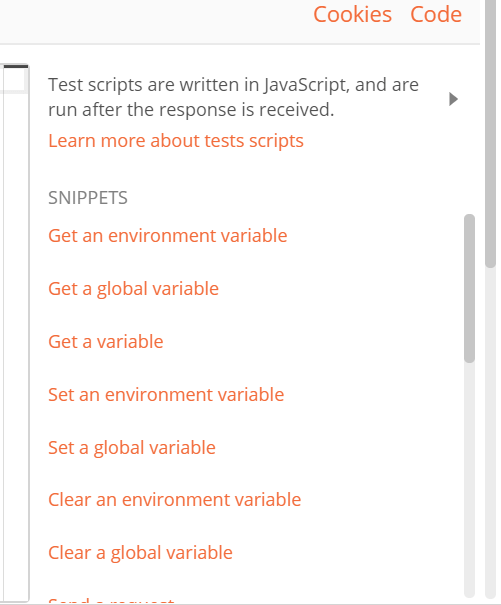
We can enter the script manually or use the Snippets, which is available on the right side of the code editor.
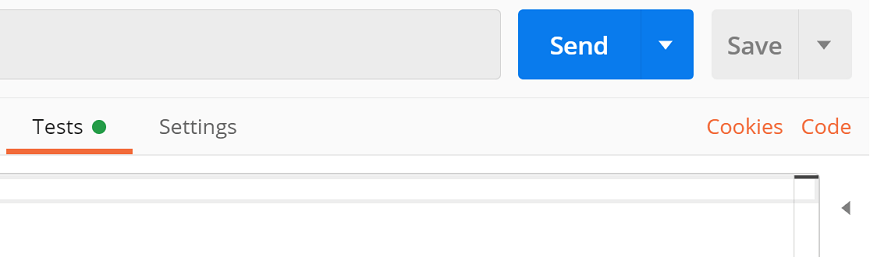
We can also write our custom test script in Postman. Postman offers a 'pm' API (called as pm.* API), which is used to write the tests.
pm.test()
This function writes the conditions of the test in the postman test sandbox. Writing tests within this feature helps you to correctly name the test and ensure that the rest of the script is not interrupted in case of any errors.
This function has two arguments, first is the test name (as a string), and second is a function which returns a Boolean value.
Let's see an example:
- Enter any URL in the URL text field.

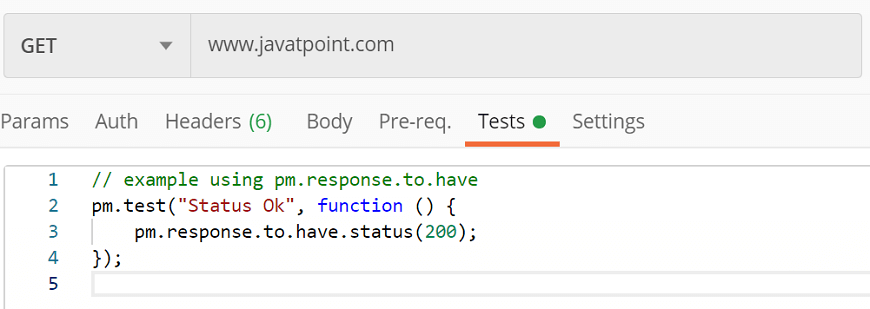
- Enter the following script in Tests tab:
// example using pm.response.to.have
pm.test("response is ok", function () {
});
Click on the Send button to test your request and select Test Results in the response section. This will show how many tests passed and how many ran in total.
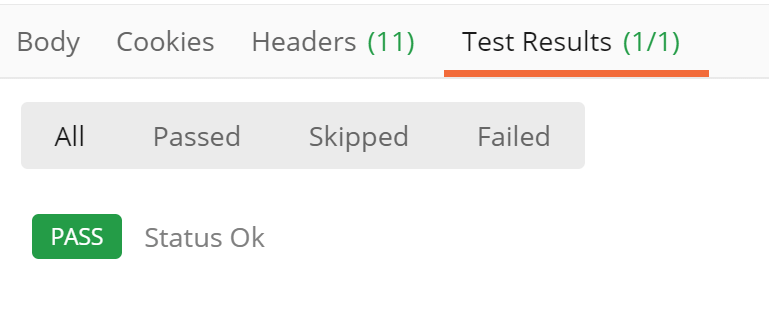
In the above example, if the request returned a 200 status code, the test will pass; otherwise, it will fail. Try to change the status code of your tests and run the same request again.
pm.test("Status Fail", function () {
pm.response.to.have.status(404);
});
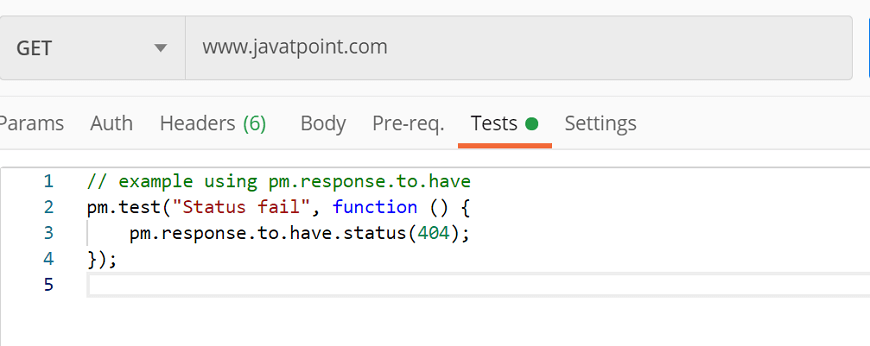
You will get the following response:
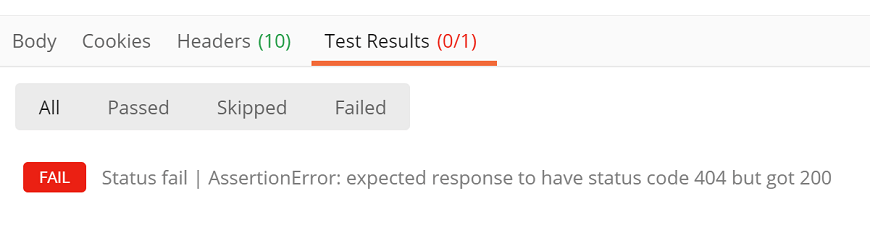
pm.except()
The pm.except() function is used to print the test result messages in a different format. This function makes the test readable, and even we can manage data assertions from a variable or response.
// example using pm.expect()
pm.test("Status", function () {
pm.expect(pm.response.code).to.equal(404);
});
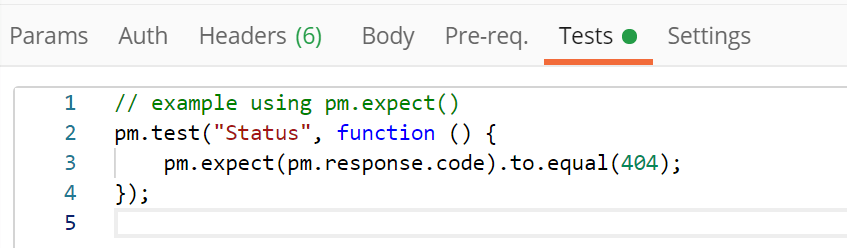
Click on the send button and see the Test Results from the response section:
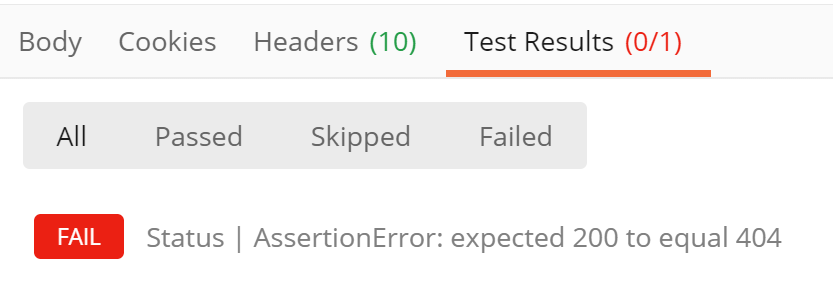
Through this function we can test the request environment, as given below:
pm.test("environment to be production", function () {
pm.expect(pm.environment.get("env")).to.equal("production");
});
Another example is:
// example using response assertions
pm.test("Status Ok", function () {
pm.response.to.not.be.error;
pm.response.to.have.jsonBody("");
pm.response.to.not.have.jsonBody("error");
});
pm.response.to.be.*
This is an object, offers shorthand for the tests based on commonly used response.
// example using pm.response.to.be*
pm.test("Response", function () {
// assert that the status code is 200
pm.response.to.be.withBody;
pm.response.to.be.json;
});
Test Results
To test written tests are passing or failing; we use Test Results. Once you run a request with tests, then select the Test Results tab from the response window. Here, you will get a list of your test results, whether the test has passed or failed. A test with Boolean value true means a passing test, and false means test is failing.
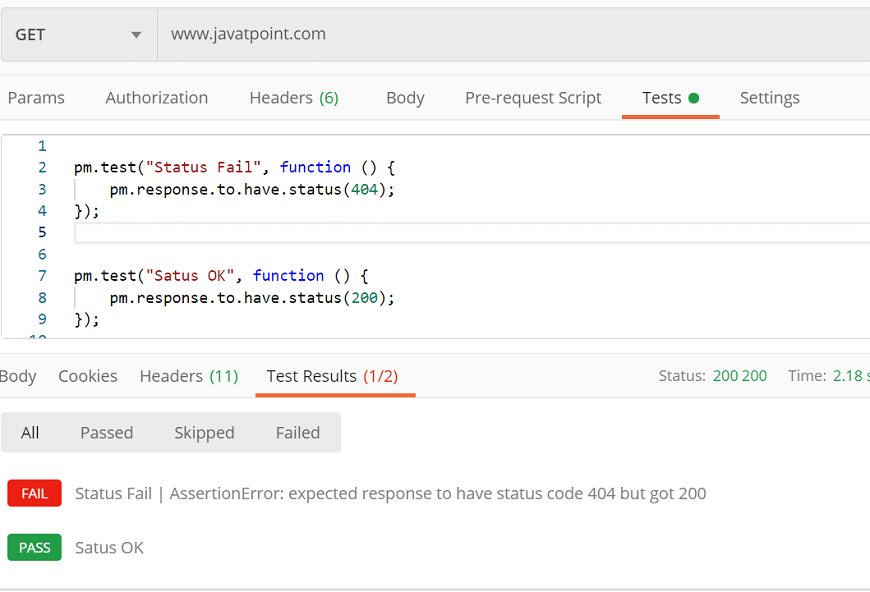
Test Examples
As we understood from the previous section, Test scripts are executed after a request has been sent, and the server has received a response.
Here, we will discuss some examples of tests. Most of the examples are available in the snippets of the Postman. We can run multiple tests for a single request.
Environments
Setting an Environment Variable
- pm.environment.set("variable_key", "variable_value");
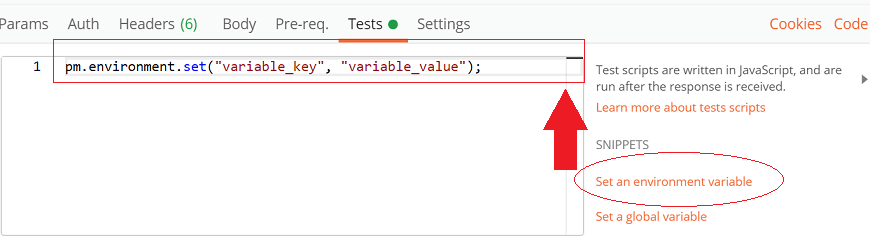
We can also set a nested object as an environment variable:
var array = [1, 2, 3, 4];
pm.environment.set("array", JSON.stringify(array, null, 2));
var obj = { a: [1, 2, 3, 4], b: { c: 'val' } };
pm.environment.set("obj", JSON.stringify(obj));
Getting an Environment Variable
- pm.environment.get("variable_key");
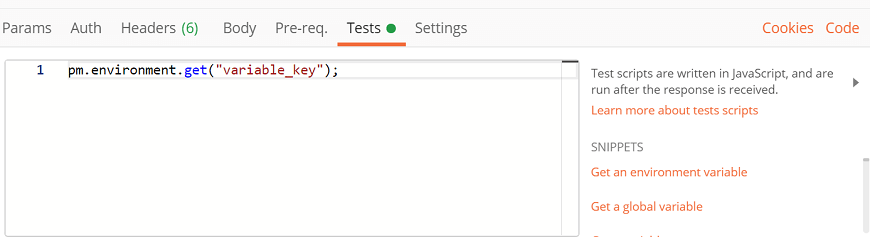
Clear an Environment Variable
- pm.environment.unset("variable_key");
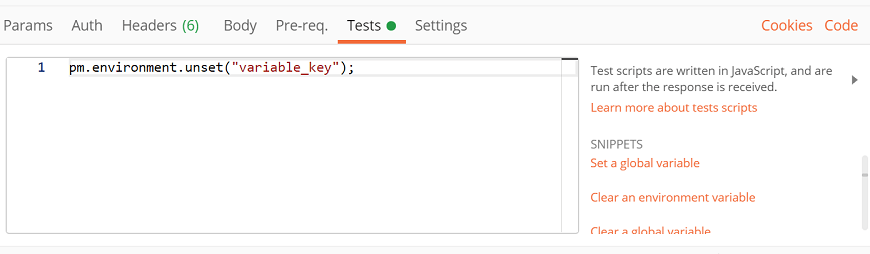
Collection
Setting a Collection Variable
- pm.collectionVariables.set(variableName:String, variableValue:String);
Get a Collection Variable
- pm.collectionVariables.get(variableName:String);
Clear a Collection Variable
- pm.collectionVariables.unset(variableName:String);
Globals
Setting a Global Variable
pm.globals.set("variable_key", "variable_value");
- pm.globals.unset("variable_key");
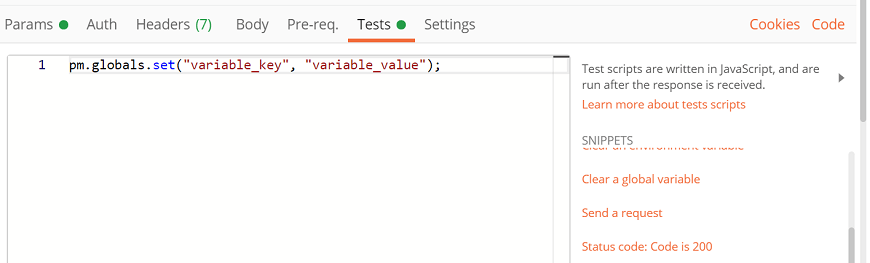
Response Handling
Search for a String in Response Body
pm.test("Body Contains", function () {
pm.expect(pm.response.text()).to.include("search_string");
});
Check if Response Body is equal to a String
pm.test("Body is correct", function () {
pm.response.to.have.body("response_body_string");
});
Check for a JSON Value
pm.test("Your test name", function () {
var jsonData = pm.response.json();
pm.expect(jsonData.value).to.eql(100);
});
Check if Content-Type header is present
pm.test("Content-Type header is present", function () {
pm.response.to.have.header("Content-Type");
});
Response Time is less than 200 ms
pm.test("Response time is less than 200ms", function () {
});
Status code is 200
pm.test("Status code is 200", function () {
});
Code name contains a string
pm.test("Status code name contains a string", function () {
pm.response.to.have.status("Created");
});
Successful POST request status code
pm.test("POST request Successful ", function () {
});
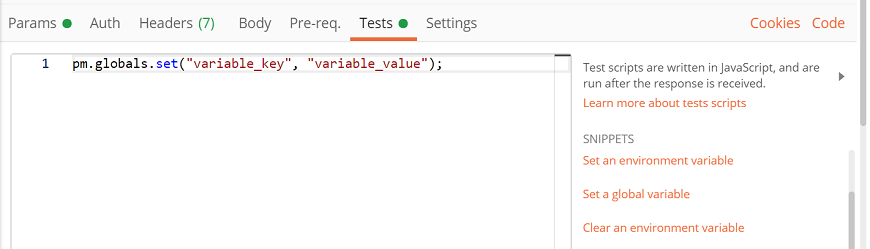
Getting a Global Variable
pm.globals.get("variable_key");
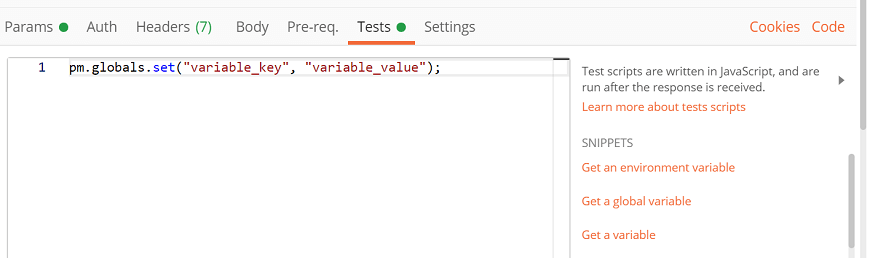
Clear a Global Variable
- pm.globals.unset("variable_key");
Response Handling
Search for a String in Response Body
pm.test("Body Contains", function () {
pm.expect(pm.response.text()).to.include("search_string");
});
Check if Response Body is equal to a String
pm.test("Body is correct", function () {
pm.response.to.have.body("response_body_string");
});
Check for a JSON Value
pm.test("Your test name", function () {
var jsonData = pm.response.json();
pm.expect(jsonData.value).to.eql(100);
});
Check if Content-Type header is present
pm.test("Content-Type header is present", function () {
pm.response.to.have.header("Content-Type");
});
Response Time is less than 200 ms
pm.test("Response time is less than 200ms", function () {
});
Status code is 200
pm.test("Status code is 200", function () {
});
Code name contains a string
pm.test("Status code name contains a string", function () {
pm.response.to.have.status("Created");
});
Successful POST request status code
pm.test("POST request Successful ", function () {
});
Workflows in Postman
POSTMAN workflow is the order of request execution within a collection. When you run the collection directly, then the requests are either executed randomly or executed serially. But we can also set the priority of the request, and we can also choose the order of execution of request means we can set which request should be executed when. This feature is called workflow in Postman.
Postman provides a feature to control the workflow of requests in the collection, and the feature is called Collection Runner (or Runner).
Once a request is executed by the collection runner, all requests within the collection are executed, but there is a pattern in which all requests are executed. Postman provides many inbuilt algorithms to decide in which pattern the request has to be run.
Order of Execution of Collection Runner
Generally, the collection runner runs the request in sequential order. Some APIs requires to send request one by one; means, the second request that can execute only after the first request has completed and the third request will wait for the response of the second request. And so on.
In this case, the default request execution in the collection runner is fine, as there is no requirement to run the requests parallelly, or no random request has to be run.
But there may be cases where one API request can be dependent on two or more different API response. Or there may be another situation where a particular API request which is in the middle of the APIs request execution queue, have to get executed for different request randomly.
In this case, the sequential execution of the request in the collection runner will not be useful. We should have to create a workflow and inform the collection runner that, which requests to execute when. This task can only be done by calling an API request. This is called an API call.
An API call means calling an API for its execution in a user-defined manner.
Default Workflow in Postman
Let's see how the normal request execution workflow runs in default.
- Create a collection and give the name of the collection. Here my collection name is "Default Workflow."

- Add three requests in the collection and name it as Request 1, Request 2, Request 3.
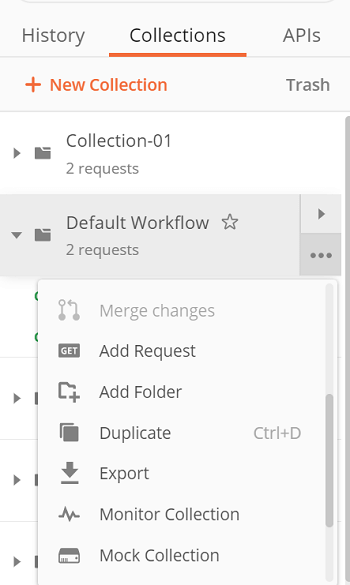
- Three requests are:
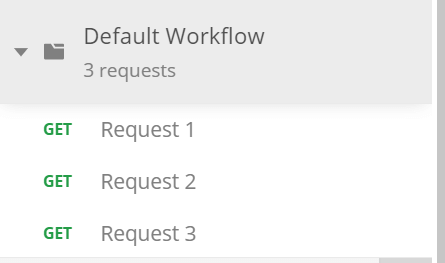
Add the following URL in-
Request 1: www.javatpoint.com
Request 2: www.google.com
Request 3: www.facebook.com
- Now you have three different requests in a collection. Run the collection runner now.
Select the Runner (Collection Runner) menu from the top of the postman window. It will open a new window.
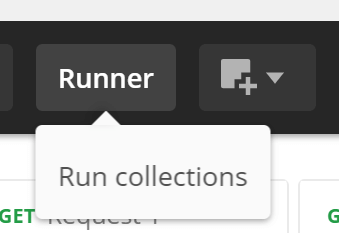
- Choose your collection.
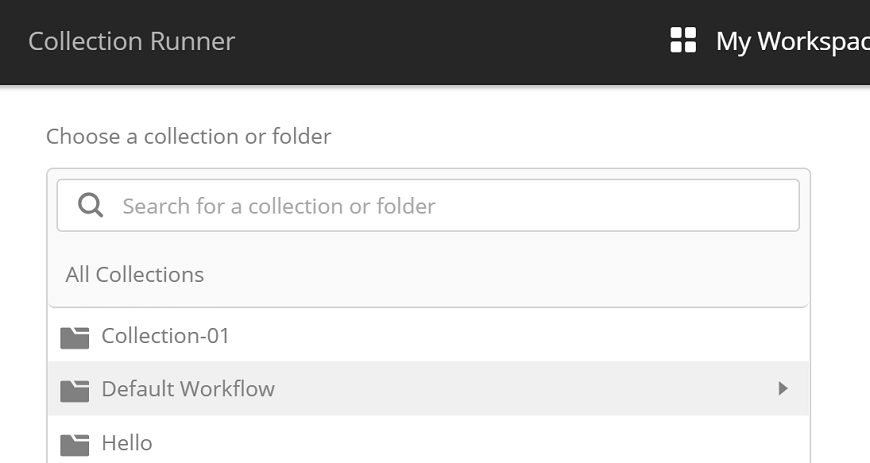
- Run the collection to see all the iterations, orders, environments, etc. for the collection.
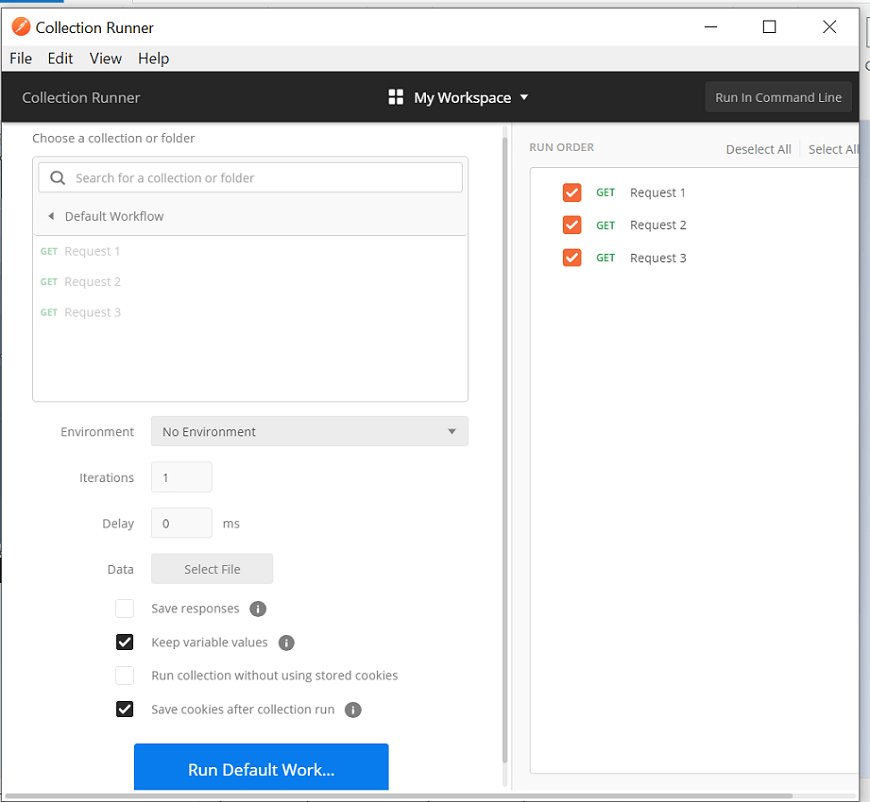
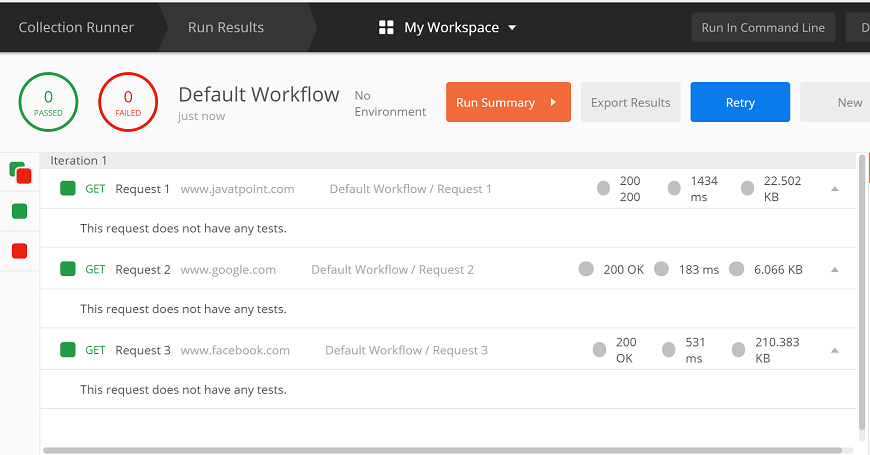
Now in the above image, you can see the request is sent sequentially. It starts with the Request 1, and then continues to Request 2 and then Request 3. This means it is running sequentially.
Asserts in Postman
The assertion checks whether the given predict is true or false in any programming language. A predict is a Boolean expression with the value true or false. That means assertion is nothing but code that can be used to check or analyze the response that is received from the server.
An assertion is a code written in javascript in Postman that is executed after receiving the response.
Why we use Assertion in Postman
The main purpose of the test is to determine whether a given parameter of the system is working or not. To apply the force on the function parameters, we assert the predicted values during a test run with the actual values.
Assertions help us to assert that expected and actual values should match during a test run. If the actual and expected values don't match, then the test will fail with the output pointing to the failure.
In Postman, we can write the assertion in many ways. One of the simplest ways is the snippets, which are nothing but a block of codes that have some unique functions inside it and are available in the postman app. Users can easily access the snippets and can get the code inside the tests editor and run the test.
Example
Here we will discuss assertions that are primarily based on responses in the format of .json.
In Postman, an assertion can be applied on different attributes such as an object, arrays, etc.
As we know by default in Postman, the received response from the server is displayed in the JSON format, or even we can select the JSON application and get the response converted into the JSON format.
First of all, enter the following URL in the URL text field:
https://reqres.in/api/users?page=2
Send the request and see the response:
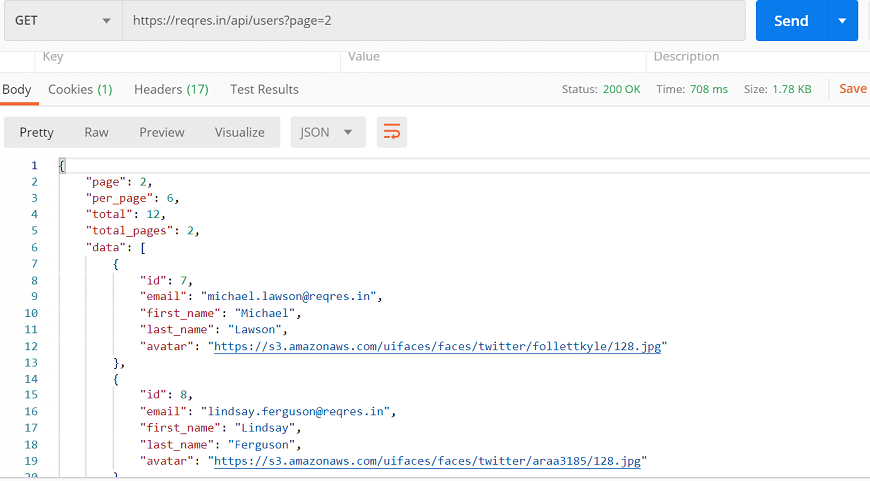
Now add the following line of code in the test tab of the given request.
let jsonData = pm.response.json();
console.log(jsonData.data);
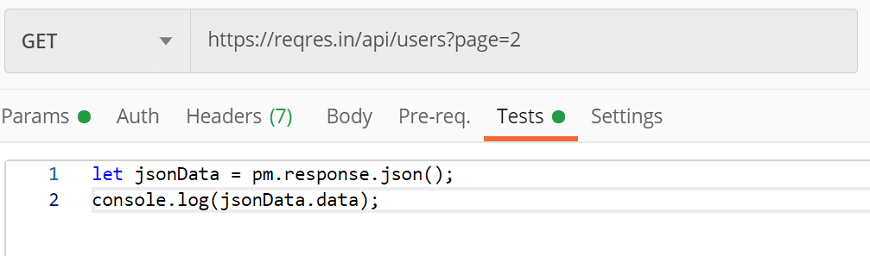
The code pm.response.json() is used to parse the JSON body. And console.log(jsonData.data) code is used for logging the object into the Postman console.
Now, return the request and open the postman console.
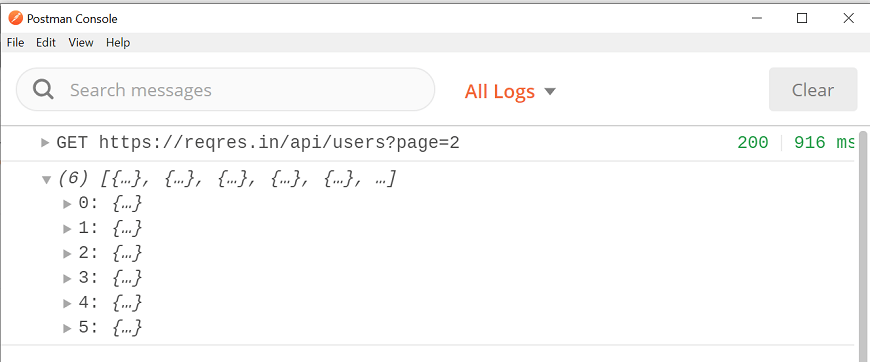
In the above image, you can see the arrays inside the object. Various objects are listed numbered from 0 to 5, so there were six different objects.
We can access the name and value of the array with the help of the dot (.) operator.
Edit the tests editor with the following line of code and see the console:
let jsonData = pm.response.json();
console.log(jsonData.data[2].id);
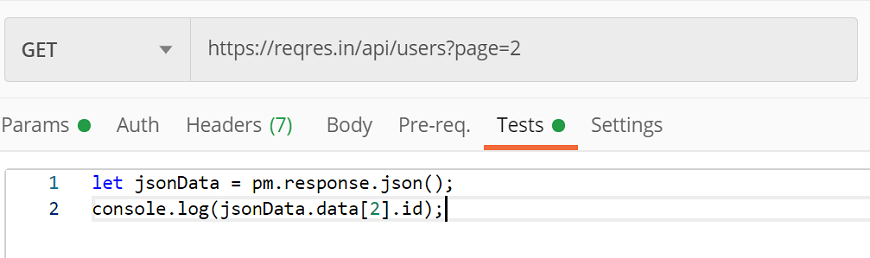
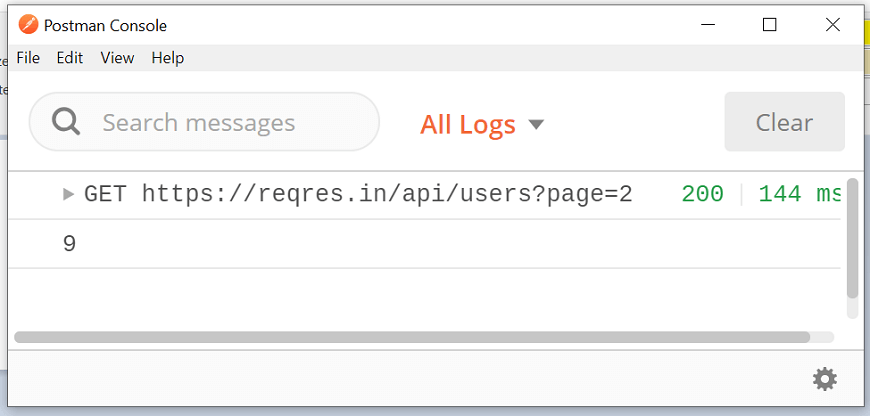
Here, you can see the value of the id, which belongs to index 2 of the array.
Chai Assertion Library
Chai assertion library is an external javascript library used to write assertions. Compared to what we write directly in javascript, this assertion library needs less time & effort and easy use.
Chai assertion library is available by default in the Postman. So when you are writing chai assertions, then don't worry about other processes of installation. The main feature of Postman assertions is that they write the tests with English sentences, which is human readable. So it is very easy to read and user friendly.

If you would like to learn more about the Chai Assertion Library, there is an official website for that. You can visit this chaijs.com.
Writing Assertions using Chai Assertion Library.
Copy the following URL in the URL text field.
Example 1:
- Go to the Tests tab and write the following code in the Tests editor.
pm.test("If 100 equal to 200", function(){
pm.expect(100).to.eql(200);
});
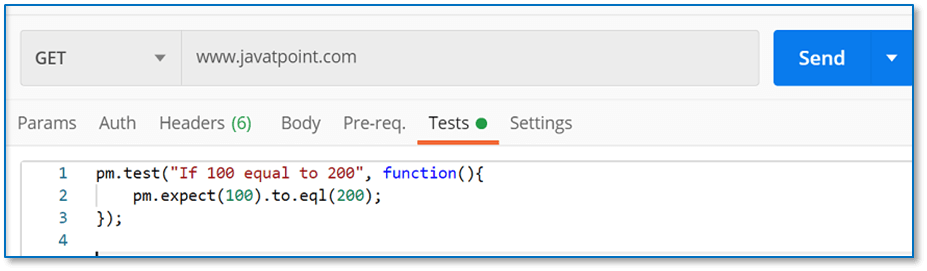
- Click on Send and see the Test Results from the response section.

In the above example, we are checking that if 100 is equal to 200 or not. The response is failed, which is obvious.
Just edit the code with the following code and see the response again.
pm.test("If 100 equal to 100", function(){
pm.expect(100).to.eql(100);
});
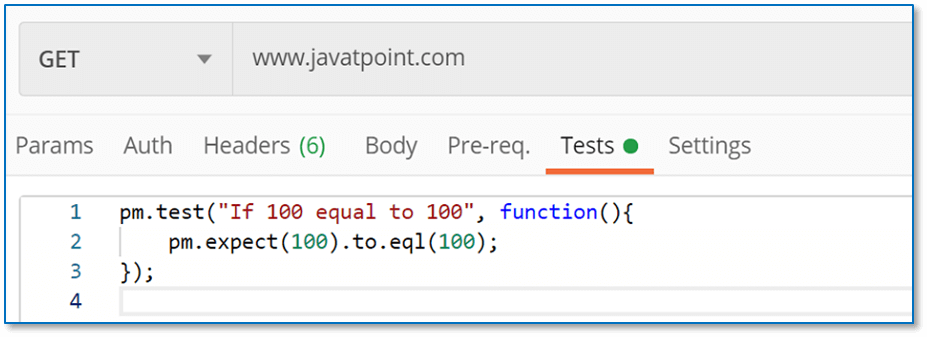
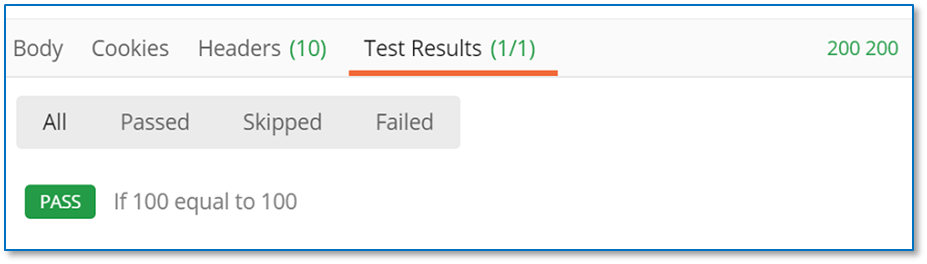
Since 100 equal to 100. The test is passed.
Example 2:
Here, we will check the given number is in an array or not.
- Open the tests tab and write the following code:
pm.test("Number included", function(){
pm.expect([100,200,300]).to.include(300);
});
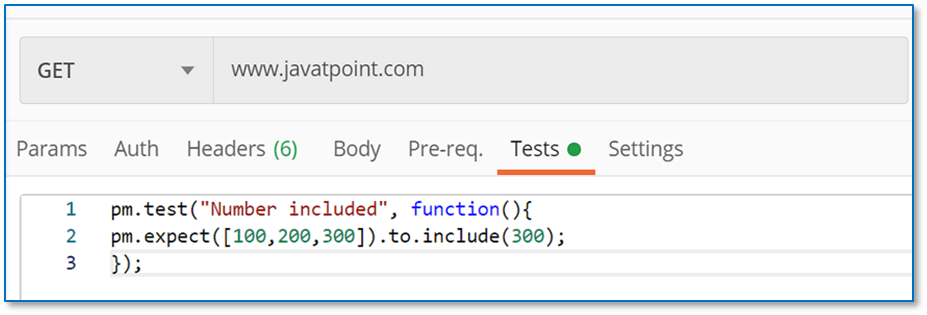
- Press send and see the Test Results tab from the response.
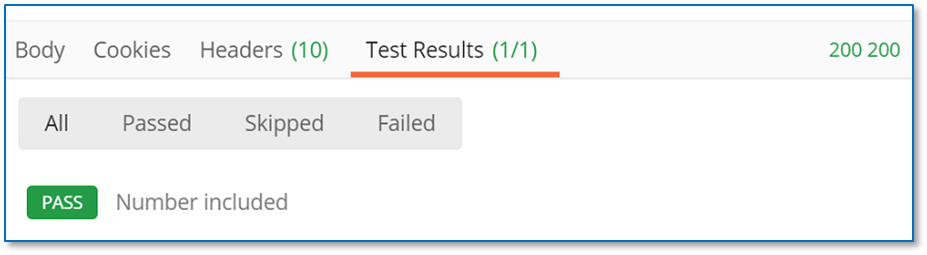
Here, you can see that the test is passed because, in the array list of 100, 200, and 300 has 300.
Example 3:
In this assertion, we will verify the object.
- Open the tests tab and write the following code:
pm.test("Compare Name", function(){
let x= {
"name" : "Nikita"
};
let y= {
"name" : "Nikita"
};
pm.expect(x).to.eql(y);
});

- Click on the Send button and see the Test Results from the response.
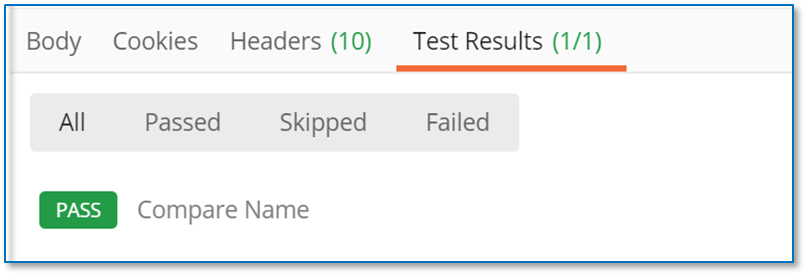
The test is passed because on both objects, names are equal.
In the above code, we have used eql(). Postman offers both methods eql() and equal(). But both methods are different. equal() is used to compare the objects, and eql() is used to compare the properties of the objects. In this case, eql() compared the name property of the object.
Try to edit the last line of code with pm.expect(x).to.equal(y), and see the response.
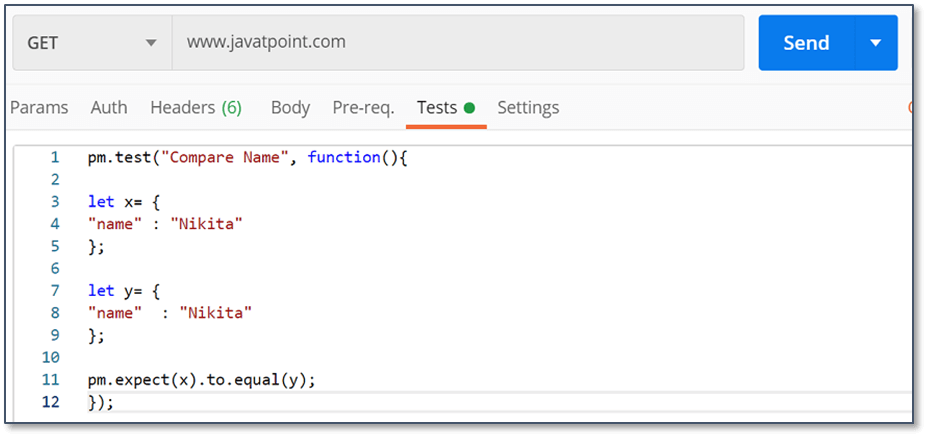
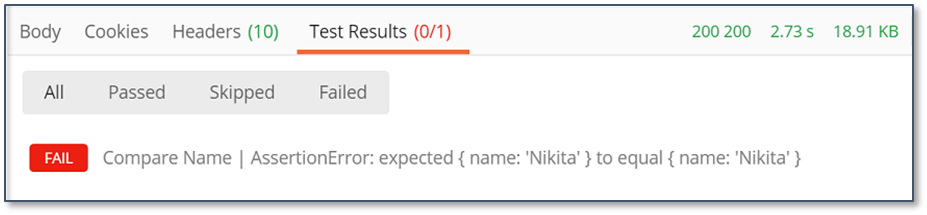
The above test failed because we have used equal(), which compares the object, not the property of the object.
MOCK SERVERS
Intro to Mock Servers
The mock server is a fake server that simulates as a real server to help the users for testing and checking their APIs and APIs responses.
During the various API testing, a Mock server is used when specific responses are required to be received that are not readily available on the web servers or for certain testing, which cannot be done due to security issues on real servers.
How Mock Server Works
When you send the request then MockServer receives that request, it matches the request against the specified requirement, and if no matches are found, it will proxy the request, if possible. The request would otherwise return a 404.
For each Received Request:
Find matching expectations and perform an action.
If the request does not match the expectation, then it will proxy request.
if not a proxy request will return 404
Here the expectation is the action being taken, which could be returned to a response.
Types of Mock Servers
We can create two types of Mock Servers in Postman:
1. Private mock server
These cannot be accessed by everyone. When you create a private mock server, users may share the collections with their teammates lying under it. Your team may use the mock by adding API keys in the request header x-api-key, like x-api-key:<your postman API key>.
2. Public mock server
Public mock servers are open to all. When you share this mock server, users are not required to add a Postman API key to consume the mock.
Benefits of Postman Mock server
To check your own API during development and before you make that API live on your organization's server.
To get faster reviews and bugs.
Without any authentication, any type of request can be made into the server.
To test the dependencies inside the API until they are open to everyone.
For QA engineers, use this to check or isolate external dependencies and check the integration.
Using it before actual endpoints are available by front end developers.
A mock server is used by engineers to create a prototype of their idea to submit it for funding to the investors.
Setting Up a Mock Server
To set up a mock server in Postman, we will need a collection because mocks in Postman are tied with a collection. Postman compares the requests and creates mock responses from the examples in the requests of a collection.
Before creating a Mock server in Postman, there are some important points about the mock server we must know:
In the Postman app, the mock server is already integrated, so we don't need to waste the time to download and install externally.
The mock server supports CORS. CORS stands for Cross-Origin Resource Sharing. When using the mock server, it ensures you that you won't get any cross-origin errors.
The mock server is available in Postman, which is free to use.
In Postman, there are many ways to build a mock server:
New Button
Postman API
Launch Screen
Postman App
By default, the mocks are open to using. It is accessible publicly. When you make a private mock server, enterprise users and postman pro clients can share the underlying collection with their group and particular team members, or they can give permissions to edit or view.
Let's create the mock server. Here we will discuss how to create a mock server with the New button.
- From the top left corner in the Header section of the Postman app, select the New button.

- Select the Mock Server.
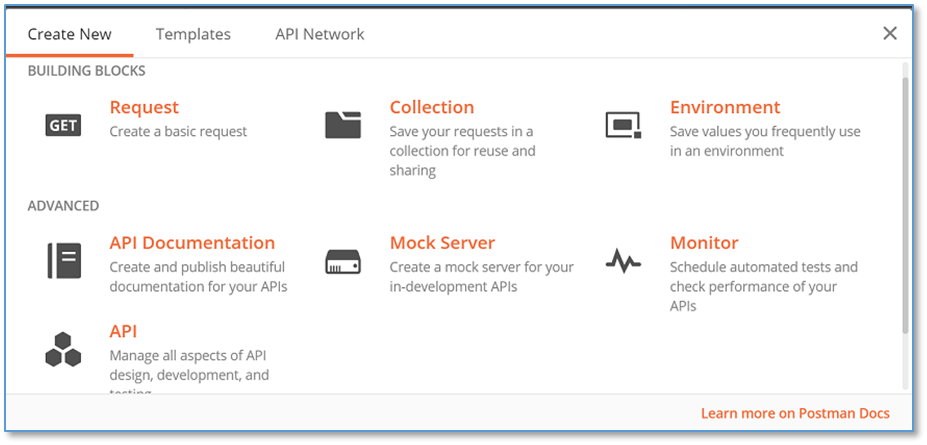
- Once you select the Mock server, a new panel will be opened. Through this panel, we can create a new request.

In the above image, we have multiple options.
Here,
The method is request type methods such as GET, POST, etc.
Request Path is the URL of the request for your API.
Response Code is the code in which we want to get in response.
Response Body is the body of the response that you want to show in response.
Fill the column as given below:
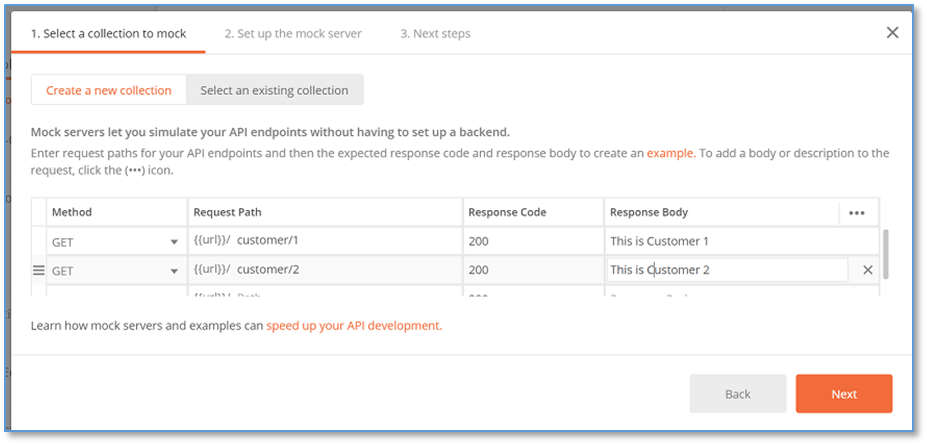
- Click on Next. Now on the next tab, give the name of your mock server. You can give anything as per your choice.
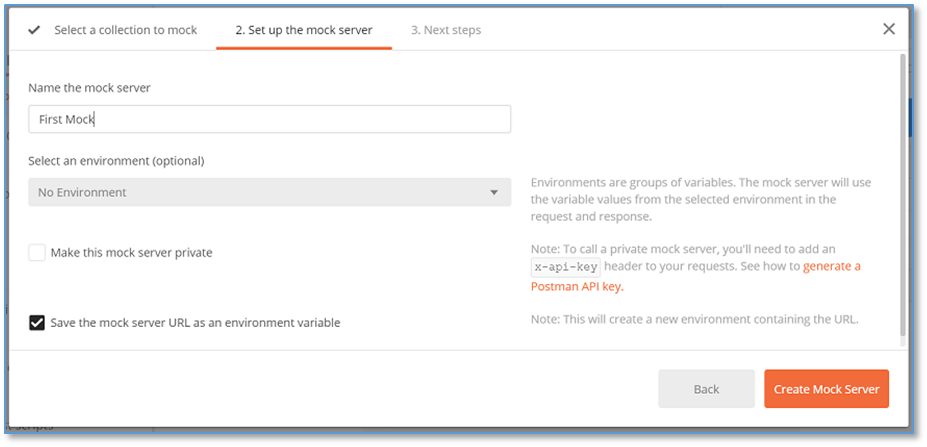
In the above image, you can see one checkbox. If you want to make your mock server private, enable it.
Select the Create Mock Server button.
- The next panel is the review panel, which gives you the review that your mock server has been successfully built.
This screen will also display an URL through which we can access the mock server.
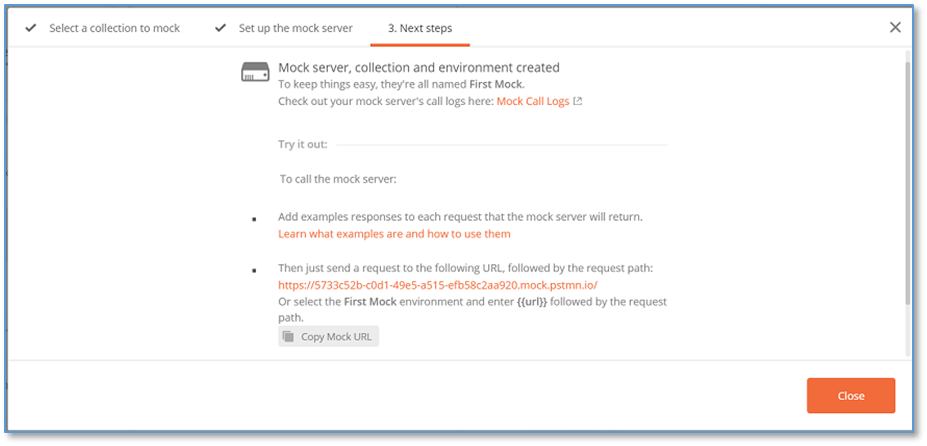
- Click on the Close button to close the panel.
Once you close the panel, a new collection has been generated with the given APIs.
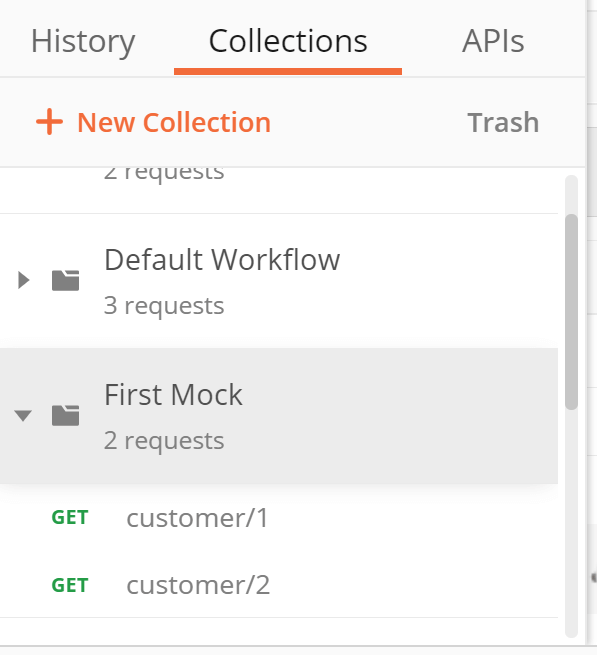
- We can also see a new environment has been created with the same name.
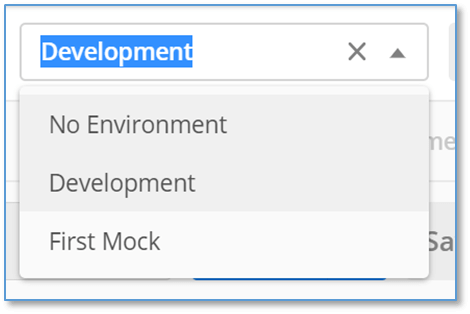
Select this environment variable.
- Now, choose the first request from the collection and see the request url.
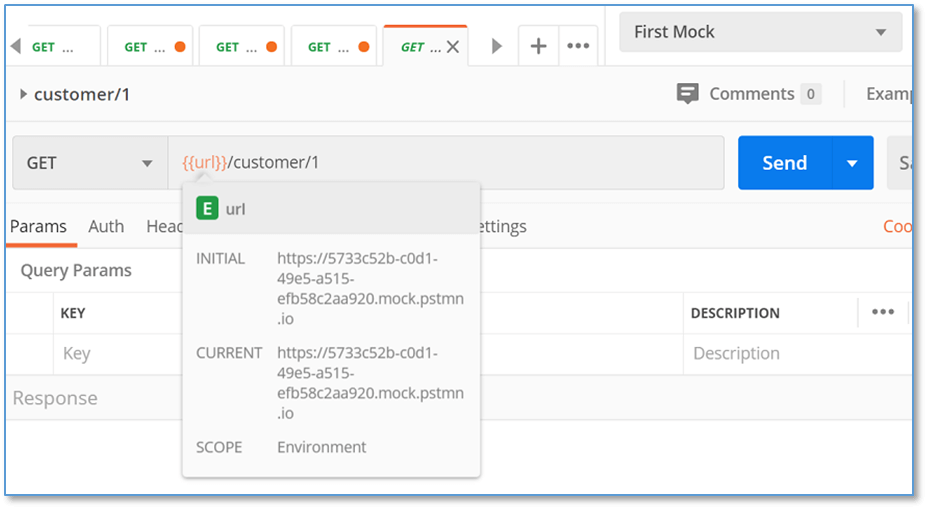
- Click on the send button. Here you can see the response.
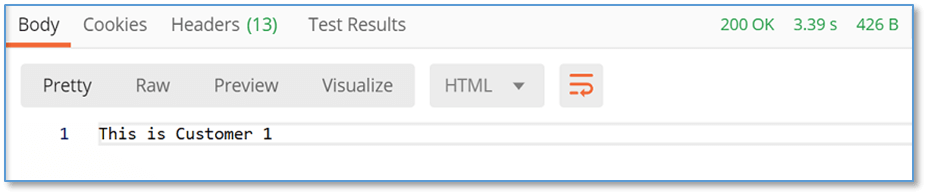
Here, you can see, we got the same response body and the same response code as we have created while setting up the mock server.
Get the Response in Mock Server
Here we will discuss how to get the response in other different formats in Postman, which is very easy. The most common format is JSON. Let's see how to get the response in JSON format.
- From the top left corner in the Header section of the Postman app, select the New

- Select the Mock Server.

- Once you select the Mock server, a new panel will be opened. Through this panel, we can create a new request.
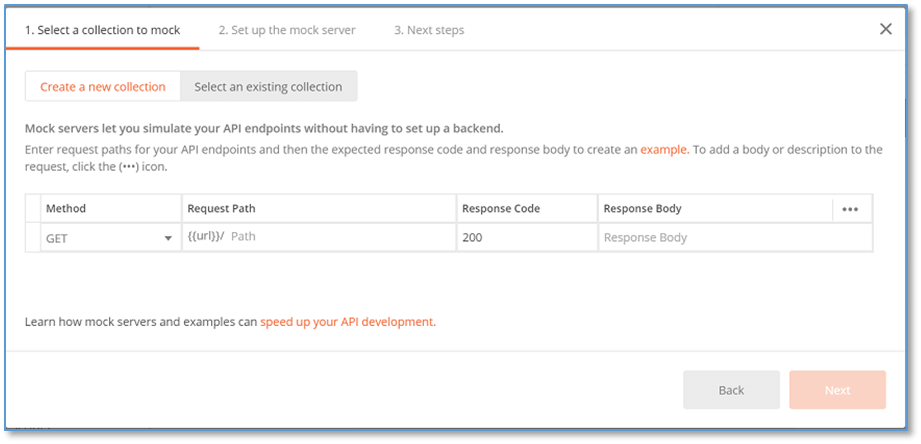
- In the Response Body column, instead of writing plain text, enter the response body in JSON format.
Here, we will write the data about different Employees:
{
"Employees" [
{
"Id": "101",
"Name": "Nikita Kesharwani",
"DOB": "12-12-1992",
"Father's Name": "John E. Silverman",
"Blood Group": "O+",
"Contact Number": "999912345",
"Address": "Cartridge World Bradford 212 Manningham Lane BD8 7DT Bradford RShaw Limited T/A Cartridge World",
},
{
"Id": "102",
"Name": "Senthil Gonzaleaz",
"DOB": "24-06-1989",
"Father's Name": "Richard O. Locher",
"Blood Group": "AB+",
"Contact Number": "+636312749",
"Address": "Alina Business & Financial Services 61 High Street SE25 6EF London Alina Business & Financial Services",
}
]
}
Copy the above JSON in the Response body.
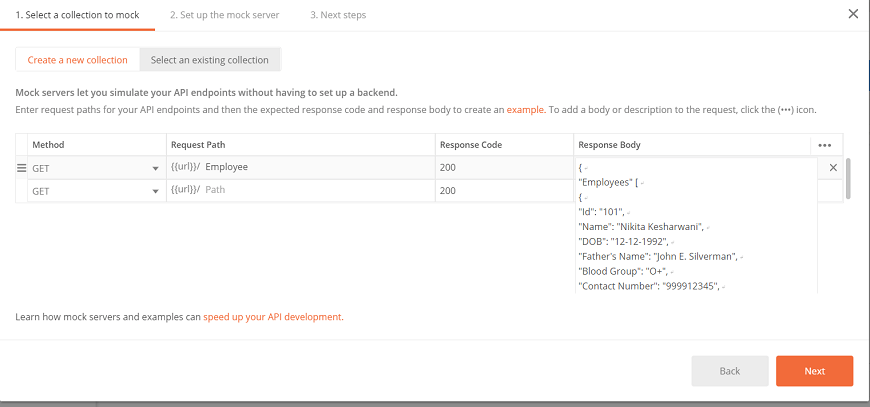
- Press Next. Now in the next panel, give the name of the server as per your choice. I gave 'JSON Response'.

- Select on Create Mock Server button.
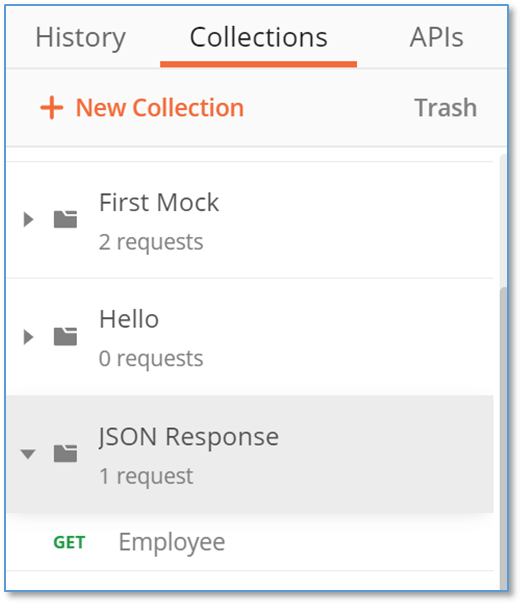
- Select the Employee API and then select the JSON Response environment.
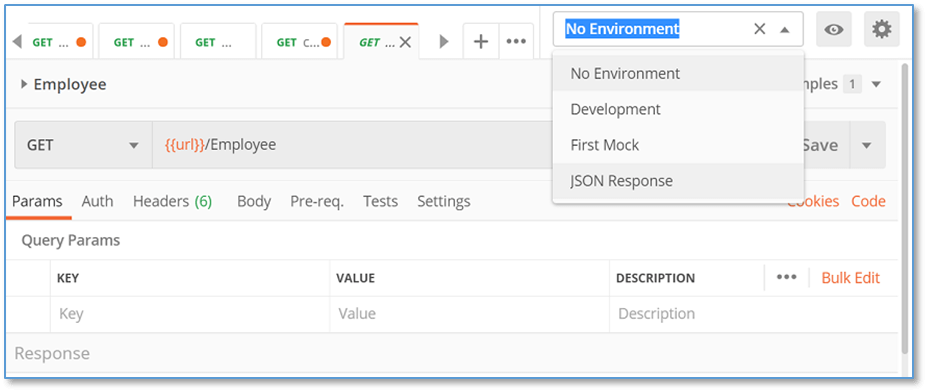
- Press send and see the response.
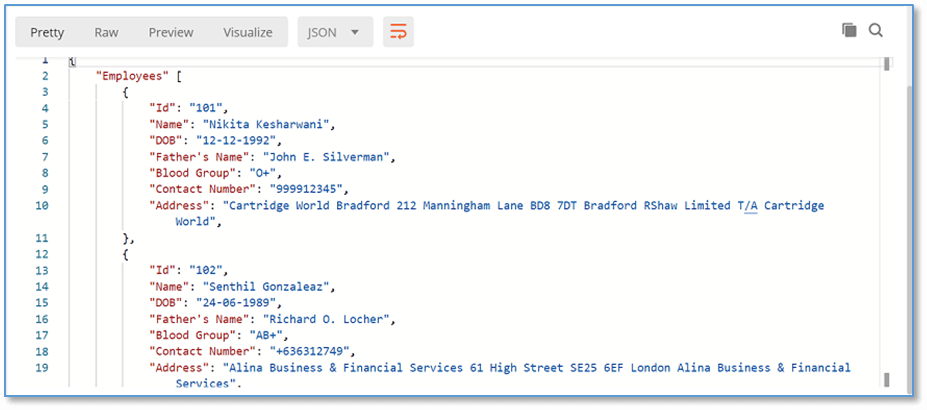
Here, you might get the response in HTML format by default, change the format to JSON from the dropdown, and you will get the response as given above.
Similarly, we can use different formats to get the response in a mock server.
POSTMAN API
Introduction to Postman API
The endpoints of the Postman API allow you to integrate Postman into your toolchain for development.
In postman API, we can create new collections, update environments, update existing collections, and directly add and run monitors. It helps you to access the stored data programmatically in your postman app.
Generating a Postman API Key
It is necessary to have an applicable API key to send the request.
- Go to the following link web dashboard.
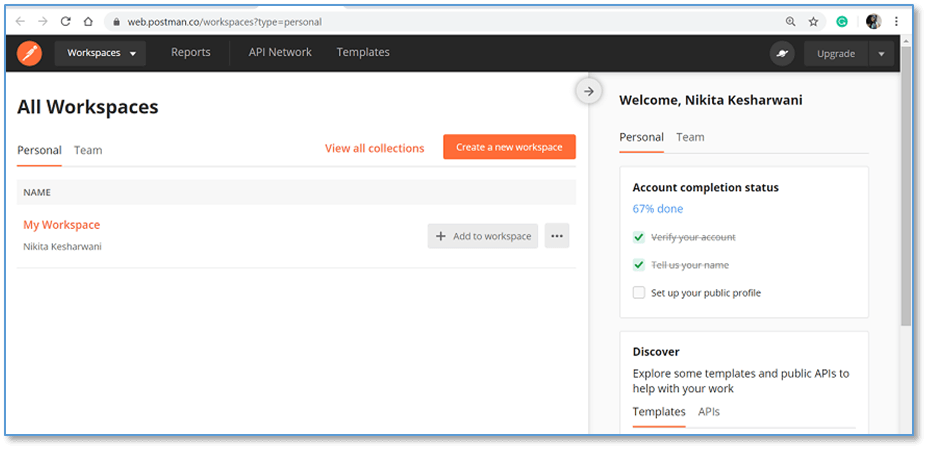
- Choose your workspace.
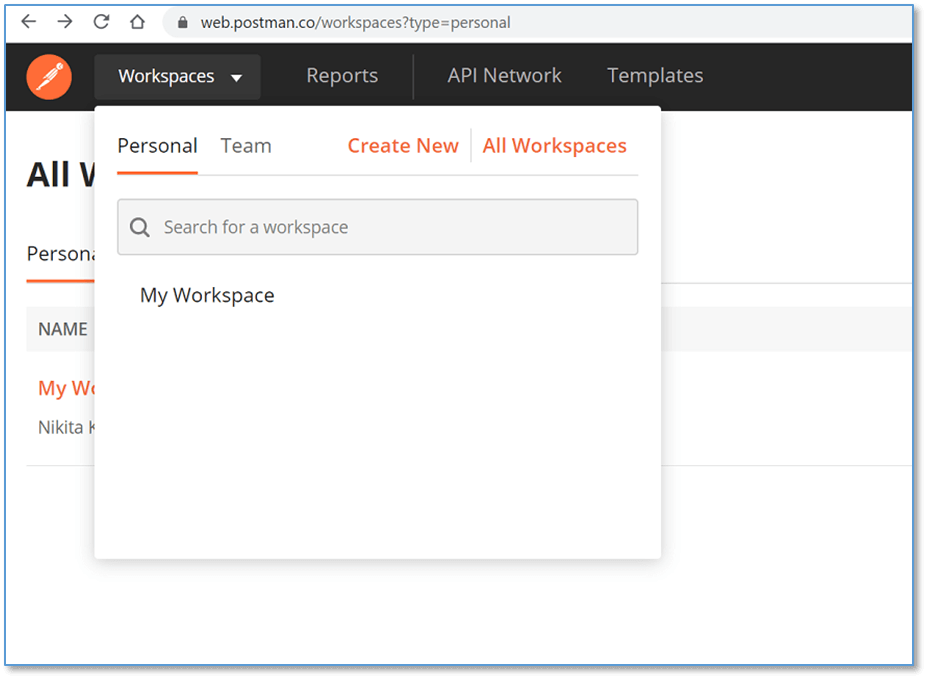
- Select the Integrations tab and locate the Postman API and then select View Details.
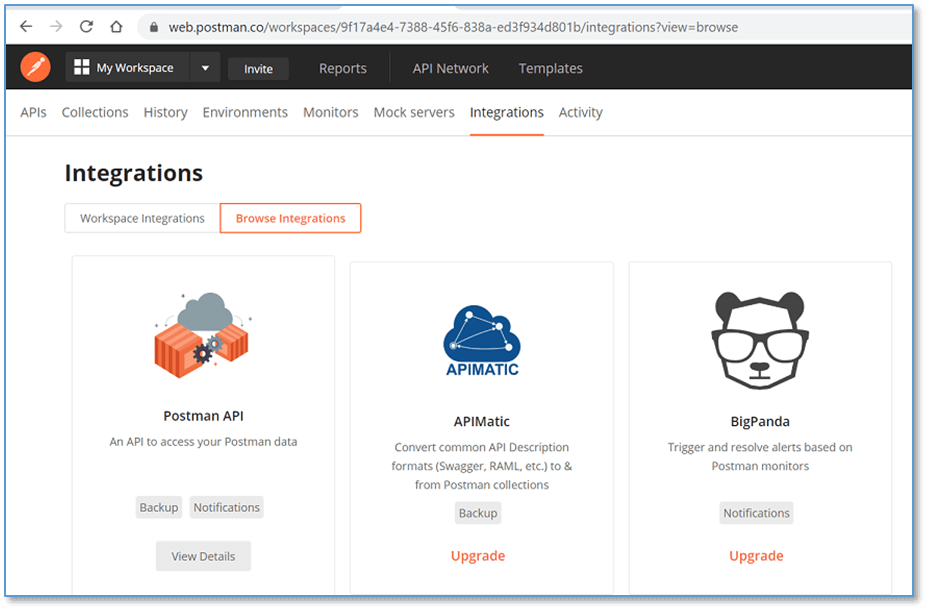
- You will get the Generate API Key option if you don't have any keys yet. Select the Generate API Key
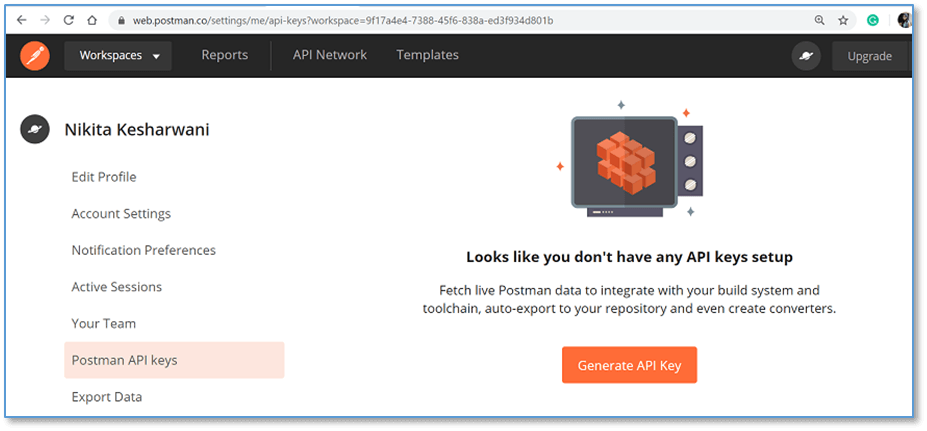
- Enter the name of the key as per your choice and click on Generate API Key. Here I gave 'user-development-key'.
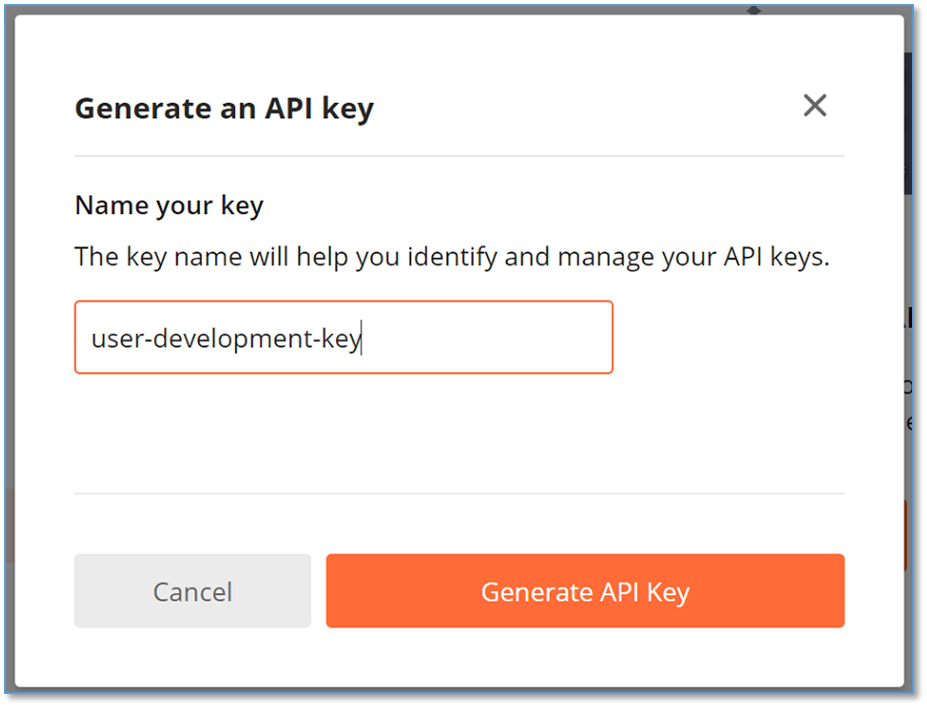
- Don't forget to copy the key. Then click close.
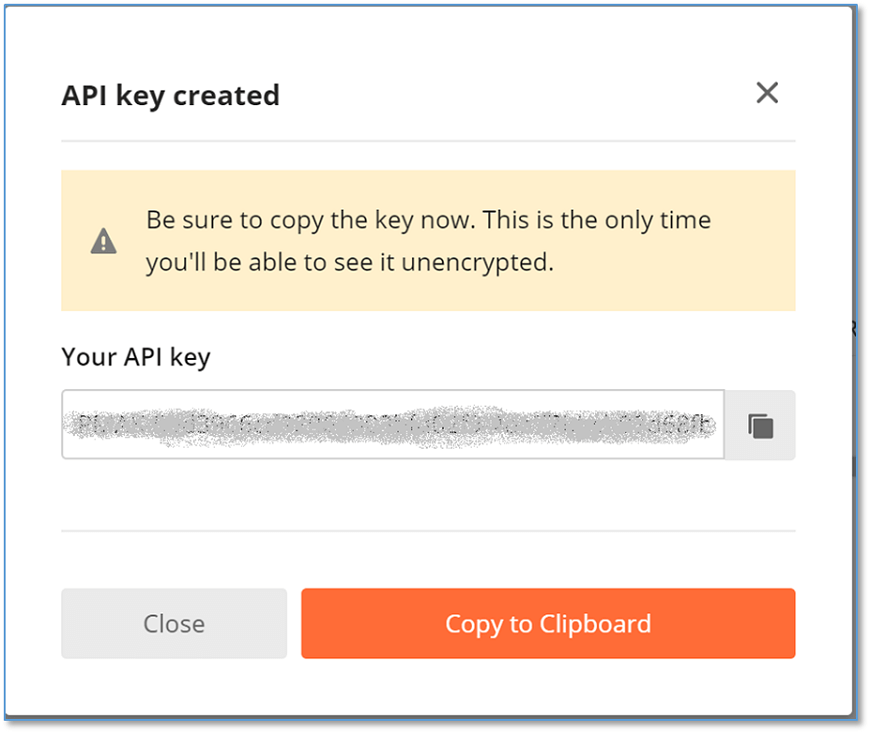
- Your key has been generated. You can now handle the keys within your workspace.
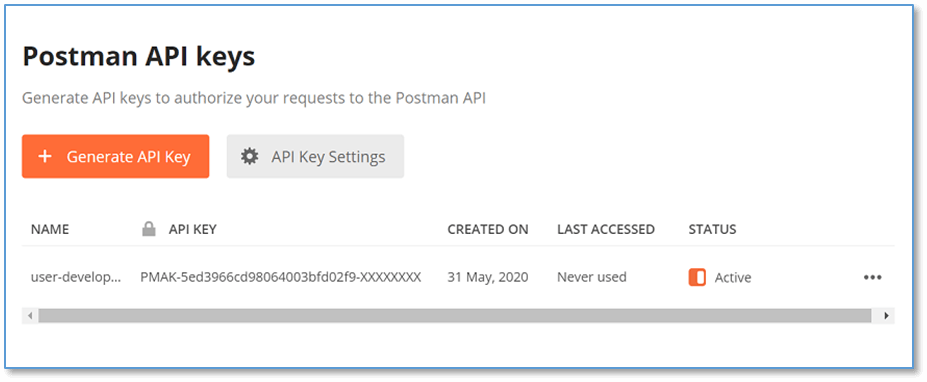
- You can delete and regenerate the key.
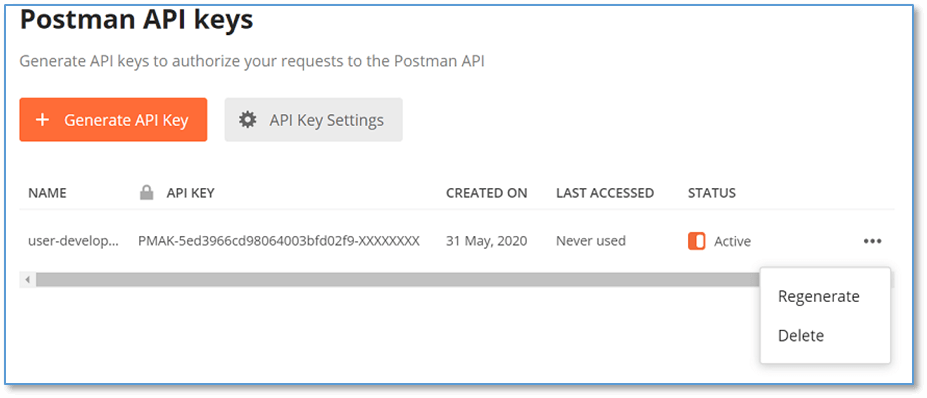
- Select on API Key Settings option to set the expiration period of your key.

Authentication
By submitting your API Key in the X-Api-Key header of any of your created requests, you will need to authenticate your requests to the Postman API.
This API key is used to give access to authorized data.
You can also store your API key in an environment variable with the name postman-api-key. The Postman API collection can access the API key automatically.
Rate Limits
60 requests per minute are required to access the API with the key.
Each response of an API contains the following set of headers to identify your consumption status.
| Header | Description | | --- | --- | | X-RateLimit-Limit | This header specifies the maximum number of requests the consumer is allowed to submit per minute. | | X-RateLimit-Remaining | This header specifies the number of requests that are left in the current limit window. | | X-RateLimit-Reset | This header defines the time at which the current rate limit window resets in UTC epoch seconds. |
CONTINUOUS INTEGRATION
Continuous Integration is also known as CI. It is a development method that is required several times a day by developers to integrate the code into a shared repository.
Each check-in process involves automating the build and allowing teams to detect problems early. By integrating regularly, we can quickly detect errors, and locate the errors very easily.
To run within your CI environment, let's use collections from Postman API.
Some pre-requisites are:
It would be best if you had a system set up with Continuous Integration that can execute shell commands and have access to change the same.
You should have an API key.
It requires a postman collection that can check your local server, and note the collection UID.
Follow the following steps:
1. Install Node
If your CI already have Node installed, you can skip this stage.
Some CI has, by default, installed Node. If your CI has no node, then open this link and follow the steps to install the Node on your CI's platform. Make sure you have NodeJS v4 or above.
2. Install Newman
In Postman, Newman is a command-line collection runner tool that lets you run a collection on your server or in your local development environment.
To install the Newman use the given command:
- npm i newman -g;
3. Execute Newman
To execute the Newman, use the below command:
The above command is the syntax to run a newman. Change the parameters accordingly.
If you want to modify an environment to the collection, use the given command instead of above command:
newman run api.getpostman.com/collections{{collection_uid}}?apikey={{postman-api-key-here}}
--environment api.getpostman.com/environments{{environment_uid}}?apikey={{postman-api-key-here}}
Branching and Looping
In Postman, we can also work on branching and looping. We can branch and loop across API requests with the help of setNextRequest() function.
- postman.setNextRequest("request_name");
This function is used to set the request to be executed next. This function takes one argument, i.e., the name of the request, which will execute next.
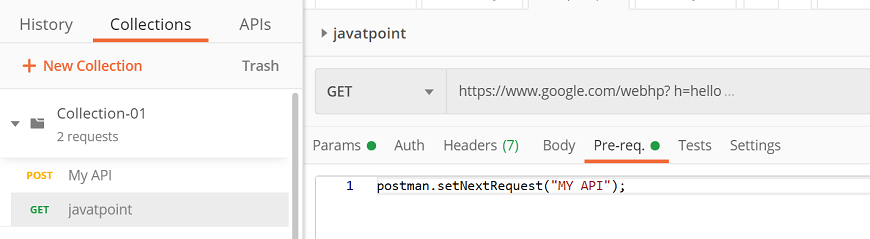
In the above example, "My API" is the name of the request.
Some features of setNextRequest():
Provide the request name or request ID, and the collection runner will handle the rest.
We can use the setNextRequest() in the test script as well as in the pre-request script. The last set value takes precedence when you have more than one assignment.
The collection runner will follow the linear execution settings from default settings and moves to the next request if Postman.setNextRequest() isn't given in a request.
Loop Over the Current Request
If you give the currently running request name in the argument of setNextRequest() function, then Postman will run the same request continuously.
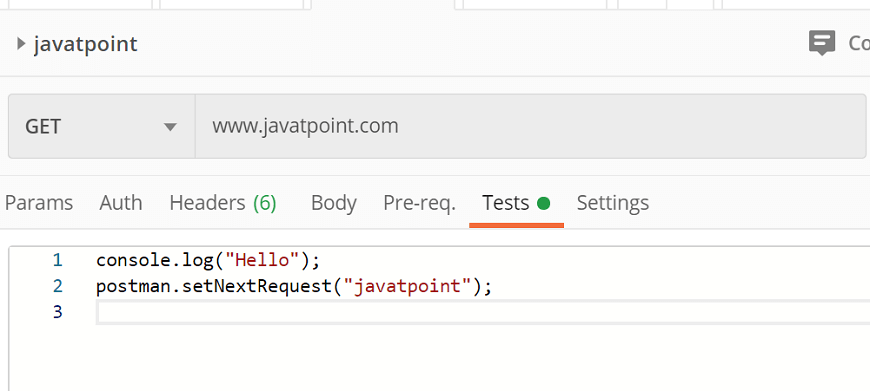
But when you are continuously looping along with the same request, we have to apply some logic on setNextRequest() so that the request won't run endlessly; the collection runner will otherwise have to be force closed.
Stop Workflow Execution
To stop the execution of workflow pass the null argument in setNextRequest() function.
- postman.setNextRequest(null);